
Planting
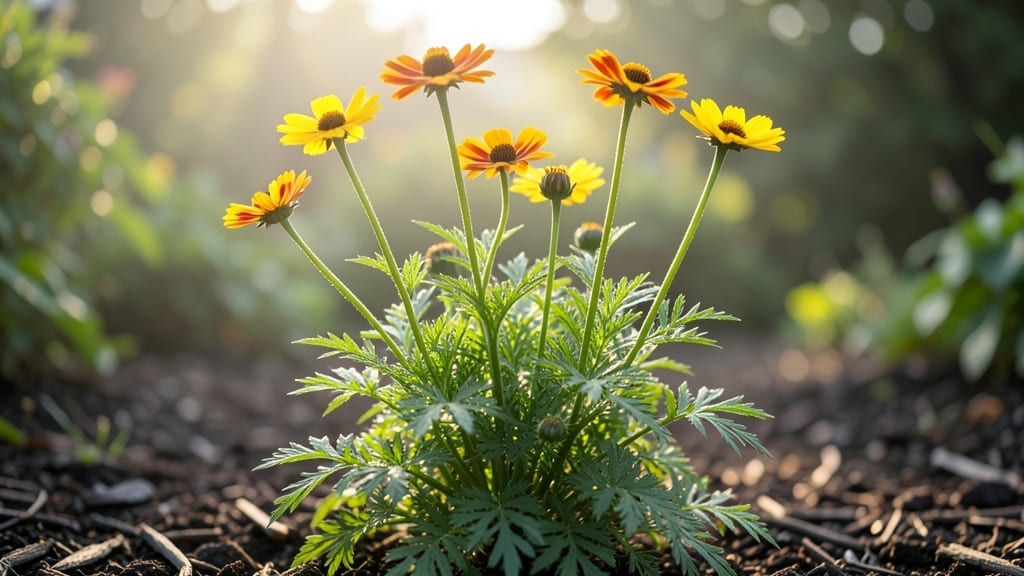
The tickseed plant care is deceptively simple—those twist-resistant seed pods make saving seeds effortless. 🌱 I've grown them for years, and honestly, they're one of the easiest perennials to master while still looking stunning in your garden.
They thrive in full sun to partial shade and prefer well-draining soil, though they're tough enough to handle poor conditions. Water them once a week (more in extreme heat), but never let them sit in soggy soil—they'll tell you when they're thirsty with droopy leaves.
The real magic happens in late summer when those papery seed pods form. Twist them open to collect seeds for next year, or let them self-seed naturally. They're also drought-tolerant once established, making them perfect for low-maintenance gardens. If leaves yellow or wilt, it's usually overwatering or poor drainage.
Snip back leggy stems in early spring to encourage bushier growth. These plants reward patience with months of bright blooms and zero fuss.
📚 In This Guide
- What you need
- Instructions
- Tips and common mistakes
- Wrapping up and next steps
What you need
- ● Tickseed seeds: Choose Coreopsis varieties like Coreopsis verticillata (threadleaf) or Coreopsis lanceolata (lanceleaf). Buy from a reputable supplier (1–2 seed packets for beginners).
- ● Well-draining potting mix: 2–3 gallons of a blend with perlite or sand (e.g., 60% peat moss, 30% compost, 10% perlite).
- ● Containers or garden bed: For seeds: 4–6-inch pots (1–2 per seed) or seed trays with drainage holes.
- ● For cuttings: 6-inch pots with sterile potting mix.
- ● Drainage trays or saucers: 1–2 to catch excess water.
- ● Watering can or spray bottle: With a fine mist nozzle for seedlings.
- ○ Gloves (optional): To protect hands from prickly seed pods.
- ● Hand trowel or small shovel: For transplanting seedlings.
- ● Pruning shears: Sharp, sterilized shears for trimming deadheads or cuttings.
- ○ pH testing kit (optional): To check soil acidity (ideal pH: 6.0–7.0).
- ● Sunlight access: A south-facing window or grow lights (12+ hours/day for seedlings).
- ○ Fertilizer (optional): Balanced liquid fertilizer (10-10-10) or slow-release granules.
- ● Compost tea for organic boosts.
- ● 💡 Seed-starting hack: Chill seeds in the fridge for 1–2 weeks (stratification) to mimic winter conditions and improve germination.
- ● 🌡️ Temperature control: Keep soil at 60–70°F (15–21°C) for optimal growth.
- ● 🎯 Zero-waste prep: Save dried seed pods from mature plants—tickseed pods twist open naturally, making seed collection effortless!
Step-by-Step instructions for growing and maintaining tickseed plants
Tickseed's unique twist-resistant pods make it a gardener's dream for zero-waste seed saving—here's how to coax its vibrant blooms and sturdy structure.
🌱 Step 1: Select the Perfect Planting Location
Tickseed thrives in full sun with at least 6-8 hours of direct light daily. Choose a spot with well-draining soil—this plant despises soggy roots. I always test drainage by digging a 6-inch hole, filling it with water, and watching how quickly it drains. If water sits after 30 minutes, amend the soil with 1 part sand to 3 parts native soil.
The plant's natural resilience means it tolerates drought once established, but young seedlings need consistent moisture. You'll know you've picked the right spot when the foliage stays deep green and stems remain upright rather than stretching toward light.
☀️ Step 2: Plant at the Right Time and Depth
Sow seeds 4-6 weeks before your last frost date indoors or directly in the garden after soil reaches 60°F. Press seeds just ¼ inch deep—any deeper and they'll struggle to emerge. I use my finger to create small dimples in the soil rather than pressing seeds too firmly, which can damage the delicate seed coat.
Space seedlings 12-18 inches apart to allow for air circulation. Crowding invites fungal diseases that tickseed's thin stems can't handle. Thin seedlings to the strongest one per spot, cutting at soil level with clean scissors rather than pulling to avoid disturbing roots.
💧 Step 3: Water Strategically for Strong Growth
Water deeply once weekly rather than frequent shallow waterings. This encourages deep root growth that supports those iconic twist-resistant pods. You'll know moisture is right when the top 2 inches of soil feel dry to touch—stick your finger in to check rather than guessing.
Once established, tickseed becomes drought-tolerant, but don't skip watering entirely. During flowering, increase to twice weekly watering to support pod development. I always water at the base rather than overhead to prevent fungal spores from landing on the delicate blooms.
✂️ Step 4: Prune for Airflow and Pod Production
Remove spent flowers by pinching them off at the stem base. This redirects the plant's energy toward producing more pods rather than setting seed. I do this every 2-3 days during peak bloom—it takes just a few minutes but dramatically increases your harvest.
Trim any leggy stems that develop. These appear as thin, pale growths stretching toward light. Cut them back to the nearest healthy leaf to encourage bushier growth. The goal is a compact plant with multiple stems producing pods rather than one tall, weak stalk.
🪴 Step 5: Harvest and Save Seeds Sustainably
Collect pods when they turn brown and begin to split open. The twist-resistant design means they won't shatter when ripe. Gently twist the pods to release seeds—this is where tickseed earns its name. Store seeds in a cool, dry place for up to 2 years without losing viability.
Leave some pods on the plant for wildlife. Birds and small mammals adore the seeds, and the plant's resilience means it will still produce plenty for your needs. I always save seeds from the healthiest plants, selecting those with the darkest, most uniform pods for next year's planting.
Tips & tricks for perfect tickseed plant care
Here's what nobody tells you about growing these resilient plants to their full potential.
Sunlight Strategy: While tickseed thrives in full sun, I've found that morning sun with afternoon shade in hot climates produces slightly larger pods. The 6-8 hours of direct light should ideally be spread throughout the day rather than concentrated in peak afternoon heat, which can stress the plants. Watch for leaves that turn yellow or crisp at the edges—this is your plant's way of saying it needs relief from intense afternoon rays.
Planting Precision: The ¼-inch planting depth is critical because tickseed seeds need just enough light to germinate, but too much exposure can dry them out. I've learned to use a toothpick to create those small dimples rather than pressing seeds too firmly—this delicate approach prevents seed coat damage that could delay germination. For container growing, use well-draining pots with drainage holes to prevent root rot, especially in Step 1's well-draining soil requirement.
Watering Wisdom: When checking soil moisture in Step 3, I've discovered that the top 2 inches should feel dry but not bone-dry—think of it like a slightly damp sponge rather than a wet washcloth. Overwatering is the biggest mistake I see with tickseed; these plants are far more drought-tolerant than most gardeners realize. The twice-weekly watering during flowering is particularly important for pod development, but I always check for wilting leaves before watering again.
Harvesting Hack: For seed saving, I've developed a simple trick: collect pods when they're brown but still slightly crisp to the touch. These will release seeds easily when twisted, while fully dried pods may crumble. Store your saved seeds in small paper envelopes rather than plastic bags—they'll last longer and won't develop condensation that could encourage mold. The 2-year viability is impressive, but I've found seeds stored in cool, dark places (like my basement) often remain viable even longer.
Pro Tips for Tickseed Plant Care
- Here's what nobody tells you about growing these resilient plants to their full potential.
- Sunlight Strategy: While tickseed thrives in full sun, I've found that morning sun with afternoon shade in hot climat...
- Planting Precision: The ¼-inch planting depth is critical because tickseed seeds need just enough light to germinate,...
Frequently asked questions
Got questions about growing and maintaining your tickseed plant? You’re not alone—this unique, drought-tolerant beauty has a few quirks! Below, we’ve rounded up the most common queries to help you keep your plant thriving and twist-resistant pods ready for seed saving.
How often should I water my tickseed plant?
Water your tickseed plant deeply but infrequently—about once every 1–2 weeks, depending on your climate. These drought-resistant plants store water in their stems, so overwatering can cause root rot. Stick your finger 1–2 inches into the soil; if it’s dry, it’s time to water. Pro tip: Reduce watering in winter when growth slows.
When is the best time to harvest tickseed pods?
Harvest pods when they’re light brown and slightly papery (usually late summer to early fall). Gently twist them off the stem—if they resist, they’re not ready yet! Store dried pods in a cool, dry place for up to a year. Warning: Avoid harvesting when pods are still green or moist to prevent mold.
Can tickseed grow in containers, or does it need a garden bed?
Yes! Tickseed thrives in containers 12+ inches deep with drainage holes. Use a well-draining potting mix and place it in full sun. Just ensure the pot doesn’t stay soggy—containers dry out faster than garden beds. Bonus: Move pots indoors if temps drop below 20°F to protect tender roots.
Why are my tickseed leaves turning yellow?
Yellowing leaves often signal overwatering or poor drainage. Let the soil dry between waterings and check for root rot (black, mushy roots). If pests like aphids are the culprit, spray leaves with soapy water or introduce beneficial insects. Fix: Repot in fresh, gritty soil if drainage is the issue.
Are there tickseed plant alternatives for seed saving?
If tickseed isn’t your style, try coreopsis or black-eyed Susan—both produce twist-resistant pods and thrive in similar conditions. For zero-waste seed saving, sunflowers (with their easy-to-harvest heads) are another great option. Tip: Choose heirloom varieties for the best seed quality!
Wrapping up and next steps
Caring for your tickseed plant is a rewarding journey that yields zero-waste seeds and stunning foliage! With minimal effort—sunlight, well-draining soil, and occasional pruning—you’ll enjoy a low-maintenance, eco-friendly companion. Whether you’re saving seeds or admiring its twisted pods, this plant thrives on attention to detail and a little patience.
Ready to grow your green thumb? 🌱 Start small—plant one this season and watch it flourish. Share your progress with fellow gardeners or explore more tickseed varieties to expand your collection!