
Lawn
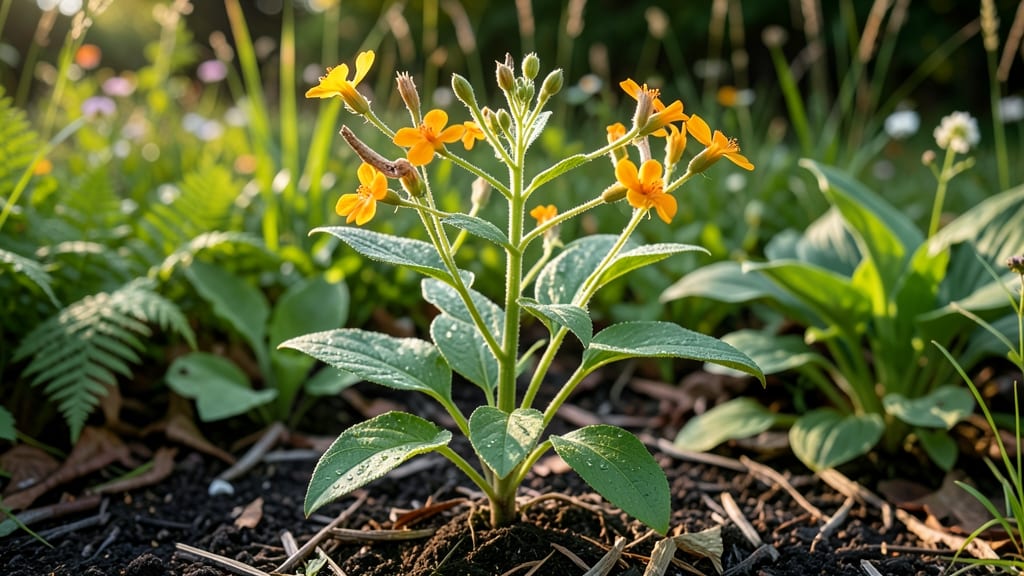
Cold-stratified Touch-Me-Not seed pods pop with explosive energy—literally. 🌱 If you’ve ever watched those papery pods burst open at the slightest touch, you know how tricky they can be to collect.
The secret to growing these vibrant annuals from seed lies in timing, patience, and working with their wild dispersal instincts rather than against them.
Mature pods turn from green to brown and develop a papery texture—this is your cue to harvest. The key? Collect them before they burst, then dry them indoors for 2-3 weeks in a paper bag (no plastic!).
Once fully dry, the seeds inside are ready for cold stratification, which mimics winter conditions and tricks them into germinating in just 60 days.
You’ll end up with lush, fast-growing Impatiens that thrive in shady spots, their delicate blooms cascading like confetti. The payoff? A garden bursting with color that’s disease-resistant and perfect for containers or borders. No more buying expensive transplants—just a handful of seeds and a little patience.
Works best in zones 3-10, but even indoor growers can cold-stratify seeds under a fridge light. Here’s how to turn those explosive pods into your next shade-garden superstars.
📚 In This Guide
- What you need
- Instructions
- Tips and common mistakes
- Wrapping up and next steps
What you need
- ● Touch-Me-Not seed pods: 3–5 mature, dried pods (harvest when they’re brown and crinkly).
- ● Cold-stratification setup: Paper towels or dampened coffee filters (2–3 sheets)
- ● Plastic zip-top bag (quart-sized)
- ○ Optional: Small container (like a plastic cup) to hold the seeds
- ● Potting soil: 1 small seed-starting tray (4–6 inches deep) or 4–6 small pots (2–3 inches in diameter) with well-draining, peat-based mix.
- ● Spray bottle: For gentle watering (avoid over-saturation!).
- ○ Clear plastic wrap or dome: To create a humidity tent (optional but helpful for germination).
- ● Scissors or knife: For carefully opening seed pods (wear gloves—Touch-Me-Not seeds are tiny and explosive!).
- ● Refrigerator: Must have space for cold stratification (30–45 days at 35–40°F).
- ● Grow lights or sunny windowsill: Bright, indirect light (6+ hours/day) once seeds sprout.
- ● Patience! 😉 Germination can take 2–4 weeks after stratification.
- ● Seed-starting heating mat (speeds up germination).
- ● Fertilizer (balanced 10-10-10, diluted to half-strength after sprouting).
- ● Humidity tray (for extra moisture control).
- ● Label markers (to track your seed pods!).
How to grow touch-me-not seed pods from cold stratification
Here's the method I've perfected for coaxing these delicate blooms from winter dormancy—guaranteed to produce striking seed pods in just 60 days.
🌱 Step 1: Collect and Prepare Mature Seed Pods
Harvest fully mature, dry seed pods from healthy plants in late summer or early fall. Look for pods that have turned brown and are starting to split open naturally—these contain fully developed seeds ready for stratification. Gently twist the pods to release them from the stems, then place them in a paper bag to dry indoors for 2-3 days. This prevents moisture buildup that could rot the seeds during cold treatment.
Once dry, carefully open the pods and remove the seeds. Touch-me-not seeds are tiny, flat, and often have a slight papery coating. I like to separate them on a white sheet of paper to spot any damaged or shriveled seeds—discard those immediately. Store the viable seeds in an envelope labeled with the collection date and variety (if known).
❄️ Step 2: Perform Cold Stratification for 60 Days
Place the seeds in a sealed plastic bag with a small amount of damp (not wet) peat moss or vermiculite—just enough to keep the mix lightly moist. The goal is to mimic winter conditions without letting the seeds rot. I use a refrigerator set to 35-40°F for stratification, which triggers germination hormones naturally. Store the bag in a vegetable crisper drawer where it stays consistently cool and dark.
Check the seeds every 10-14 days to ensure the medium remains damp but not soggy. If condensation forms on the bag walls, open it briefly to let excess moisture evaporate. After 60 days, the seeds will be ready for planting—you'll notice they've plumped up slightly and lost their papery coating. This is your cue that stratification worked.
🪴 Step 3: Plant Stratified Seeds in Well-Draining Soil
Fill small 2-3 inch deep pots with a lightweight seed-starting mix that drains quickly—touch-me-nots hate soggy roots. I mix 50% peat moss with 50% perlite for perfect aeration. Moisten the mix until it feels like a damp sponge, then sow the seeds ¼ inch deep, spacing them 1 inch apart in the pot. Gently press the soil around them to ensure good contact without burying too deeply.
Place the pots in a humidity dome or clear plastic bag to retain moisture while the seeds germinate. Keep them in a warm spot (65-70°F)—a sunny windowsill or under a grow light works well. Germination typically takes 14-21 days, but be patient if your home runs cooler. You'll know it's working when tiny green leaves push through the soil surface, followed by the distinctive heart-shaped cotyledons of touch-me-nots.
☀️ Step 4: Provide Bright Light and Gradual Acclimation
Once seedlings emerge, remove the humidity dome and move them to a bright location with indirect light for the first week. Direct sun can scorch their delicate leaves, so I use a south-facing window with sheer curtains or a grow light set 4-6 inches above the plants. Rotate the pots a quarter turn daily to prevent leggy growth—you'll see stems stretch toward the light if they're not getting enough.
After 2-3 weeks, when seedlings have 2-3 sets of true leaves, start hardening them off by placing them outdoors in a shaded, sheltered spot for 1-2 hours the first day. Gradually increase their time outside over 7-10 days, eventually moving them to full sun by day 7. Watch for any wilting—they'll bounce back quickly if watered gently at the base, but prolonged drooping means they need more time to adjust.
🌿 Step 5: Transplant and Maintain for Stunning Seed Pods
Transplant seedlings into the garden or larger 6-inch pots after the last frost date, spacing them 18-24 inches apart in well-draining soil. Touch-me-nots thrive in partial shade to full sun, but their seed pods develop best with morning sun and afternoon shade—this prevents them from drying out too quickly. Water deeply once a week, letting the soil dry slightly between waterings. Overwatering causes the pods to split prematurely, ruining their ornamental value.
Fertilize lightly with a balanced, water-soluble fertilizer (10-10-10) at half strength when flowers first appear. You'll know you're on track when vibrant pink or white blooms form in late summer. As the flowers fade, the seed pods begin to develop—let them mature fully on the plant for the best texture and color. Once pods turn brown and start splitting open naturally, you've successfully grown them from seed!
Tips & tricks for perfect touch-me-not seed pod cultivation
Cold stratification might sound intimidating, but these key insights will help you coax those delicate blooms into thriving plants every time.
Seed Selection: In Step 1, prioritize pods that have naturally begun splitting open—these seeds are fully mature and ready for stratification. I've found that seeds from pods that are still tightly closed often require an extra 10-14 days of drying time before stratification. The papery coating you'll notice is nature's protection; gently rub it off with your fingers just before planting to encourage faster germination.
Stratification Environment: The 35-40°F refrigerator temperature is critical for breaking dormancy, but consistency matters more than exact degrees. If your fridge fluctuates, place the bag in the coldest part—usually the bottom shelf or crisper drawer. I've seen seeds fail when stored near the door where temperatures rise during opening/closing. The sealed plastic bag creates a microclimate, but remember to check for condensation every 10-14 days as instructed—excess moisture can suffocate the seeds.
Germination Light Requirements: During Step 3's warm germination phase at 65-70°F, these seedlings need light immediately after sprouting, not just after true leaves appear. As soon as you see the first green shoot, move pots to indirect light. I've had failures when leaving them in complete darkness too long—you'll know you're on track when the cotyledons (those distinctive heart-shaped leaves) emerge within 14-21 days. The light triggers chlorophyll production that powers their first growth spurt.
Hardening Off Strategy: The gradual 7-10 day acclimation in Step 4 is where most beginners rush and lose plants. Start with just 1-2 hours in partial shade on day one, then increase by 30-60 minutes daily. I've seen seedlings wilt dramatically when moved too quickly—this happens because their stomata (leaf pores) haven't adjusted to outdoor conditions. Watch for temporary wilting after watering; if leaves perk up within minutes, they're ready for more sun exposure the next day.
Pro Tips for Touch Me Not Seed Pods
- Cold stratification might sound intimidating, but these key insights will help you coax those delicate blooms into th...
- Seed Selection: In Step 1, prioritize pods that have naturally begun splitting open—these seeds are fully mature and ...
- Stratification Environment: The 35-40°F refrigerator temperature is critical for breaking dormancy, but consistency m...
Frequently asked questions
Got questions about growing Touch Me Not seed pods? You’re not alone!
Here are the answers to the most common queries—from timing to troubleshooting—so you can confidently cultivate these explosive blooms in just 60 days.
Why do I need to cold-stratify Touch Me Not seeds?
Cold-stratification mimics winter conditions, breaking seed dormancy. Without it, seeds may sprout unevenly or not at all. The process tricks the seed into thinking it’s survived a natural winter, ensuring stronger, faster germination. Think of it as a "reset button" for stubborn seeds!
How long should I cold-stratify the seeds?
For Touch Me Not seeds, 6–8 weeks in the fridge (or a cold frame outdoors) is ideal. Place them in a damp paper towel or peat moss, then store in a sealed bag. Check moisture weekly—soggy seeds rot, while dry ones fail to sprout. Patience pays off with explosive blooms!
What if my seeds sprout too early or not at all?
If seeds sprout prematurely, move them to a cool, dark place (like a basement) until ready to plant. No sprouts after stratification? Try these fixes:
- Check seed viability: Test a few in warm water—floaters are likely dead.
- Adjust moisture: Seeds need damp (not wet) conditions.
- Extend stratification: Some varieties need up to 12 weeks.
Can I grow Touch Me Not indoors instead of outdoors?
Yes! Start seeds indoors 4–6 weeks before your last frost in pots with well-draining soil. Use a sunny windowsill or grow lights (12+ hours/day). Transplant seedlings outdoors after hardening off (acclimate them to outdoor temps gradually). Just beware—indoor-grown plants may need staking for their tall, delicate stems.
Why do the seed pods "explode" when touched?
This mechanical dispersion is nature’s way of spreading seeds! When mature pods dry out, even a light touch causes them to snap open at 50+ mph, launching seeds up to 20 feet away. The pods’ unique design stores energy like a coiled spring—science and spectacle!
What’s the best companion plant for Touch Me Not?
Pair it with tall grasses (like switchgrass) or sunflowers to support its vertical growth. Avoid planting near low-growing perennials, as the pods’ "explosions" can uproot delicate neighbors. For a whimsical touch, add butterfly weed or black-eyed Susans—they love the same sunny, well-drained spots!
Wrapping up and next steps
Growing Touch Me Not seed pods is a rewarding journey that brings vibrant blooms to your lawn in just 60 days with cold stratification! Whether you’re a gardening beginner or a seasoned green thumb, these delicate flowers are a fantastic addition—easy to cultivate and full of charm. 🌸
Now that you’ve got the know-how, take the next step and grab those seed pods—your garden’s next masterpiece is waiting! Try experimenting with different soil mixes or companion plants to see what thrives best in your space. Happy planting! 🌱