
Lawn
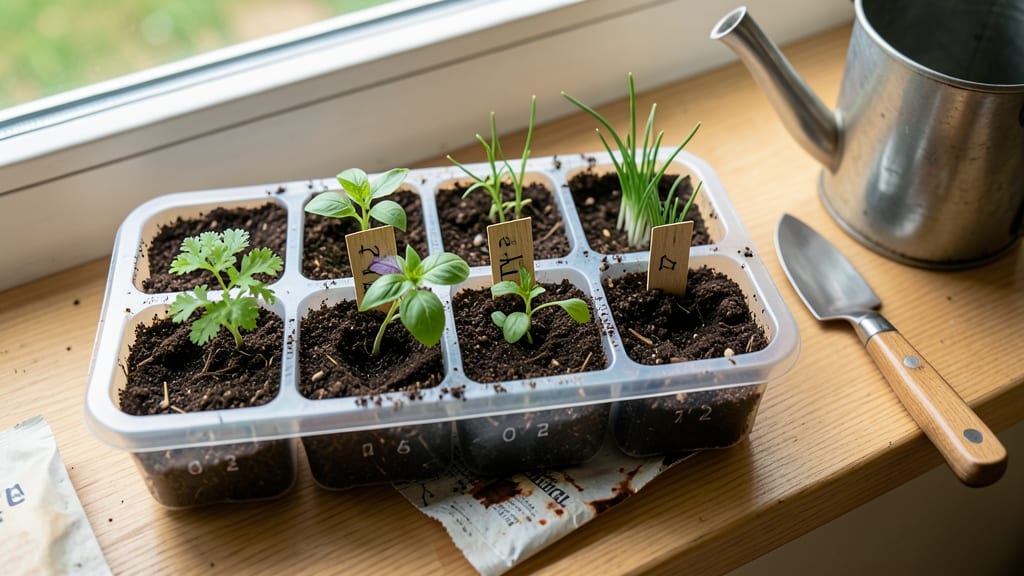
Reusable seed trays cut my seed-starting costs in half while giving seedlings room to grow strong roots. 🌱 The first time I switched from disposable trays, my basil seedlings were twice as sturdy—no more leggy, weak plants that toppled at transplant time.
The key is choosing the right material (plastic lasts years, biodegradable breaks down with the plant) and keeping them clean between uses.
Most trays come with drainage holes, but if yours don’t, punch your own—just use a nail and a hammer. Fill them with a lightweight mix of 50% peat moss, 30% perlite, and 20% compost, then sow seeds just below the surface.
Water gently from the bottom to avoid washing seeds away, and place under grow lights or in a sunny window.
By the time seedlings hit 2-3 inches tall, they’re ready to transplant. The trays’ sturdy sides make it easy to pop them out without disturbing roots, and you’ll reuse them for 5+ seasons—saving money and reducing waste.
Just rinse with soapy water after each use to prevent mold or disease buildup.
Pro tip: Label trays with seed varieties and dates to avoid confusion, and store empty trays in a dry place. If you notice seedlings stretching too tall, move them closer to light—this is the #1 sign of overcrowding or weak light.
With these trays, you’ll get healthier starts every time, and your garden will thank you at harvest.
📚 In This Guide
- What you need
- Instructions
- Tips and common mistakes
- Wrapping up and next steps
What you need
- ● Reusable seed trays: 1–2 trays (10" x 20" or 12" x 24" sizes work best). Look for stackable, durable plastic or biodegradable options (e.g., 6-cell or 20-cell configurations).
- ● Seed starting mix: 1–2 bags (5–10 lbs) of sterile, well-draining potting soil (avoid garden soil—it’s too dense!).
- ● Seeds: Choose fast-growing varieties (e.g., lettuce, herbs, or flowers) for early trays. Check seed packets for depth requirements!
- ● Watering can or spray bottle: A fine-mist sprayer helps avoid displacing seeds.
- ● Plant labels: 10–20 wooden or plastic tags + a pencil to track varieties.
- ○ Flat tray or seedling mat: Optional but helpful for warmth (70–75°F is ideal for germination).
- ● Grow lights: LED clips or a full spectrum bulb (12–16 hrs/day) for indoor setups.
- ● Humidity dome: Clear plastic wrap or a store-bought lid to retain moisture.
- ● Fertilizer: A balanced, water-soluble fertilizer (5-10-5 ratio) for later stages.
- ● Tweezers or seed spreader: For precise seed placement (great for tiny seeds!).
- ● Bottom tray or saucer: To catch excess water and prevent messes.
Step-by-Step instructions for using reusable seed trays
Here’s how to maximize your reusable trays for healthy, robust seedlings that thrive from the start.
🌱 Step 1: Prepare Trays and Fill with Moistened Mix
Start by washing your reusable seed trays with warm, soapy water to remove any residue from previous use. Rinse thoroughly and let them dry completely—this prevents mold and disease in your new seedlings. Once dry, fill each cell with a sterile seed-starting mix (never garden soil) up to ½ inch below the rim. I like to press the mix down lightly with my fingers to eliminate air pockets, but don’t compact it too tightly.
Moisten the mix with a spray bottle until it’s damp but not soggy—think of a wrung-out sponge. You’ll know it’s right when a gentle squeeze releases moisture without dripping. This even moisture ensures seeds germinate uniformly and roots establish quickly. If your mix is too dry, seedlings struggle to push through, and if it’s too wet, they’ll rot before sprouting.
🌱 Step 2: Sow Seeds at the Correct Depth
Check the seed packet for depth guidelines, but a general rule is to plant seeds at a depth twice their diameter. For tiny seeds like lettuce, press them gently into the surface with your fingertip—no need to bury them. Larger seeds, like beans, can go slightly deeper (½ inch). I use a toothpick to create small holes for precision, especially with delicate seeds.
Space seeds evenly in each cell—crowding leads to weak, leggy seedlings. If the packet says to sow 2-3 seeds per cell, I plant them in a triangle pattern for balanced growth. Cover lightly with a thin layer of mix, then mist again with water. Avoid heavy watering here; you’ll disturb the seeds and bury them too deep. A fine mist is all they need.
💧 Step 3: Provide Warmth and Humidity for Germination
Place the trays in a warm spot, ideally between 70-75°F. A seedling heat mat works wonders if you’re starting early in cool weather—it keeps the soil consistently warm and speeds up germination. Cover the trays with a clear plastic dome or wrap them in plastic wrap to trap humidity. This mimics the greenhouse effect and helps seeds break through the soil faster.
Check daily for condensation on the plastic—this means the humidity is perfect. If you see droplets, leave it be. If the plastic fogs up completely, lift it for 10 minutes to let excess moisture escape. Germination usually takes 5-14 days, depending on the plant. Watch for the first tiny green shoots—this is your signal to remove the cover immediately to prevent damping-off, a fungal disease that attacks young seedlings.
☀️ Step 4: Move to Bright Light and Monitor Growth
Once seedlings emerge, place the trays under grow lights or in a south-facing window where they’ll get 12-16 hours of light daily. Without enough light, seedlings stretch toward the source, becoming weak and spindly. I keep my lights 2-3 inches above the trays and raise them as the seedlings grow to maintain that distance. You’ll know they’re getting enough light when the leaves are dark green and compact.
Water from the bottom by placing the trays in a shallow tray of water for 10-15 minutes. This encourages roots to grow downward and strengthens the seedlings. Avoid overhead watering now—it can spread disease and wash away soil. Check the soil moisture by sticking your finger ½ inch deep; if it feels dry, it’s time to water again. Overwatering here is the biggest mistake—it causes roots to suffocate and seedlings to collapse.
✂️ Step 5: Thin and Harden Off for Transplanting
When seedlings have 2-3 true leaves (the first set are cotyledons, or seed leaves), it’s time to thin. Use scissors to snip the weakest seedling at soil level, leaving the strongest one in each cell. This might feel wasteful, but crowded seedlings compete for nutrients and light, leading to stunted growth. After thinning, let the trays dry out slightly—this toughens the seedlings and prepares them for transplanting.
Start hardening off by moving the trays outside for 1-2 hours on a shaded day, then gradually increase their time outdoors over 7-10 days. This acclimates them to wind, sun, and temperature fluctuations. By the time you’re ready to transplant, your seedlings will be sturdy and ready to handle the garden. Plant them at the same depth they were in the trays, and water deeply to help them settle in.
Tips & tricks for perfect seedling growth in reusable trays
Here's what I've learned after growing hundreds of seedlings—these tricks make all the difference between weak starts and thriving plants.
Soil Moisture Secret: After filling your trays in Step 1, I recommend running a quick test: Press your finger into the mix up to your first knuckle. If it comes out clean, add a light mist until it feels like a damp sponge—not dripping, not bone dry. Too much moisture in Step 1 causes rot, while too little makes seeds struggle to sprout. I've seen entire trays fail because of this simple oversight.
Precision Planting Technique: For Step 2, I use a bent paperclip to create planting holes instead of toothpicks. It's more precise and won't break when pressing seeds into the soil. When planting multiple seeds per cell, I make a small triangle pattern—this gives each seedling equal access to light and nutrients. The triangle method prevents the "winner takes all" scenario where one seedling crowds out its neighbors.
Germination Environment: The 70-75°F range in Step 3 is crucial, but don't stop there. Place your trays on a towel or tray to catch any condensation that drips from the plastic cover. This prevents soggy bottoms that can rot roots. I also prop up one side of the plastic wrap slightly—this creates a tiny air gap that prevents complete suffocation while maintaining humidity. Watch for that first green shoot like a hawk—it's your signal to remove the cover immediately.
Light Management: When moving to grow lights in Step 4, I set a timer for 12 hours on/4 hours off to mimic natural day cycles. This prevents the "light shock" that causes seedlings to stretch dramatically. Adjust your light height every 3-4 days as seedlings grow—keeping them 2-3 inches away ensures even growth. You'll notice the difference immediately: compact, dark green leaves instead of leggy, pale stems.
Pro Tips for Reusable Seed Trays
- Here's what I've learned after growing hundreds of seedlings—these tricks make all the difference between weak starts...
- Soil Moisture Secret: After filling your trays in Step 1, I recommend running a quick test: Press your finger into th...
- Precision Planting Technique: For Step 2, I use a bent paperclip to create planting holes instead of toothpicks. It's...
Frequently asked questions
Got questions about reusable seed trays? You’re not alone! Here are some of the most common queries—plus straightforward answers to help you grow like a pro.
What materials are best for reusable seed trays?
Opt for durable, lightweight materials like recycled plastic or biodegradable fiber. Plastic trays (e.g., polypropylene) last years, while fiber trays break down naturally after use. Avoid thin or flimsy options—they warp under moisture.
How long can I reuse seed trays before they wear out?
With proper care, plastic trays can last 5–10 years, while fiber trays degrade after 1–2 seasons. Clean them thoroughly after each use (soapy water + bleach rinse) to prevent mold. Store them in a dry place to extend their lifespan.
Can I use reusable trays for all types of seeds?
Yes! They work for vegetables, herbs, flowers, and even grass seeds. Just ensure the tray has adequate drainage holes (¼-inch diameter) to prevent root rot. For delicate seeds (like lettuce), use a fine seed-starting mix.
What’s the best way to clean trays between uses?
Scrub trays with hot, soapy water and a brush to remove soil. Rinse with a 10% bleach solution (1 part bleach to 9 parts water) to kill pathogens, then air-dry completely. For stubborn residue, soak in vinegar overnight.
Aren’t disposable trays easier?
Disposable trays save time upfront, but reusable trays pay off long-term. A pack of 50 plastic trays costs ~$20–$40, while disposables add up to $100+ per year. Plus, reusables reduce waste—eco-friendly and budget-friendly!
Why are my seedlings leggy or weak in trays?
Leggy seedlings often mean low light or overcrowding. Place trays near a south-facing window or under grow lights (12–16 hours/day). Thin seedlings if roots tangle, and use a lightweight potting mix to avoid compacting soil.
Wrapping up and next steps
Reusable seed trays are a game-changer for gardeners looking to save space, reduce waste, and nurture healthier seedlings—all while keeping costs low. Whether you’re a seasoned gardener or just starting, these trays make seed starting effortless, eco-friendly, and efficient.
Ready to give it a try? Start small with a few trays this season and watch your seedlings thrive!
🌱 Next step: Gather your materials, follow the steps, and let those seeds grow!