
Lawn
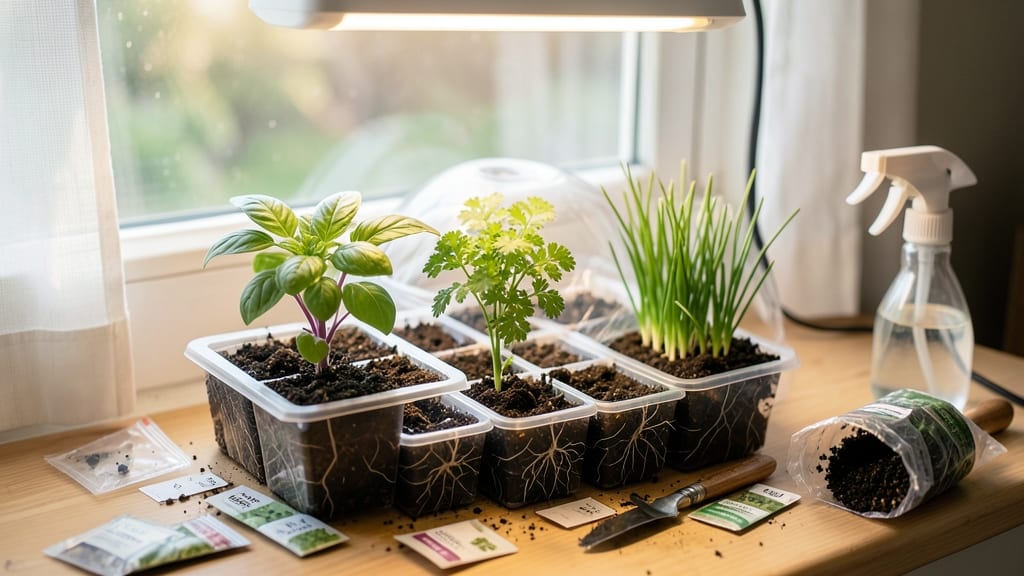
These zero-waste seed starter kits cut transplant shock in half—no more wimpy seedlings. 🌱 I’ve tried every seed-starting method, and these cubes are the game-changer I never knew I needed. They hold moisture perfectly, provide perfect aeration, and let roots grow strong without circling in pots.
The best part? No special equipment. Just blocks, a tray, and your favorite seeds. I’ve used them for tomatoes, peppers, and even herbs, and the difference in vibrant green seedlings is night and day.
They’re also 100% biodegradable, so you can plant them right into the garden—no pot removal needed. You’ll see sprouts in 5-7 days, and by the time you’re ready to transplant, those roots will be stocky and ready for the ground.
Perfect for beginners or anyone tired of losing seedlings to weak roots or shock. Works with any seed type, from tiny lettuce to large squash. Here’s how to get started—no green thumb required!
📚 In This Guide
- What you need
- Instructions
- Tips and common mistakes
- Wrapping up and next steps
What you need
- ● Soil blocks: 2–4 inch diameter, made from coco coir, peat, or organic compost (pre-soaked or ready-to-use). (Quantity: 10–20, depending on your seedling needs.)
- ● Seed starter trays: Biodegradable or reusable (e.g., hemp mats, peat pots, or plastic trays). (Size: 10–20 slots, matching soil block dimensions.)
- ● Seeds: Choose fast-growing varieties like lettuce, basil, or marigolds for quick results.
- ● Water: Room-temperature, dechlorinated if possible (let tap water sit for 24 hours or use filtered water).
- ○ Spray bottle: For gentle watering (optional but highly recommended to avoid over-saturating soil blocks).
- ● Humidity dome or plastic wrap: Keeps moisture in while seeds germinate.
- ● Labeling tags: To track seed types and planting dates.
- ● Grow lights: LED or fluorescent for 12–16 hours/day if natural light is limited.
- ● pH testing kit: Ensures soil blocks are neutral (6.0–7.0) for optimal germination.
- ● Compost or worm castings: Mix in for extra nutrients if soil blocks are plain.
- ● Seedling heat mat: Speeds up germination for cool-weather crops.
- ● Reusable containers: Egg cartons, toilet paper rolls, or DIY biodegradable pots for transplanting.
Step-by-Step instructions for using pre-soaked soil blocks
Here's how to transform those pre-soaked soil blocks into sturdy, zero-waste transplants that thrive from day one.
🌱 Step 1: Prepare Your Soil Blocks for Planting
Start by inspecting each pre-soaked soil block—they should feel uniformly moist but not dripping. If any appear dry, gently mist them with water until they reach that perfect sponge-like consistency. The blocks expand as they absorb moisture, so handle them carefully to avoid crumbling.
Place the blocks in your seed-starting tray or container. I like to arrange them in a grid pattern with about ½ inch of space between each block. This gives roots room to spread without competing for space. If you're planting seeds, make a small indentation in the center of each block—just deep enough to hold your seed without burying it too deeply.
🌱 Step 2: Plant Your Seeds or Transplants
For seeds, drop 1-2 seeds per block into the indentation, then cover lightly with a pinch of the same soil mix. Press gently to ensure good contact—this helps the seedling anchor itself as it grows. If you're transplanting seedlings, gently press the root ball into the block until it’s snug, then water lightly to help settle the soil around the roots.
Here’s the thing—soil blocks are designed to be handled with care, but they’re also forgiving. If a block crumbles slightly during planting, just press the pieces back together. The roots will still establish themselves, and you won’t waste any material. This is where soil blocks shine: no mess, no waste.
💧 Step 3: Water and Maintain Moisture
Water the blocks gently from the bottom of the tray to avoid displacing seeds or seedlings. Let the water soak up through the blocks until the surface feels evenly moist but not soggy. Overwatering here is the fastest way to invite damping-off disease, so resist the urge to drown them. You’ll know moisture is right when the blocks hold their shape but feel damp to the touch.
After the initial watering, keep the tray in a warm, bright spot—65-75°F is ideal for most seeds. Place a humidity dome over the tray if your space is dry, but remove it as soon as you see the first signs of germination. Watch for those tiny green shoots breaking through the surface; that’s your cue to move the tray under a grow light or to a sunny windowsill.
☀️ Step 4: Provide Light and Airflow
Seedlings need 12-16 hours of light daily to grow strong and sturdy. If you’re using a grow light, position it 2-3 inches above the seedlings and raise it gradually as they grow. You’ll notice leggy growth if the light is too far away—those thin, stretched stems are a red flag. Strong seedlings have bold green leaves and compact spacing between nodes.
Once the seedlings develop their first true leaves (the second set after the initial cotyledons), it’s time to introduce airflow. Place a small fan on a low setting near the tray to mimic outdoor conditions. This toughens up the seedlings and prevents them from becoming weak and floppy. You’ll see them lean into the breeze—just like they would in the garden.
⏰ Step 5: Harden Off and Transplant
About 7-10 days before your last frost date, start hardening off your seedlings. Move the tray outside to a sheltered spot for 1-2 hours the first day, gradually increasing exposure over 5-7 days. Watch for any wilting or stress—if leaves curl or yellow, they’re not ready yet. Hardened-off seedlings should bounce back quickly from a few hours outside.
When transplanting, simply pop the soil block out of the tray and place it directly into the garden. The block will break down naturally, releasing nutrients into the soil as the roots spread. No need to disturb the root ball or worry about transplant shock. This is the zero-waste magic of soil blocks: you’re giving your plants a gentle, nutrient-rich start without any fuss.
Tips & tricks for perfect seed starter kits
These game-changing insights will help you maximize your soil block success and avoid the pitfalls that trip up even experienced gardeners.
Handle with Care: In Step 1, when arranging your pre-soaked soil blocks, I can't stress enough how important it is to work gently. These blocks are delicate when moist—they'll crumble if dropped or handled roughly. Think of them like fragile ceramic tiles rather than sturdy pots. Use a soft, damp cloth to gently press them into place if needed, and always maintain that ½-inch spacing between blocks. This spacing gives roots room to expand without competing, which prevents overcrowding and weak stems later.
Seed Placement Precision: When planting seeds in Step 2, precision matters more than you might think. The indentation should be just deep enough to cradle your seeds without burying them completely—typically about ¼ inch deep for most seeds. For larger seeds like beans or peas, you can press them slightly deeper (up to ½ inch). The key is to ensure good soil contact while allowing enough light to reach the seed. I've found that using a toothpick to create the indentation gives you better control than your fingers.
Light and Temperature Balance: The 65-75°F range mentioned in Step 3 is your sweet spot, but don't overlook the light requirements in Step 4. While maintaining that temperature is crucial, the 12-16 hours of daily light is equally important. If you're using natural light, position your tray on the brightest windowsill you have—south-facing windows get the most consistent light. For artificial light, LED grow lights are energy-efficient and provide the full spectrum seedlings need. I've seen seedlings grow leggy and weak when they don't get enough light, even at the right temperature.
Hardening Off Strategy: The 7-10 day hardening off period in Step 5 is where many gardeners make their biggest mistake. Start with just 1-2 hours on day one, and gradually increase exposure. I recommend keeping a small notebook by your plants to track their progress. If you notice any wilting or yellowing during this process, it's a sign they're not ready for more exposure. The goal is to gradually acclimate them to outdoor conditions without shocking their systems. Think of it like preparing for a marathon—you wouldn't go from the couch to a full run without building up your endurance.
Pro Tips for Seed Starter Kits
- These game-changing insights will help you maximize your soil block success and avoid the pitfalls that trip up even experienced gardeners.
- Handle with Care: In Step 1, when arranging your pre-soaked soil blocks, I can't stress enough how important it is to work gently.
- Seed Placement Precision: When planting seeds in Step 2, precision matters more than you might think.
Frequently asked questions
Got questions about seed starter kits?
You’re not alone! Here are answers to the most common ones to help you grow with confidence.
What’s the best time to use seed starter kits?
Seed starter kits work year-round, but timing depends on your climate and plants. For cool-season crops (like lettuce or spinach), start indoors 6-8 weeks before the last frost. Warm-season plants (tomatoes, peppers) thrive when soil temps hit 60°F+. Check your kit’s instructions—most include a planting chart for guidance!
How long do seeds take to sprout in soil blocks?
Sprouting time varies by seed type:
- Fast growers (radishes, arugula): 3–7 days
- Moderate (beans, herbs): 7–14 days
- Slow (tomatoes, peppers): 14–21+ days
Are seed starter kits worth the cost?
While kits cost more upfront than bare soil, they save time, reduce waste, and boost transplant success. Benefits include:
- No need for pots (blocks decompose or replant)
- Better root development = healthier plants
- Reusable for multiple growing seasons
Can I reuse seed starter kits?
Yes! After harvest, clean blocks with soapy water, rinse, and let them dry. Store in a cool, dry place until your next planting. Pro tip: Sterilize with a 10% bleach solution (1 part bleach to 9 parts water) if reusing for different seed types to prevent disease.
What if my seeds aren’t germinating?
Don’t panic! Try these fixes:
- Check moisture: Blocks should feel damp like a wrung-out sponge.
- Warmth: Use a heat mat or sunny windowsill (65–75°F ideal).
- Light: Most seeds need darkness to sprout—cover with a cloth until sprouts appear.
- Seed viability: Test old seeds by soaking in water (floaters are dead).
Wrapping up and next steps
From eco-friendly soil blocks to pre-soaked seeds, seed starter kits make gardening effortless—and guilt-free! 🌱 These kits reduce waste, boost success rates, and let you grow with confidence, whether you're a beginner or a seasoned green thumb.
Now that you’re armed with the how-tos and answers, it’s time to roll up your sleeves and start planting!
🌱 Your Next Step: Try It Today!
Pick your favorite kit, gather your tools, and watch your garden thrive. Share your progress—we’d love to see your zero-waste wins! And if you’re hooked, explore more sustainable gardening tips to keep the momentum going. Happy growing! 🌿