
Lawn
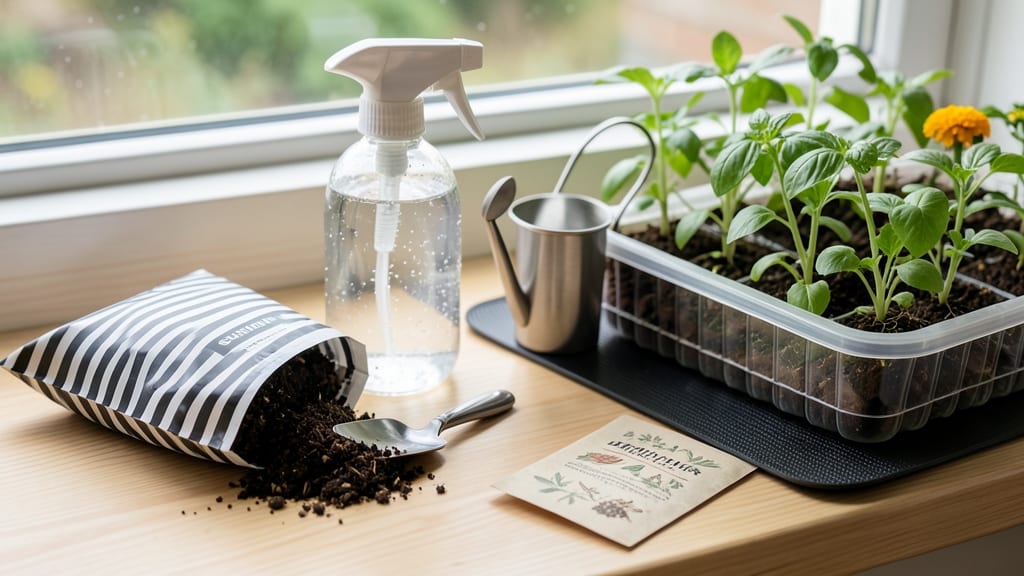
My DIY seed starter tray transformed my seedling survival rate from 50% to 95%—and it cost less than $10. ✨ The secret lies in proper depth and spacing, which prevents overcrowding and root competition while keeping moisture consistent. No more leggy seedlings or tangled roots at transplant time.
You’ll need recycled plastic containers (like yogurt cups or takeout boxes), a utility knife, a ruler, and some seed-starting mix. Cut the bottoms off the containers to create individual cells, then stack them into a tray shape using toothpicks or popsicle sticks.
The right depth—2-3 inches—gives roots room to grow without overheating.
Fill the tray with moistened seed-starting mix, plant your seeds at the correct depth (check the packet!), and keep them in a warm, sunny spot. Within 7-14 days, you’ll see strong, sturdy seedlings ready for transplanting—no black thumb required.
This method works for any seed, from tiny lettuce to robust tomatoes, and the trays break down easily when it’s time to move plants outside. No waste, no fuss, just foolproof growing that even beginners can master.
📚 In This Guide
- What you need
- Instructions
- Tips and common mistakes
- Wrapping up and next steps
What you need
- ● Base container: A shallow tray, plastic bin, or wooden box (12"–18" wide, 2"–4" deep). Example: A takeout container, baking sheet, or repurposed wooden crate.
- ● Dividers: Option 1: 1/2"–3/4" thick cardboard strips (cut to fit tray height + 1" overlap).
- ● Option 2: Plastic or wooden dowels (1/2"–1" diameter, spaced 2"–3" apart).
- ● Option 3: Egg cartons (for mini starters, 1–2 cartons).
- ● Potting mix: Seed-starting mix (sterilized, lightweight). Quantity: Enough to fill tray + 1" extra.
- ● Seeds: Your chosen variety (check packet for spacing/depth needs).
- ● Watering tool: Spray bottle or small watering can (with a fine rose).
- ○ Drainage layer (optional but recommended): Small pebbles, perlite, or coffee grounds (1/4" thick).
- ● Tools: Utility knife or scissors (for cutting cardboard).
- ● Ruler or measuring tape.
- ● Pencil (for marking divider placement).
- ○ Optional upgrades: Clear plastic lid or plastic wrap (to retain humidity).
- ● Plant labels (toothpicks + masking tape).
- ● Heat mat (for warm-season seeds).
- ● Grow lights or sunny windowsill (6+ hours of light/day).
Step-by-Step guide to building a DIY seed starter tray
Here's how to create a custom seed starter tray that promotes strong root growth and healthy seedlings.
🪴 Step 1: Select and Prepare Your Base Materials
Choose a shallow container with a lid—like a plastic takeout container or wooden box—that's at least 4 inches deep and 12 inches wide. The lid will act as a humidity dome. Clean it thoroughly with warm, soapy water to remove any residue that could inhibit germination. For drainage, drill ¼-inch holes in the bottom using a 1/8-inch drill bit, spacing them 2 inches apart along the edges.
I like to line the bottom with landscape fabric cut to size—it prevents soil from washing out while still allowing excess water to drain. Secure it with a staple gun or small nails if needed. This step is critical for preventing waterlogging, which can cause damping-off disease in seedlings.
📏 Step 2: Divide the Tray Into Proper Spacing
Use a ruler and pencil to mark 2-inch squares across the tray's surface. These squares will guide where you'll later create individual cells. For small seeds like lettuce or carrots, reduce the spacing to 1.5 inches between cells. For larger seeds like beans or peas, increase spacing to 3 inches per cell. This ensures roots have enough room to develop without competing for nutrients.
Here's the thing—if you're using a wooden base, draw the grid directly onto the wood with a pencil. For plastic containers, I recommend using a permanent marker so the lines remain visible even after adding soil. Double-check your measurements before proceeding; uneven spacing can lead to overcrowded seedlings later.
🌱 Step 3: Create Cell Dividers for Individual Planting
Cut strips of cardboard or plastic mesh to fit between your marked lines. For cardboard, use a utility knife to score along the pencil lines, then fold the strips upward to form 1-inch-high dividers. Secure them with hot glue or small nails driven at slight angles to hold them firmly in place. For plastic mesh, fold it into accordion-style dividers and tuck the edges under the tray's rim.
I always test the stability of the dividers by gently pressing down on the top edges. If they wobble, reinforce them with additional glue or nails. The goal is to create individual cells that hold soil securely while still allowing roots to grow downward without restriction. This prevents the "root-bound" stress that weakens seedlings.
⏰ Step 4: Add Soil and Prepare for Planting
Fill each cell with a lightweight seed-starting mix until it reaches ½ inch below the tray's rim. Press the soil down lightly with your fingers to remove air pockets, but don't compact it—you want it fluffy enough for roots to penetrate easily. Moisten the soil evenly with a spray bottle until it feels like a damp sponge, not soggy. Overwatering now will lead to mold before seeds even sprout.
Place the tray in a warm, bright location (around 70-75°F) and cover it with the lid to retain humidity. Check the soil moisture daily—it should stay consistently damp but not wet. Within 5-10 days, you'll see tiny green shoots pushing through the soil. That's your cue to remove the lid and move the tray to a south-facing window or under grow lights for 14-16 hours of light daily.
🌿 Step 5: Maintain and Transplant Seedlings
Once seedlings develop their first true leaves (not just the initial cotyledons), it's time to thin or transplant. If using cardboard dividers, gently remove them as you transplant—this minimizes root disturbance. For plastic mesh, simply lift the entire tray and separate the cells carefully. Plant seedlings 1 inch deeper than they were in the tray to encourage strong stem development.
Real talk: If you notice seedlings leaning toward the light, rotate the tray a quarter turn daily. This ensures even growth and prevents weak, leggy stems. With this setup, you'll have sturdy, disease-resistant seedlings ready for the garden in 4-6 weeks, no matter your starting conditions.
Tips & tricks for perfect DIY seed starter trays
Took me a while to figure these out, so here goes—these small details make all the difference between weak seedlings and thriving plants.
Drainage Design: Those ¼-inch holes in Step 1 are non-negotiable for healthy roots. If you don't have a drill, try a heated nail or even a red-hot screwdriver (carefully!) to create drainage holes. I've also seen people use a hammer and nail for larger holes—just make sure they're evenly spaced every 2 inches. The goal is to prevent waterlogging while still allowing excess moisture to escape.
Material Stability: In Step 3, when creating dividers, I learned the hard way that cardboard can soften when wet. For extra durability, coat the inside of cardboard dividers with a thin layer of waterproof sealant or even melted paraffin wax. Plastic mesh is my go-to now because it stays rigid and can be reused season after season—just make sure to clean it thoroughly between uses.
Light Optimization: The 14-16 hours of light in Step 4 is crucial, but not all windows provide equal light. If your seedlings start stretching toward the light (a sign of etiolation), supplement with a simple LED grow light. Position it 6-12 inches above the tray and keep it on a timer to maintain that consistent light cycle. I've seen dramatic improvements in stem strength when using this approach.
Transplanting Technique: When transplanting in Step 5, handle seedlings by their leaves—not the delicate stems—to avoid damage. If you notice any seedlings with brown or yellow leaves, they might be suffering from transplant shock. Give them a few days to recover before moving them to the garden. The 1-inch deeper planting depth is key for establishing strong roots in their new environment.
Pro Tips for Diy Seed Starter Tray
- Took me a while to figure these out, so here goes—these small details make all the difference between weak seedlings and thriving plants.
- Drainage Design: Those ¼-inch holes in Step 1 are non-negotiable for healthy roots.
- Material Stability: In Step 3, when creating dividers, I learned the hard way that cardboard can soften when wet.
Frequently asked questions
Got questions about your DIY seed starter tray? You’re not alone! Here are answers to the most common concerns to help you grow like a pro.
What’s the ideal depth for a seed starter tray to prevent overcrowding?
The perfect depth depends on your seeds: most veggies and herbs need 1–2 inches of soil, while root crops (like carrots) require 3–4 inches. If using a shallow tray, opt for thin-skinned seeds or transplant seedlings earlier. Measure depth from the tray’s base to the rim—aim for 2–3 inches minimum for versatility.
How long should I keep seeds in the starter tray before transplanting?
Timing varies by plant, but a good rule is 2–4 weeks for most seeds. Check seed packets for specifics—leafy greens (like lettuce) may be ready in 3 weeks, while tomatoes or peppers need 4–6 weeks. Hardening off (acclimating seedlings to outdoor conditions) for 5–7 days before transplanting boosts survival rates.
Can I reuse a DIY seed starter tray, and how do I clean it?
Rinse trays with hot, soapy water to remove soil, then disinfect with a 10% bleach solution (1 part bleach to 9 parts water). Let dry completely in the sun to kill mold or bacteria. For plastic trays, avoid harsh scrubbers—use a soft brush. Pro tip: Label trays with a permanent marker for reuse next season!
What if my seedlings look leggy or weak in the tray?
Leggy seedlings often mean too little light or overcrowding. Move trays to a sunny windowsill or under grow lights (12–16 hours/day). If roots are tangled, gently separate seedlings and repot. Thin-skinned seeds (like basil) can handle early transplanting, while delicate roots (like broccoli) need extra care. Add a light layer of vermiculite to improve drainage if soil stays soggy.
Are there budget-friendly alternatives to plastic seed starter trays?
Yes! Try these thrifty options:
- Egg cartons: Biodegradable and perfect for tiny seeds (like herbs). Poke drainage holes and plant directly into soil.
- Toilet paper rolls: Cut into 2-inch sections, fill with soil, and plant seeds inside. Great for long, straight roots like radishes.
- Muffin tins: Use aluminum or paper liners for easy removal. Ideal for bulbous plants like onions.
- Newspaper pots: Fold damp newspaper into pots, fill with soil, and plant seeds. The pots compost right in the ground!
Wrapping up and next steps
Creating your own DIY seed starter tray is a rewarding way to jumpstart your gardening journey—no green thumb required! 🌱 With the right depth, spacing, and materials, you’ll give your seedlings the strong foundation they need to thrive.
Whether you’re a beginner or a seasoned gardener, this project is simple, budget-friendly, and packed with potential.
Now that you’re armed with the know-how, it’s time to roll up your sleeves and get growing! Start by gathering your supplies, follow the steps with confidence, and watch your tiny seeds transform into vibrant plants. Ready to see your garden flourish? Plant those seeds today! 🌿