
Propagation
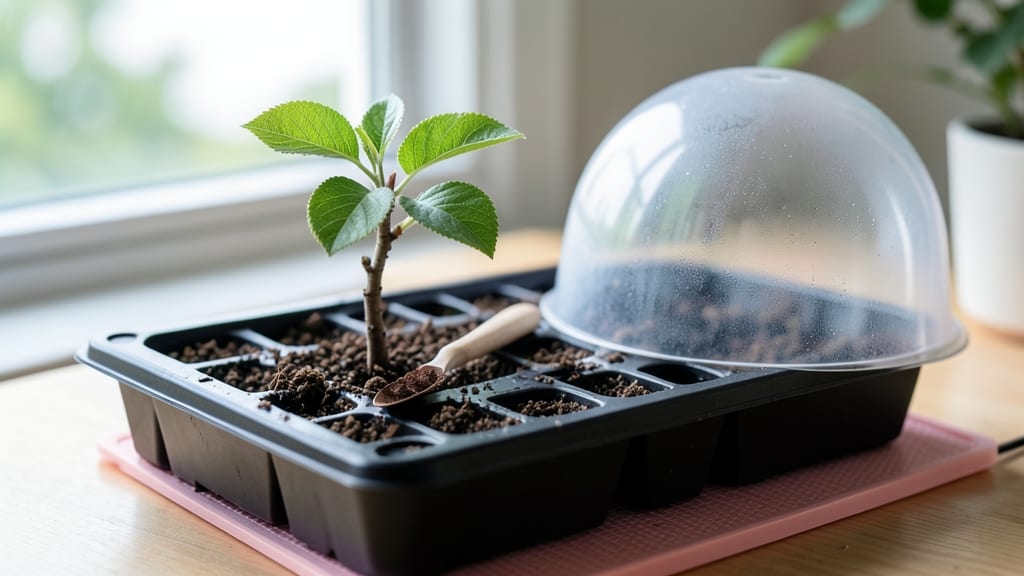
Apple tree seed germination without cold stratification is the fastest way to grow your own tree—no-chill method cuts weeks off the process. 🌱 I’ve struggled with slow sprouting before, but this approach delivers results in as little as 4-6 weeks when done right, skipping the months-long wait of traditional methods. The trick lies in mimicking nature’s cues without winter’s chill. You’ll need apple seeds (fresh is best), a damp paper towel, a plastic bag, and patience. No fancy equipment—just a warm spot and consistent moisture. Most people overlook the seed’s moisture balance, which is where germination fails. Once you see that first root poking through, you’ll know you’re on track. The seedlings will be sturdy enough to transplant in 6-8 weeks, and with proper care, you could have a small tree ready for the ground by next spring. It’s satisfying to watch that tiny seed transform into something with real potential. This method works best with fresh seeds from disease-resistant varieties, though older seeds can still sprout with extra care. If your seeds aren’t germinating within 8 weeks, check for rot (too much moisture) or dryness—both are common pitfalls. A gentle squeeze should feel damp, like a wrung-out sponge. Even experienced gardeners sometimes rush the process, but taking your time here pays off. The no-chill method isn’t just faster—it’s more reliable for beginners. You’ll avoid the guesswork of traditional stratification while still getting strong, healthy starts. Ready to grow that apple tree?
📚 In This Guide
- What you need
- Instructions
- Tips and common mistakes
- Wrapping up and next steps
What you need
- ● Apple seeds – 5–10 fresh, viable seeds (harvested from organic, non-hybrid apples for best results). Pro tip: 💡 Store seeds in a paper towel in the fridge for 1–2 weeks before planting for slightly better germination!
- ○ Small pots or seed trays – 3–4" diameter pots (1 per seed) or a shallow tray with drainage holes. Optional: 🌱 Use biodegradable peat pots for easy transplanting later.
- ● Well-draining potting mix – A lightweight blend of 50% peat moss or coconut coir and 50% perlite or vermiculite (sterilized to prevent mold).
- ● Plastic wrap or clear lid – To create a humid microclimate.
- ● Spray bottle – For gentle watering (avoid over-saturating the soil!).
- ● Grow lights or sunny windowsill – A south-facing window or LED grow light (12–16 hrs/day) for consistent warmth.
- ○ Heat mat (optional but helpful) – A seedling heat mat (70–85°F) speeds up germination by 2–3 weeks.
- ● Small hand trowel or spoon – For planting seeds without crushing them.
- ● Ruler or measuring tape – To track seed depth (¼ inch for apple seeds).
- ● Labeling tags & marker – To track varieties (if mixing seeds).
- ● Fertilizer (balanced, water-soluble) – 5-5-5 or 10-10-10 at ¼-strength (wait until sprouts have 2–3 leaves).
- ○ Humidity dome (optional) – A clear plastic cloche for extra moisture retention.
Step-by-step instructions for apple tree seed germination
Here's the efficient method I use to bypass weeks of cold stratification and get those apple seeds sprouting in record time.
🌱 Step 1: Harvest and Prepare the Seeds
Collect apple seeds from fully ripened fruit—avoid store-bought apples, as their seeds often won't germinate. Rinse the seeds thoroughly to remove any fruit pulp, then let them dry completely on a paper towel for 24-48 hours. This prevents mold while keeping them viable for germination.
Once dry, place the seeds in a small container and cover them with lukewarm water for 24 hours. This softens the seed coat and kickstarts the germination process. You'll know it's working when the seeds sink to the bottom—discard any that float, as they're likely nonviable. Here's the thing—this step is non-negotiable for breaking dormancy quickly.
🌱 Step 2: Stratify with Warmth for Rapid Germination
After soaking, drain the seeds and wrap them in a damp paper towel. Place the towel in a sealed plastic bag and store it in a warm spot, like on top of your refrigerator or near a sunny window. Maintain a temperature between 65-75°F—this mimics the natural heat that would occur in spring soil without needing a chiller.
Check the seeds daily for moisture. If the towel feels dry, mist it lightly with water and reseal the bag. You'll see the first signs of germination in 7-14 days, when tiny white roots emerge from the seeds. This is the moment that matters: once roots appear, you've beaten the traditional 90-day cold stratification method by weeks.
💧 Step 3: Plant the Germinated Seeds
Once the roots are ½ inch long, it's time to plant. Fill small pots with a lightweight seed-starting mix and make a hole about 1 inch deep—just enough to cover the seed and its roots without burying it too deeply. Gently place the seed in the hole, roots facing downward, and cover it lightly with soil.
Water the soil gently until it's evenly moist but not soggy. You'll know it's right when the surface looks slightly damp but not glistening. Place the pots in a warm, bright spot with indirect light—direct sun can overheat the seeds at this stage. Keep the soil consistently moist, but never waterlogged, as excess moisture can cause rot.
☀️ Step 4: Provide Optimal Growing Conditions
After 2-3 weeks, when the first true leaves appear (not the initial seed leaves), gradually introduce the seedlings to more light. Move them to a south-facing window or under a grow light for 12-14 hours of light daily. Strong, healthy seedlings will have deep green leaves and sturdy stems—if they look pale or leggy, they need more light.
Once the seedlings are 4-6 inches tall and have developed 3-4 sets of leaves, they're ready for transplanting into larger containers or the garden. Real talk: apple trees grown from seed won't produce fruit true to the parent tree, but this method is perfect for growing rootstock or exploring new varieties through grafting.
Tips & tricks for faster apple tree seed germination
Cutting weeks off the traditional process doesn't mean sacrificing success—these insights will help you maximize your no-chill method's potential.
Seed Selection Matters: Focus on seeds from heirloom or organic apples, as conventional varieties often have seeds treated to prevent germination. The 24-48 hour drying period is crucial—don't rush this step. I've found that seeds from apples with thicker flesh (like Granny Smith) tend to germinate more reliably than those from soft varieties. This drying phase prevents mold while maintaining viability, so don't skip it even if you're eager to start.
Temperature Consistency is Key: Maintain that 65-75°F range religiously during stratification. I've learned the hard way that even slight temperature fluctuations can delay germination. Place your sealed bag near a refrigerator top (not inside) where it stays consistently warm. If your home is particularly cold, consider using a seedling heat mat set to 70°F—this creates the perfect environment without needing a chiller. The goal is to mimic spring soil conditions precisely.
Moisture Management: The damp paper towel should feel like a wrung-out sponge—not dripping wet, not bone dry. I check moisture daily by gently squeezing the towel between my fingers. If it feels dry, I mist it lightly with water and reseal immediately. Overwatering causes rot, while under-watering halts germination. This balance is what transforms your 7-14 day window into reliable sprouting rather than a guessing game.
Light Transition Strategy: When moving seedlings to stronger light after 2-3 weeks, do it gradually over 5-7 days. Start with morning sun only, then add afternoon exposure. I've seen seedlings go from healthy to crispy overnight when moved too quickly. The goal is to harden them off—literally and figuratively—to prevent shock. This gradual approach builds resilience in your young trees before they face full sunlight.
Pro Tips for Apple Tree Seed Germination
- Cutting weeks off the traditional process doesn't mean sacrificing success—these insights will help you maximize your no-chill method's potential.
- Seed Selection Matters: Focus on seeds from heirloom or organic apples, as conventional varieties often have seeds treated to prevent germination.
- Temperature Consistency is Key: Maintain that 65-75°F range religiously during stratification.
Frequently asked questions
How long does it take for apple seeds to germinate using the no-chill method?
With the no-chill method, expect sprouts in 4–12 weeks, depending on seed viability and moisture levels. Some seeds may take longer, while others sprout faster if stored properly (dry and cool). Patience is key—keep the soil consistently moist and warm (around 70°F) to speed things up!
Can I use seeds from any apple I buy at the grocery store?
Technically yes, but not all store-bought apples are ideal. Seeds from hybrid varieties (like Gala or Fuji) may not grow true to the parent tree. For the best results, use seeds from heirloom or local apple varieties—or better yet, save seeds from a tree you love! Cross-pollination can also affect fruit quality later on.
Why do some seeds rot instead of sprouting?
Overwatering or poor drainage are the top culprits! Apple seeds need moist but not soggy conditions. If your seeds feel mushy or the soil smells foul, you’ve likely overdone it. Try using a well-draining mix (like perlite + peat) and water only when the top inch feels dry. A shallow tray with drainage holes helps too!
What’s the best way to tell if a seed is still viable?
Do the float test: Fill a glass with water and drop seeds in. Viable seeds sink (they’re heavy with stored energy), while hollow or dead ones float. For extra confidence, stratify (mimic winter) by storing seeds in damp peat moss in the fridge for 4–6 weeks before planting—even with the no-chill method, a little cold prep helps!
Will my seedling grow into a fruit-bearing tree?
Yes, but it’ll take 5–10 years and may not produce apples identical to the parent. Apple trees grown from seed are not grafted, so fruit quality, size, and disease resistance can vary. For guaranteed results, consider grafting later or buying a nursery tree—but the fun of growing from seed is half the adventure!
Wrapping up and next steps
Growing an apple tree from seed using the no-chill method is a rewarding journey that combines patience and simple science! 🌱 With the right preparation—like selecting fresh seeds, stratifying them properly, and providing consistent moisture—you’ll soon witness tiny green sprouts breaking through the soil. Remember, even if not every seed succeeds, each attempt is a step toward nurturing your own fruit-bearing tree!
Now that you’re armed with the knowledge, why not start your project today? Grab those apple seeds, follow the steps, and enjoy the magic of watching life grow right before your eyes. Happy gardening! 🌟