
Lawn
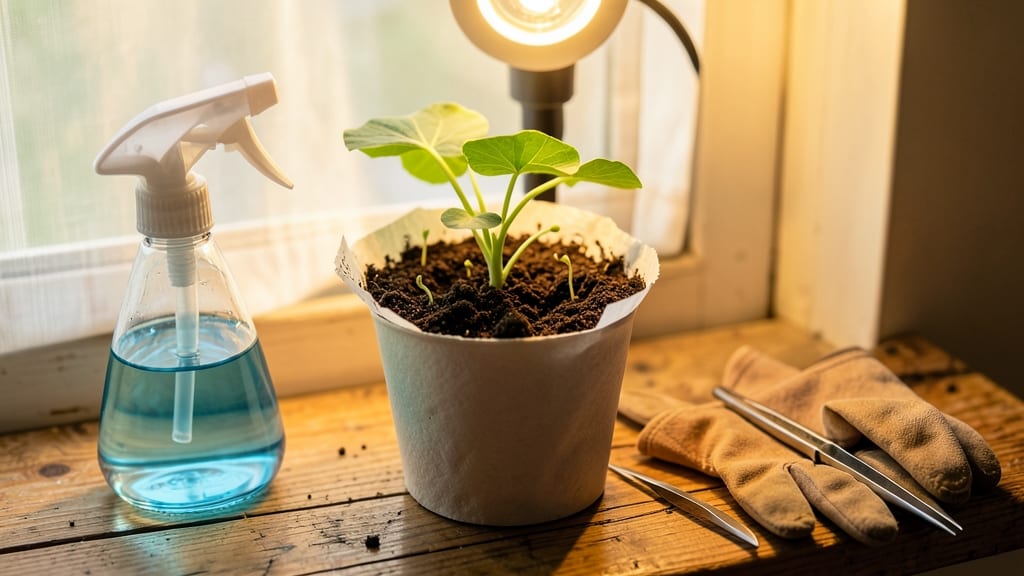
My seed sheet garden transformed how I start plants—no more tangled roots or delicate transplanting. These biodegradable pods hold seeds perfectly spaced, then dissolve right into the soil when you plant them whole.
The first time I saw those little sprouts poking through the mesh, I knew I’d never go back to traditional seed starting.
You’ll need seed sheets (available for lettuce, herbs, flowers, and more), a tray or flat, and some potting mix. The process takes about 10 minutes to set up, and germination happens faster than with bare seeds because the moisture stays trapped.
No more guessing whether you watered enough or if the seeds are buried too deep—just pop them in the soil and watch them grow.
By the time your seedlings are ready to transplant, they’ll be sturdy enough to handle moving without shock. The mesh breaks down naturally, so you’re not left with plastic waste or tangled roots to tease apart.
Imagine harvesting crisp lettuce straight from the garden in just 4-6 weeks—that’s the magic of seed sheets.
Perfect for beginners or anyone tired of seed-starting struggles, this method works for both indoor and outdoor planting. Whether you’re growing herbs on a windowsill or a full garden bed, these pods make the process simpler and more reliable than ever.
📚 In This Guide
- What you need
- Instructions
- Tips and common mistakes
- Wrapping up and next steps
What you need
- ● Seed sheets (biodegradable pods): Choose 3–5 varieties (e.g., lettuce, basil, or microgreens). Opt for organic, non-GMO seeds for best results.
- ● Spray bottle (8–16 oz): For gentle, even watering—avoid tap water if it’s chlorinated (let it sit out for 24 hours or use filtered water).
- ● Tray or shallow container: A 10x20-inch plastic or wooden tray with drainage holes (or a repurposed baking sheet).
- ● Growing medium: Option 1: Coconut coir mat (pre-moistened, ~12x24 inches).
- ● Option 2: Paper towels or coffee filters (2–3 layers, cut to tray size).
- ● Scissors or craft knife: For trimming seed sheets to fit your tray.
- ● Humidity dome: A clear plastic lid or DIY cover (e.g., a cut-up plastic bottle) to retain moisture during germination.
- ● Grow lights (LED, 12–24W): If growing indoors without sunlight (place 4–6 inches above seedlings).
- ● Plant markers: Toothpicks or popsicle sticks to label your seed sheets.
- ● Organic fertilizer (diluted): Fish emulsion or seaweed extract (1 tsp per gallon of water) for nutrient boosts.
How to grow a seed sheet garden without the twist
This method transforms messy seed starting into a clean, mess-free process—no more tangled pods or weak seedlings.
Understand the Seed Sheet Structure
The seed sheets work like tiny, biodegradable pods that dissolve in water. Each sheet contains multiple seeds embedded in a paper matrix designed to break apart naturally when wet. The key here is patience—don’t rush the process. These sheets aren’t like traditional seed packets; they need time to soak and soften before planting.
Start by examining your seed sheets under bright light. You’ll see individual seeds embedded in the paper, often arranged in rows. This layout makes spacing automatic—no more guessing how far apart to plant. The sheets are pre-measured for optimal growth, so trust their design. If you’re working with multiple sheets, lay them out side by side to visualize your future garden layout.
Soak the Sheets for Optimal Germination
Fill a shallow tray or clean container with room-temperature water—about ½ inch deep. Gently place the seed sheets into the water, ensuring they float freely. Avoid stacking them, as this can prevent even moisture distribution. Let them soak for 10-15 minutes—this is critical. The paper will begin to soften and swell, but it shouldn’t dissolve completely yet.
After soaking, remove the sheets and let any excess water drain away. You’ll notice the paper has become pliable and slightly translucent. This is your cue that the seeds are ready for planting. If the sheets feel stiff or haven’t softened, give them another 5 minutes in fresh water. Over-soaking can weaken the paper before it’s planted, so don’t let it sit too long.
Plant the Soaked Sheets Directly in Soil
Prepare your planting area by loosening the soil to a depth of 1 inch. If you’re using containers, fill them with well-draining potting mix and create small furrows or pockets where the sheets will sit. The goal is to place the sheets ½ inch deep—just enough to cover them lightly with soil. Press down gently to ensure good soil contact, which helps the seeds anchor and germinate.
Space your sheets according to the plant’s mature size. For example, herbs like basil can be planted closer together (3-4 inches apart), while larger plants like tomatoes need 12-18 inches. Water the soil lightly after planting to settle everything in place. Avoid heavy watering at this stage, as it can dislodge the seeds or wash away the dissolving paper.
Maintain Moisture and Monitor Growth
Keep the soil consistently moist but not soggy for the first 7-10 days. Seed sheets rely on moisture to dissolve and release the seeds, so check daily. You’ll see the paper breaking down within 3-5 days, and tiny sprouts will emerge shortly after. Once the first true leaves appear (not the initial seed leaves), you can reduce watering slightly but maintain even moisture.
As the seedlings grow, the paper will decompose completely, leaving no trace. This eliminates the need for transplanting—just let them grow where they’re planted. If you notice any sheets drying out or curling, mist them lightly with water. Over time, the seedlings will develop strong roots and thrive without disturbance.
Thin and Care for Mature Plants
Once seedlings reach 2-3 inches tall, it’s time to thin if necessary. Seed sheets often produce multiple sprouts per pod, so gently remove weaker seedlings, leaving the strongest one in each spot. Use a small trowel or your fingers to carefully lift and discard extras. This step prevents overcrowding and ensures each plant gets enough nutrients and light.
Continue to water at the base of the plants, avoiding the leaves to prevent disease. Fertilize lightly after 4-6 weeks with a balanced, water-soluble fertilizer to support continued growth. The beauty of seed sheets is that they reduce transplant shock, so your plants will establish quickly and grow vigorously with minimal stress.
Tips & tricks for perfect seed sheet gardens
These little tricks will help you avoid the most common seed sheet pitfalls and grow a thriving garden with zero fuss.
Paper Prep Matters: Before soaking, give your seed sheets a quick visual inspection under bright light. Look for any tears or weak spots in the paper matrix—these can cause uneven germination. If you spot damaged areas in Step 1, gently reinforce them with a tiny drop of water before soaking. This ensures all seeds get equal moisture distribution during that critical 10-15 minute soak time.
Soaking Secret: The 10-15 minute soak in Step 2 is your golden window—don't cut it short! I've learned this the hard way after watching seeds fail to germinate when sheets weren't softened enough. Use a timer and check the water temperature (should be room temperature, not warm). If your sheets feel stiff after 15 minutes, give them just those extra 5 minutes in fresh water, but don't overdo it or the paper will disintegrate before planting.
Planting Precision: When placing your sheets ½ inch deep in Step 3, use the back of a spoon to create small furrows in the soil. This prevents over-deepening while still protecting the delicate dissolving paper. For containers, press the sheets gently against the soil walls to create natural support—they'll anchor better and stay in place during your first light watering.
Moisture Monitoring: During those first 7-10 critical days in Step 4, I keep a spray bottle nearby for quick moisture checks. Instead of watering from above, I mist the soil surface lightly—this prevents disturbing the dissolving paper while keeping it hydrated. You'll know you're doing it right when you see the paper breaking down within 3-5 days, revealing those first tiny sprouts.
Pro Tips for Seed Sheet Garden
- These little tricks will help you avoid the most common seed sheet pitfalls and grow a thriving garden with zero fuss.
- Paper Prep Matters: Before soaking, give your seed sheets a quick visual inspection under bright light.
- Soaking Secret: The 10-15 minute soak in Step 2 is your golden window—don't cut it short!
Frequently asked questions
Got questions about seed sheet gardens?
You’re not alone! Here are some of the most common inquiries—plus quick, practical answers to help you grow like a pro.
What’s the best time to plant seed sheets in my lawn?
Seed sheets thrive in cool-season months—think early spring or fall (March–May or September–November in most climates). Avoid summer heat, which can dry them out before germination. Check your seed sheet’s packaging for region-specific timing tips!
Do I need to water seed sheets differently than regular grass seed?
Yes! Seed sheets retain moisture better than loose seed, but they still need consistent watering. Lightly mist them daily for the first 7–10 days (keep soil damp, not soggy). After germination, water deeply 2–3 times per week. No need for fancy sprinklers—just a gentle hose spray works!
Will seed sheets work in shady areas?
Most seed sheets are designed for full sun to partial shade (4–6 hours of sunlight daily). For deep shade (<3 hours of light), opt for shade-tolerant seed sheets (like fine fescue blends) or pair them with ground cover plants. Test a small patch first to gauge success!
Can I use seed sheets over existing grass or weeds?
Not ideal! Seed sheets need bare soil to germinate. First, kill weeds with vinegar or herbicide (follow label instructions), then till or rake the area to remove debris. For patchy grass, cut out dead spots and prep the soil—no need to tear up the whole lawn!
What if frost hits before my seed sheets sprout?
Don’t panic! Light frost (<28°F) usually won’t harm seed sheets, but hard freezes can delay germination. Cover new plantings with frost cloth if temps drop below 25°F. Most seed sheets sprout in 7–21 days—just be patient and keep the soil moist until they pop!
How do I tell if my seed sheets are failing?
Watch for these red flags:
- No sprouts after 3 weeks (could mean poor soil contact or drought).
- Yellowing or wilting (overwatering or fungal issues—reduce water and improve airflow).
- Mold or slimy texture (too much moisture—unroll and let dry before replanting).
Wrapping up and next steps
Transforming your lawn into a thriving seed sheet garden is simpler—and more rewarding—than you think! These twist-free pods make planting effortless, while their natural design ensures better germination and growth.
Whether you're a green thumb or a curious beginner, this method opens the door to a lush, low-maintenance garden with minimal fuss.
Ready to take the next step? Start small—try a single sheet on a sunny patch of your yard—and watch your lawn bloom with ease! 🌱