
Planting
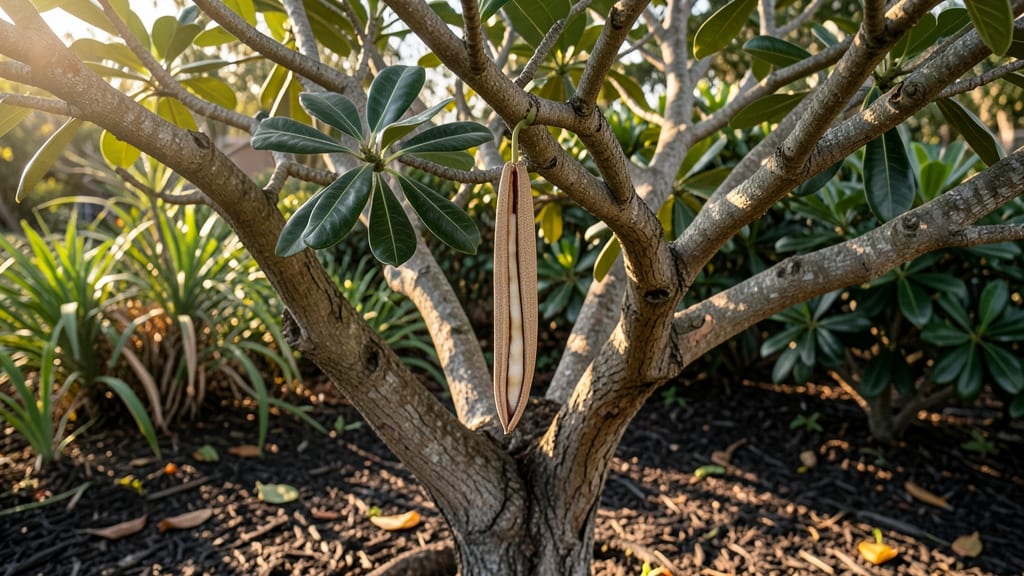
Harvesting plumeria plant seed pods from ripe fruit is where the magic of zero-waste gardening begins. 🌿 The trick to opening those tough seed pods naturally—without damaging the seeds—saves you time and keeps your garden sustainable.
I’ve cracked the method after years of trial and error, and it’s simpler than you’d think.
First, spot the pods turning brown and papery—that’s your cue they’re ready. Gently tap them on a hard surface until they split open (sometimes it takes a few days).
Once open, you’ll find flat, black seeds inside—each one packed with potential for fragrant tropical blooms. The key is patience; rushing this step often leads to damaged seeds.
Plant those seeds in a well-draining mix of perlite and peat moss, barely covering them. Keep the soil moist but not soggy, and place the pot in a warm spot (70–80°F) with bright, indirect light.
Germination can take 4–8 weeks, but consistency is everything—don’t let the soil dry out.
Once sprouted, give your seedlings plenty of airflow to prevent mold, and be ready for a slow start. Tropical plumeria love humidity, so a clear plastic bag over the pot can help.
With the right care, you’ll see those first leaves within months—and eventually, fragrant white blooms that’ll make your garden unforgettable.
📚 In This Guide
- What you need
- Instructions
- Tips and common mistakes
- Wrapping up and next steps
What you need
- ● Mature Plumeria Plant: A healthy, flowering plumeria (at least 2–3 years old) with seed pods forming after blooms. Pro tip: 💡 Look for pods that are brown and slightly papery—these are ready for harvest!
- ● Seed Pods: 3–5 ripe pods (varies by plant size). Note: Avoid green or unripe pods—they won’t yield viable seeds.
- ● Pruning Shears or Sharp Knife: Sterilized tools to snip pods cleanly without damaging the plant.
- ● Paper Towels or Absorbent Cloth: For drying seeds post-harvest.
- ● Sealing Bag or Airtight Container: A quart-sized zip-top bag or small jar to store seeds until planting.
- ○ Labeling Tags: Optional but helpful! Label your container with the plumeria variety and harvest date.
- ● Rubbing Alcohol (70% or higher): To sterilize tools and prevent fungal issues.
- ● Spray Bottle with Water: For lightly misting pods if they’re stubbornly closed.
- ● Planting Tray or Pots: Small pots (3–4 inches) with well-draining soil mix for seedling germination.
- ○ Heat Mat (Optional): Speeds up germination for tropical seeds like plumeria.
- ● Camera or Notebook: To document your harvest progress—because plumeria seed pods are that satisfying!
Step-by-step guide for extracting plumeria seeds from pods
Here's how I harvest seeds naturally—no tools, no waste, just patience and a little science.
🌱 Step 1: Identify and Harvest Ripe Pods
Plumeria pods turn from green to a papery brown when ready—this usually happens 3-6 months after flowering. Gently twist the pod at its base until it releases with a slight pop. If it resists, wait another week; forcing it open too soon ruins the seeds inside.
I always harvest on a dry day so the pods don't stick to my hands. Lay them on a clean towel to catch any seeds that might fall out prematurely. The pods should feel light and brittle, like dried paper—this is your signal they're ready.
💧 Step 2: Soak Pods to Softened the Seeds
Fill a bowl with lukewarm water (never hot) and submerge the pods completely for 24-48 hours. This softens the fibrous interior, making it easier to separate the seeds without damaging them. I place a small weight on top to keep them submerged—otherwise, they'll float and dry out.
Check periodically after 12 hours. If the pod walls begin to split open on their own, that's perfect. If not, extend the soak another 12 hours. The water should smell faintly sweet—this is normal and indicates the seeds are releasing natural oils.
☀️ Step 3: Extract Seeds Without Tools
Remove the soaked pods and place them on a clean towel. Using your thumbs, gently press along the seams where the pod naturally splits. The seeds will pop out cleanly—no need to cut or pry. I find it satisfying when they slide out like tiny, waxy beans, still attached to their papery husks.
Discard the empty pod husks (they're completely spent now). Rinse the seeds under cool water to remove any residual pulp. This prevents mold when you store them. Spread them on a paper towel to dry for 1-2 hours—they're ready when they feel slightly firm to the touch.
✂️ Step 4: Store Seeds for Future Planting
Once dry, place the seeds in a paper envelope (plastic traps moisture and causes rot). Label with the variety and harvest date—plumeria seeds stay viable for 1-2 years if stored in a cool, dry place (like a pantry or seed drawer). I keep mine in a small glass jar with a silica gel packet to absorb any lingering dampness.
Real talk: Don't rush this step. Seeds planted too soon may not germinate well. Wait until spring in warm climates or late winter indoors under grow lights. The drying and storage process ensures you'll have fresh, high-quality seeds when planting season arrives.
Tips & tricks for perfect plumeria seed pod harvesting
Between us, harvesting plumeria seeds doesn't have to be a guessing game—these small details make all the difference.
Pod Ripeness Test: The 3-6 month timeline is your baseline, but don't rely on it alone. Press your thumbnail into the pod—if it leaves a clean, unbroken impression (no green resistance), that's your cue it's ready. I've seen pods turn brown prematurely, so always double-check with this test before harvesting. The slight give when twisted at the base is your best indicator of readiness.
Soaking Strategy: That 24-48 hour soak window is critical, but here's what nobody tells you—the water temperature matters more than you think. Lukewarm water (around 85°F) works best because it mimics natural tropical conditions where plumeria grows. Too hot and you'll cook the seeds; too cold and the soaking process drags out. I use a thermometer to check—this makes the difference between seeds that slide out cleanly and ones that resist.
Storage Wisdom: The 1-2 year viability claim holds true only if you follow this one rule: store seeds in a location where the temperature stays between 50-60°F. I've seen seeds stored in humid basements sprout mold within weeks. That silica gel packet isn't optional—it's your insurance policy against moisture that would otherwise trigger rot. Labeling with the harvest date becomes crucial after the first year, as germination rates drop noticeably after 18 months.
Pro Tips for Plumeria Plant Seed Pod
- Between us, harvesting plumeria seeds doesn't have to be a guessing game—these small details make all the difference.
- Pod Ripeness Test: The 3-6 month timeline is your baseline, but don't rely on it alone.
- Soaking Strategy: That 24-48 hour soak window is critical, but here's what nobody tells you—the water temperature matters more than you think.
Frequently asked questions
Got questions about harvesting and growing plumeria seed pods? You’re not alone! Here are answers to the most common queries to help you navigate this rewarding process with ease.
How do I know when plumeria seed pods are ready to harvest?
Plumeria seed pods are ready when they turn brown and papery—usually 3–6 months after flowering. Gently tap them; if seeds rattle inside, they’re ripe! Avoid harvesting green pods, as they won’t produce viable seeds.
How long does it take for plumeria seeds to germinate?
Germination can take anywhere from 2 weeks to 6 months, depending on conditions. Keep soil moist (not soggy) and warm (70–80°F). Patience is key—some seeds may sprout faster with a warmth mat or humidity dome.
What if my plumeria seed pod won’t open naturally?
If pods resist opening, try these tricks:
- Soak them in warm water for 24 hours to soften the pod.
- Freeze them overnight to encourage cracking.
- Gently squeeze the pod with gloves—just enough to expose seeds.
Can I grow plumeria from store-bought seeds instead of pods?
Yes! Store-bought seeds work, but pod-grown seeds often have higher viability. If using store-bought, ensure they’re fresh (within 1–2 years) and pre-soaked for 24 hours to boost germination.
Why aren’t my plumeria seeds sprouting after months?
Common culprits:
- Old seeds (plumerias lose viability over time).
- Poor soil drainage (use a sandy, well-draining mix).
- Temperature stress (keep above 60°F).
Wrapping up and next steps
Growing plumeria from seed pods is a rewarding journey that blends patience, care, and a touch of eco-friendly magic! 🌱 By mastering the natural pod-opening trick and nurturing your seeds, you’re not just cultivating a plant—you’re fostering a connection to nature’s cycles.
Now that you’re armed with the right techniques and tips, it’s time to roll up your sleeves and start your plumeria adventure.
Ready to take the next step? Grab your seed pods, gather your tools, and let your green thumb shine! 🌟 Whether you’re a seasoned gardener or a curious beginner, every small action brings you closer to those fragrant, blooming plumeria dreams.