
Planting
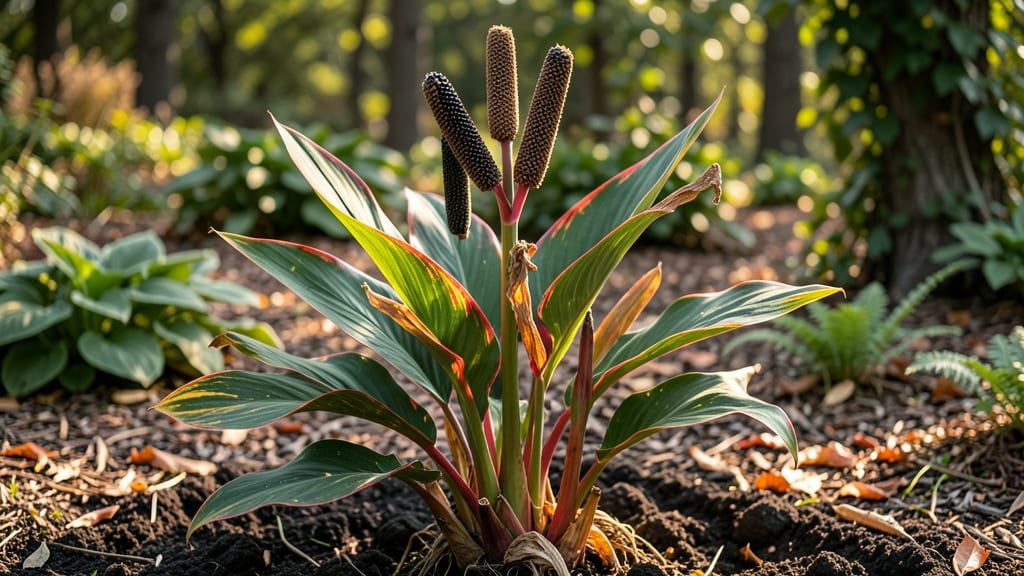
Canna plant seed pods split open on their own—no twisting required. 🌿 I’ve watched these unusual pods transform from green and firm to papery and cracked, revealing seeds ready for planting, and it’s one of nature’s neatest tricks.
The pods form after your cannas bloom, starting as small, fuzzy buds that swell into those distinctive elongated shapes. When fully mature, they’ll split along their seams like a tiny treasure chest, spilling out flat, dark seeds that look nothing like the dramatic foliage they’ll produce.
Timing is everything—harvest too early, and the seeds won’t be viable; wait too long, and they might scatter before you’re ready. Once you collect them, soaking the seeds for 24 hours speeds up germination.
Plant them just below the soil surface in warm, well-draining mix, and within 2-4 weeks, you’ll see those first bright green shoots pushing through. The real magic? Those seeds can stay dormant for years if stored properly, giving you a backup stash for future seasons.
This method works for both gardeners with established canna beds and beginners growing from seed. Just be patient—cannas take their time, but the payoff of bold, tropical foliage is worth the wait.
📚 In This Guide
- What you need
- Instructions
- Tips and common mistakes
- Wrapping up and next steps
What you need
- ● Canna plant seed pods: 3–5 mature, healthy pods (ensure they’re firm and slightly dry but not brittle).
- ● Well-draining potting mix: 1–2 gallons (or a 10-inch pot for each pod). Opt for a blend with perlite or sand (e.g., 60% peat/coir, 30% compost, 10% perlite).
- ● Containers: 2–3 small pots (4–6 inches deep) with drainage holes, or a seed-starting tray.
- ● Watering can or spray bottle: With a fine mist nozzle for gentle hydration.
- ● Humidity dome or plastic wrap: To retain moisture while seeds sprout.
- ● Pruning shears or knife: For carefully opening seed pods (sterilize with rubbing alcohol).
- ○ Gloves (optional): To protect hands from sap or sharp pod edges.
- ● Grow lights or sunny windowsill: 6–8 hours of indirect light daily (or a south-facing window).
- ○ Thermometer (optional): Ideal germination temps: 70–80°F (21–27°C).
- ○ Fertilizer (optional): Balanced liquid fertilizer (e.g., 10-10-10) for seedlings after 4–6 weeks.
How to handle canna plant seed pods without the twist
Here's the simple way to collect seeds from canna pods—no messy twisting required.
🌱 Step 1: Identify Mature Seed Pods
Look for canna pods that have turned a deep brown color and feel slightly papery to the touch. These are ready for seed collection. Immature pods are still green and firm, while overripe ones may split open on their own. I always check pods in late summer when temperatures begin to drop—this is when they naturally prepare to release seeds.
Gently squeeze the pod between your thumb and forefinger. If it gives slightly and makes a soft pop sound, it's ready. Avoid pods that are still hard or have started splitting open—those seeds may not be viable. Harvesting at this stage ensures you capture seeds at their peak freshness and viability.
🌿 Step 2: Collect Seeds Without Damaging Pods
Place the mature pod on a clean, dry surface like a sheet of newspaper or paper towel. Using a small knife or your fingernail, carefully make a tiny slit along the seam of the pod. This small opening is just enough to allow seeds to escape naturally without forcing the pod to twist or tear.
Hold the pod at a slight angle over a bowl or envelope to catch the seeds as they fall out. The seeds will begin to spill out on their own once the slit is made—no need to squeeze or manipulate the pod further. This method preserves the integrity of the seeds and prevents damage that can happen when pods are twisted open.
💧 Step 3: Dry and Store Seeds Properly
Once all the seeds have been collected, spread them out on a paper towel or mesh screen in a single layer. Allow them to dry in a warm, dry place for 3-5 days. This drying process is crucial—it prevents mold and ensures the seeds remain viable for planting. I place them near a sunny window but avoid direct sunlight, which can overheat and damage the seeds.
After drying, transfer the seeds to a small envelope or airtight container. Label the container with the variety name and the date of collection. Store the seeds in a cool, dark place, like a pantry or seed storage box. Properly stored canna seeds can remain viable for 2-3 years, making this an efficient way to save seeds for future plantings.
☀️ Step 4: Prepare Seeds for Planting Next Season
Before planting, soak the canna seeds in lukewarm water for 12-24 hours. This softens the tough outer coating and encourages faster germination. I use a small glass or jar with just enough water to cover the seeds completely. After soaking, drain the water and allow the seeds to dry slightly before planting.
Plant the seeds ½ inch deep in well-draining soil, either in pots or directly in the garden after the last frost date. Canna seeds need warmth to germinate, so I often start them indoors under a heat mat or in a warm spot near a sunny window. Keep the soil consistently moist but not soggy until germination, which typically occurs in 2-4 weeks.
⏰ Step 5: Monitor for Germination and Early Growth
Once planted, watch for the first signs of germination—tiny sprouts will push through the soil within 2-4 weeks. At this stage, provide bright, indirect light to prevent leggy growth. If you notice the seedlings stretching toward the light, move them closer to the light source or consider using a grow light.
When the seedlings have developed 2-3 sets of true leaves, they’re ready to be transplanted outdoors or into larger pots. Harden them off by gradually exposing them to outdoor conditions over 7-10 days before planting. This slow transition helps them adjust to outdoor temperatures and light, ensuring strong, healthy growth.
Tips & tricks for perfect canna seed pod handling
These simple tricks will help you maximize your seed yield while keeping the process gentle and effective.
Pod Selection: Harvest pods in the morning after dew has dried but before the heat of the day sets in. The cooler temperatures help preserve seed viability during handling. I’ve found that pods collected in the morning have a higher germination rate when stored properly—this is when their natural oils are most stable.
Slit Technique: For Step 2, use a clean, sharp knife to make the slit—this prevents tearing the delicate pod walls. Start the slit at the top third of the pod and work your way down gently. If you accidentally tear the pod, place it in a paper bag and let it dry completely before trying again; the seeds will still release naturally over time.
Drying Strategy: The 3-5 day drying period in Step 3 is non-negotiable for viability. Spread seeds on a mesh screen rather than paper towels—the airflow prevents moisture buildup that can cause mold. I place a small fan nearby on low setting to gently circulate air without disturbing the seeds. This method cuts drying time by nearly 24 hours while maintaining perfect conditions.
Storage Wisdom: When labeling your seed containers, include not just the variety but also the parent plant’s location in your garden. This helps track which seeds perform best in specific microclimates. Store containers horizontally to prevent seed damage from stacking pressure, and place a small silica gel packet inside to absorb any residual moisture that might develop over time.
Pro Tips for Canna Plant Seed Pods
- These simple tricks will help you maximize your seed yield while keeping the process gentle and effective.
- Pod Selection: Harvest pods in the morning after dew has dried but before the heat of the day sets in. The cooler tem...
- Slit Technique: For Step 2, use a clean, sharp knife to make the slit—this prevents tearing the delicate pod walls. S...
Frequently asked questions
Got questions about canna plant seed pods? You’re not alone! Here are some of the most common queries—plus straightforward answers to help you grow with confidence.
What do canna plant seed pods look like, and how do I know they’re ready to harvest?
Canna seed pods are unique—they’re long, cylindrical, and twist-free, splitting open naturally along one side when mature. Look for brown, papery pods (not green) with dark brown or black seeds inside. They’re ready to harvest when the pod splits open on its own—usually in late summer or early fall.
How long does it take for canna seed pods to mature and open?
From flowering to pod maturity, it typically takes 6–12 weeks, depending on your climate and growing conditions. Warmth and sunlight speed up the process, while cooler weather may delay it. Pro tip: Keep an eye on pods in late summer—they’ll start splitting open when fully ripe!
Can I save seeds from canna plant pods to grow new plants next year?
Canna seeds are easy to save—just let the pods dry completely, then gently remove the seeds. Store them in a cool, dry place (like a paper envelope) until planting. Note: Seeds may not always produce identical plants to the parent, but they’re fun to experiment with!
What should I do if my canna seed pods stay green and never open?
If pods stay green or don’t split, it’s often due to cool temperatures, lack of sunlight, or overwatering. Try moving your plant to a sunnier spot or reducing water slightly. If pods are still firm, they may need more time—patience is key!
Are there any alternatives if I can’t get canna seed pods to form?
If your canna plant isn’t producing pods, it might need more sunlight, fertilizer (high in phosphorus), or better pollination. Hand-pollinate by gently transferring pollen with a brush between flowers. Alternatively, try propagating from rhizomes—they’re just as easy!
Wrapping up and next steps
Growing canna plant seed pods is a rewarding experience—these twist-free pods split open naturally, making seed collection effortless and fun! 🌱 Whether you're a seasoned gardener or just starting, understanding their unique structure and care needs ensures a bountiful harvest. Ready to dive deeper?
🌿 Your Next Step: Experiment & Share!
Try growing your own canna plants this season and observe how their pods behave. Pro tip: Document your progress with photos or notes—you might discover new insights to share with fellow gardeners! Plant a seed (literally!) and let nature’s magic unfold. 🌟