
Propagation
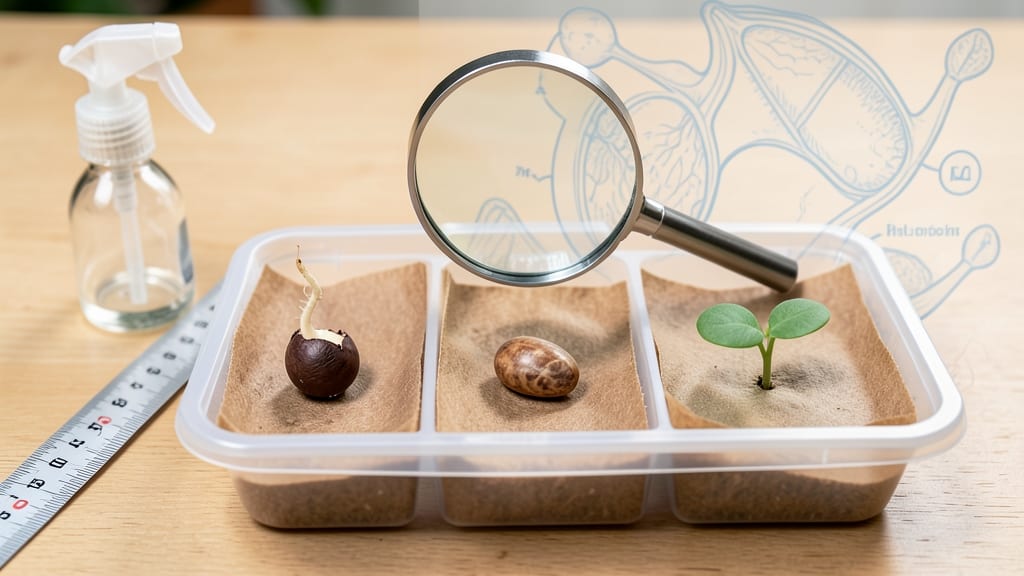
Let me explain seed germination—it’s not magic, it’s science you can control. 🌱 The moment you place a seed in moist soil, a tiny world wakes up: cells swell, roots push through, and a plant begins its life.
Understanding this process means stronger starts, fewer disappointments, and gardens that thrive from day one.
Every seed needs three things to germinate: consistent moisture (not soggy), steady warmth (65-85°F for most veggies), and oxygen (so soil isn't compacted). Light comes later—some seeds need darkness to sprout, while others wait until the shoot breaks soil.
The stages—imbibition, root growth, and leaf emergence—happen in days or weeks, depending on the plant.
Common mistakes? Overwatering (which drowns seeds) or burying too deep (smothering sprouts). The fix is simple: keep soil damp like a wrung-out sponge, plant seeds at the depth they’re sized for, and use clear containers so you can watch the magic happen without disturbing them.
Once you grasp these basics, you’ll troubleshoot like a pro—whether it’s adjusting humidity for slow starters or knowing when to thin crowded seedlings. The payoff? A garden where every seed becomes a plant, not just a guess.
📚 In This Guide
- What you need
- Instructions
- Tips and common mistakes
- Wrapping up and next steps
What you need
- ● Seeds: Choose fresh, high-quality seeds (e.g., beans, peas, or sunflower seeds). Aim for 5–10 seeds per experiment.
- ● Germination container: A shallow tray, plastic container, or even a damp paper towel (for the "paper towel method").
- ○ Growing medium (optional but recommended): Potting soil (sterilized, seed-starting mix preferred)
- ● OR a damp paper towel (for quick checks)
- ● Water: Room-temperature, filtered or distilled (avoid tap water with chlorine).
- ○ Spray bottle: For gentle moisture control (optional but helpful).
- ● Plastic wrap or lid: To retain humidity (e.g., a clear plastic dome or ziplock bag).
- ● Ruler or measuring tape: To track seed depth (typically ½–1 inch below soil).
- ● Notebook/pencil: To log observations (date planted, sprouting day, etc.).
- ○ Heat mat (optional): For faster germination (set to 70–85°F).
- ○ Grow light (optional): If seeds need light to sprout (e.g., lettuce).
- ○ Seedling pots (optional): Small biodegradable pots for transplanting later.
- ● Label markers: To label containers if testing multiple seed types.
Understanding seed germination: the science behind strong starts
Here's how seeds break dormancy and grow into seedlings—what actually happens inside that tiny package.
🌱 Step 1: Identify the Three Critical Germination Requirements
Every seed needs three things to germinate: water, oxygen, and warmth. Water activates enzymes that break down stored nutrients, oxygen fuels the chemical reactions, and warmth speeds up metabolic activity. Without all three, seeds remain dormant—sometimes indefinitely.
I always check seed packets for specific needs—some tropical seeds require 80°F+, while cool-season crops like lettuce germinate best at 60-70°F. The right temperature ensures consistent sprouting instead of patchy germination that leaves you replanting.
Notice how some seeds swell almost immediately after soaking—that's water breaking the seed coat and starting hydration. Others may take hours. This swelling is your first visual cue that germination has begun internally.
💧 Step 2: Understand the Internal Process (What Happens Inside the Seed)
The seed coat first absorbs water through tiny pores, triggering the embryo to metabolize stored food. Inside, the radicle (the embryonic root) grows downward first, seeking moisture and stability. This downward growth is why we plant seeds twice as deep as their diameter—enough to anchor but not so deep they exhaust energy reaching light.
Meanwhile, the plumule (the embryonic shoot) begins growing upward toward light. You'll see this as the first tiny green shoot pushing through the soil surface. This two-phase growth—root down, shoot up—is why proper depth matters so much. Plant too shallow, and the seed dries out before sprouting.
Here's the thing—some seeds have hard coats that resist water absorption. If you've ever soaked seeds overnight before planting, you're helping break that dormancy barrier. The swelling you see is the seed coat softening just enough for the radicle to emerge.
☀️ Step 3: Recognize the Four Stages of Visible Germination
Stage 1 (Imbibition) is when the seed absorbs water and swells—sometimes visibly, sometimes not. This can take 6-48 hours depending on seed type. Stage 2 (Radicle Emergence) is when the root breaks through the seed coat and begins growing downward. This is the first physical sign of life.
Stage 3 (Shoot Emergence) happens when the hypocotyl (the stem between root and leaves) pushes upward, often bending toward light. You'll see this as a tiny loop or curve just below the soil surface. Stage 4 (Cotyledon Development) is when the first true leaves appear—these are the seed leaves, not the plant's mature foliage.
Watch for epigeal vs. hypogeal germination: Epigeal seeds (like beans) pull the cotyledons above ground, while hypogeal seeds (like peas) keep them below. This affects how deep you should plant—beans need shallower depths than peas to avoid burying the emerging leaves.
⏰ Step 4: Learn How Environmental Factors Affect Speed and Success
Temperature is the biggest variable—most seeds germinate fastest at 70-80°F, but extremes slow or stop the process. Light exposure matters too: Some seeds (like lettuce) need darkness to germinate, while others (like radishes) prefer light. Always check seed packet instructions to avoid waiting weeks for seeds that never sprout.
Moisture levels must stay consistent but not soggy. Too little water stalls germination; too much suffocates the seed with lack of oxygen. I use a spray bottle to mist seeds daily until they sprout, then switch to bottom-watering to prevent surface crusting that blocks oxygen.
Don't forget about seed age—older seeds lose viability. If germination takes longer than expected, test a few seeds in a damp paper towel. After 5-7 days, if they haven't sprouted, they may be past their prime. Fresh seeds from reputable suppliers give you the best chance for strong, uniform starts.
✂️ Step 5: Troubleshoot Common Germination Failures
If seeds rot in the soil, you're overwatering or using compacted soil that blocks oxygen. Let the soil surface dry slightly between waterings once germination begins. For seeds that never sprout, check for dormancy requirements—some need cold stratification (like apples) or scarification (scratching the coat).
Uneven germination often means inconsistent moisture or temperature. Use a seedling heat mat to maintain even warmth, and group trays together to create a microclimate. If only half your seeds sprout, consider testing viability or adjusting your planting depth.
Real talk: Even with perfect conditions, some seeds just don't make it. That's why I always plant 2-3 seeds per cell—it gives me backup seedlings to transplant later. The strongest, healthiest sprout wins, and thinning early prevents competition for resources.
Tips & tricks for perfect seed germination
Mastering seed germination isn't just about patience—it's about understanding the delicate balance of conditions that turn tiny seeds into thriving plants.
The Temperature Factor: While most seeds thrive between 70-80°F, tropical varieties like beans and cucumbers often need that upper range (80°F+) to activate properly. I've seen seeds take twice as long to sprout when kept at cooler temperatures—especially those tropical varieties. For cool-season crops like lettuce, maintain consistent 60-70°F to prevent uneven germination. A seedling heat mat can help maintain these ideal conditions without overwatering.
Visual Cues for Success: Pay attention to the subtle signs that germination has begun. In Stage 1 (the 6-48 hour imbibition phase), you might notice seeds swelling slightly or becoming plumper. This is your first indication that internal processes are activating. For seeds with hard coats, like some legumes, watch for the seed coat to crack open—this often happens within 24-48 hours of proper soaking. The radicle (root) emergence in Stage 2 is the most obvious sign, appearing as a tiny white thread pushing downward.
Depth and Light Strategy: The rule of thumb—planting seeds twice as deep as their diameter—works for most seeds, but epigeal seeds (like beans) need shallower planting to allow their cotyledons to emerge above soil. For these, I recommend planting just 1/4 inch deep. Conversely, hypogeal seeds (like peas) can handle slightly deeper planting since their cotyledons stay below ground. Always use a light soil mix that won't compact around emerging roots, which can strangle young seedlings.
Troubleshooting Dormancy: If you're dealing with seeds that seem resistant to germinating, try scarification for hard-coated seeds by lightly sanding the outer layer with fine-grit sandpaper. For seeds requiring cold stratification (like apple seeds), place them in a sealed bag with slightly damp peat moss and refrigerate for 4-6 weeks before planting. This mimics natural winter conditions and breaks dormancy effectively. Always check seed packets—they often specify these requirements!
Pro Tips for Explain Seed Germination
- Mastering seed germination isn't just about patience—it's about understanding the delicate balance of conditions that turn tiny seeds into thriving plants.
- The Temperature Factor: While most seeds thrive between 70-80°F, tropical varieties like beans and cucumbers often need that upper range (80°F+) to activate properly.
- Visual Cues for Success: Pay attention to the subtle signs that germination has begun.
Frequently asked questions
Got questions about seed germination?
You’re not alone! Here are answers to the most common queries—from impatient gardeners to science-curious beginners.
How long does it take for seeds to germinate?
Germination time varies by seed type! Fast growers like radishes sprout in 3–5 days, while slowpokes such as peanuts or trees may take weeks or months. Check your seed packet for specifics—most list expected timelines. Pro tip: Keep soil consistently moist (not soggy!) and warm (70–85°F is ideal for most seeds).
What if my seeds aren’t germinating? Troubleshooting tips.
Don’t panic! Common culprits include:
- Cold soil: Use a heat mat or move pots to a warmer spot (e.g., near a sunny window).
- Too dry/wet: Test soil moisture—it should feel like a damp sponge, not a swamp.
- Old seeds: Some seeds lose viability after 1–5 years (check expiration dates!).
- Depth issues: Plant too deep? Tiny seeds (like lettuce) need light—press them just under soil.
Can I germinate seeds without soil? What are my options?
Try these soil-free methods:
- Paper towels: Dampen a towel, wrap seeds, and store in a sealed bag (check daily for sprouts).
- Jiffy pellets: Pre-moistened peat discs expand into seed-starting vessels.
- Water-only: Float seeds (like chives or basil) in a jar with 1 inch of water—change daily.
Do I need to soak seeds before planting?
Only for hard-coated seeds (e.g., beans, peas, or some herbs). Soaking softens the shell, speeding germination. How to: Soak in warm water for 4–12 hours, then plant. Skip soaking for delicate seeds (like tomatoes)—they’ll rot!
Will seeds germinate if planted in winter?
Maybe! Cold-hardy veggies (e.g., kale, spinach, carrots) can sprout in cool soil (40–50°F), but most need warmth. Use row covers or start indoors under grow lights. Pro tip: Wait until soil temps rise to 50°F+ for heat-loving plants (like peppers or cucumbers).
Bonus: How do I know if a seed is still viable?
Test with the “float test”:
- Fill a glass with water and drop seeds in.
- If they sink, they’re likely good (plant them!).
- If they float, they’re probably dead—toss ‘em!
Wrapping up and next steps
Understanding seed germination is your first step toward nurturing thriving plants!
From moisture and warmth to proper soil conditions, each factor plays a vital role in breaking dormancy and kickstarting growth. 🌱 With patience and the right techniques, you’ll soon witness tiny sprouts pushing through the soil—proof that nature’s magic is in motion.
Ready to put this knowledge into action? Start with a few easy-to-germinate seeds like beans or marigolds, and experiment with different conditions. Every sprouted seed is a victory—so grab your gloves and let the green journey begin!