
Lawn
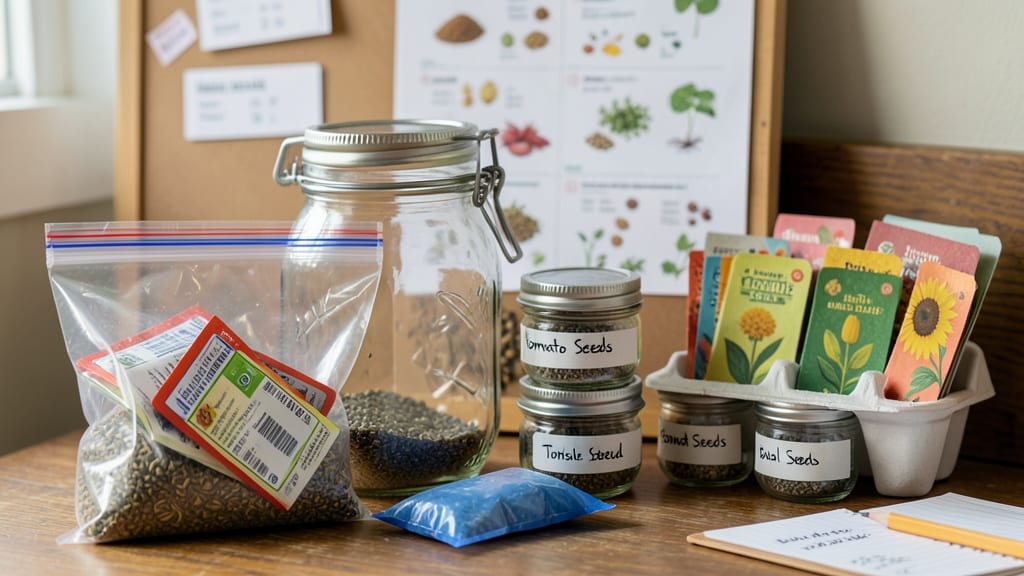
Proper seed packet storage keeps next year’s garden dreams alive—moisture is the silent killer most gardeners overlook. 🌱 I’ve ruined batches of seeds by leaving them in damp basements or unsealed containers, only to find them moldy or lifeless when planting season rolled around.
The right storage turns a simple paper packet into a time capsule for future harvests.
You only need three things: an airtight container (glass jars or resealable bags work best), a packet of silica gel (to absorb any lingering dampness), and a permanent marker for labeling. Keep seeds in a cool, dark place—your refrigerator’s crisper drawer or a basement shelf is ideal.
Heirloom varieties, in particular, can last 10+ years with proper care, while hybrid seeds stay viable for 3-5 years if stored correctly.
When you open the container next spring, you’ll find seeds that germinate just as well as day-one freshness. The key is consistency: check for moisture every few months, and avoid plastic bags that trap humidity.
Labeling isn’t just helpful—it’s essential. I once planted a batch of ‘Black Krim’ tomatoes only to realize too late they were actually ‘Cherokee Purple’—a lesson learned the hard way.
For rare or expensive seeds, consider vacuum-sealing or even freezing them for long-term storage. The extra effort pays off when you’re ready to grow that perfect variety again. Now, let’s make sure your seeds survive the off-season—and your garden thrives for years to come.
📚 In This Guide
- What you need
- Instructions
- Tips and common mistakes
- Wrapping up and next steps
What you need
- ● Seed packets – All varieties you plan to save (check expiration dates—most last 1-2 years).
- ● Air-tight containers – Must be moisture-proof: Mason jars (4-8 oz) with rubber seals
- ● Plastic or glass containers with tight lids (e.g., Tupperware, ammo cans)
- ● Vacuum-seal bags (for bulk storage)
- ● Desiccant packets – 1-2 per container (silica gel or food-grade desiccants).
- ● Permanent markers – For labeling (include variety, year, and germination notes).
- ○ Paper envelopes (optional) – If storing seeds loose (e.g., for small quantities like poppies).
- ● Small funnel – For easy seed transfer into containers.
- ● Ruler or measuring tape – To ensure containers are fully sealed.
- ● Freezer or cool, dark pantry – Ideal storage temp: 32–40°F (0–4°C).
- ● Aluminum foil or parchment paper – Line containers for extra moisture barriers.
- ○ Ziploc bags (optional) – For short-term storage (replace desiccants every 6 months).
Step-by-Step instructions for storing seed packets long-term
Here's how I ensure my seeds stay viable for years—no more damp, moldy packets ruining your future garden.
🪴 Step 1: Empty Packets and Dry Seeds Thoroughly
Open each seed packet and spread the seeds on a clean, dry surface like a paper towel or mesh screen. I place them in a single layer to prevent moisture buildup between seeds. Leave them in a warm, dry spot for 3-5 days, stirring occasionally to expose all sides to air.
Seeds absorb moisture from the air over time, so this drying step is critical. You'll know they're ready when they feel light and crisp to the touch—no dampness or stickiness. If your climate is humid, add a small silica gel packet (the kind that comes with electronics) to the drying container to absorb excess moisture.
💧 Step 2: Store in Airtight, Moisture-Proof Containers
Transfer the dried seeds into small, airtight containers like glass jars, plastic containers with tight seals, or even repurposed spice jars. I label each container with the seed type and date using a permanent marker—fading labels are a common frustration.
Place a desiccant packet (like those used for electronics or medications) inside each container. These packets absorb any residual moisture that could shorten seed viability. Store the containers in a cool, dark place like a pantry, basement, or refrigerator—never near a window or heat source.
☀️ Step 3: Maintain Consistent Temperature and Darkness
Ideal storage conditions are 40-50°F with low humidity. A refrigerator works well, but avoid the crisper drawer where moisture levels fluctuate. I keep mine in a dedicated seed storage bin on the pantry shelf—far from the oven and stove.
Light exposure breaks down seed oils and accelerates aging, so opaque containers or wrapping them in aluminum foil add an extra layer of protection. Check containers annually for moisture buildup or pests—seeds stored properly can last 5-10 years, but neglect invites mold and spoilage.
⏰ Step 4: Test Viability Before Planting Next Season
Before using stored seeds, perform a germination test to ensure they're still viable. Take 10 seeds and place them between damp paper towels in a sealed plastic bag. Keep them in a warm spot (70-75°F) and check for sprouts in 5-7 days. If 80% or more sprout, your seeds are good to plant.
If germination rates are low, extend the test to 10 days or plant a few seeds in soil to see if they emerge. Seeds like tomatoes and peppers lose viability faster than others, so I test them every 2-3 years—even if storage conditions were perfect. Discard any seeds that fail the test to avoid wasting garden space.
Tips & tricks for perfect seed longevity
Here's what I've learned after years of saving seeds—these details make all the difference between seeds that sprout and seeds that fail.
Drying Efficiency: In Step 1, if your climate is particularly humid, consider using a small fan on low setting to gently circulate air around your seeds during the 3-5 day drying period. This helps evaporate moisture faster while preventing seeds from overheating. I've found that placing the drying tray on a mesh screen over a shallow dish of rice (not touching) also helps absorb ambient moisture—just swap the rice every few days. The goal is to get seeds to that perfect crisp, dry state where they feel like they've been sitting in your pantry for months already.
Container Selection: For Step 2, don't overlook the importance of container size—smaller containers actually work better than large ones. A half-pint mason jar creates a better moisture-to-seed ratio than a quart jar, and you can fill it completely without leaving air pockets. I've had success with vacuum-sealed bags too, but only if you completely remove all air before sealing. The key is eliminating any air space where condensation could form during temperature fluctuations.
Temperature Monitoring: When aiming for that 40-50°F range in Step 3, don't rely solely on your kitchen thermometer—different areas of your home can vary dramatically. I keep a small digital thermometer in my seed storage bin to monitor conditions continuously. If you notice condensation forming on the inside of containers, that's your first sign that humidity levels are too high. In summer months, I actually move my seed storage to the basement where temperatures stay more stable around 55°F—closer to ideal than my 70°F kitchen.
Viability Testing: For Step 4, if you're testing seeds from particularly old packets, consider extending the germination test to 14 days for some varieties. Some heirloom seeds and vegetables like squash can take longer to sprout, and you don't want to discard perfectly good seeds prematurely. I've also found that using distilled water instead of tap water in the germination test can yield slightly better results, especially if your tap water has high mineral content.
Pro Tips for Seed Packet Storage
- Here's what I've learned after years of saving seeds—these details make all the difference between seeds that sprout and seeds that fail.
- Drying Efficiency: In Step 1, if your climate is particularly humid, consider using a small fan on low setting to gently circulate air around your seeds during the 3-5 day drying period.
- Container Selection: For Step 2, don't overlook the importance of container size—smaller containers actually work better than large ones.
Frequently asked questions
Got questions about keeping your seed packets fresh and ready for planting? Here are some of the most common concerns—and their answers—to help you store seeds like a pro!
How long can I store seed packets before they expire?
Most seed packets list a germination rate guarantee (usually 1–5 years), but many stay viable longer if stored properly. Heirloom and non-hybrid seeds can last 5–10+ years in ideal conditions (cool, dry, dark). Always check the packet date and test viability if unsure!
What’s the best way to protect seeds from moisture?
Moisture is the #1 enemy of seeds! Store packets in airtight containers (like glass jars or resealable bags with silica gel packets). Avoid plastic bags alone—they trap humidity. For extra defense, place a desiccant packet or a small bag of rice in the container to absorb moisture.
Should I refrigerate or freeze seed packets?
Refrigeration (35–40°F) is ideal for long-term storage (5+ years), while freezing (below 32°F) can extend viability even further—especially for delicate seeds like lettuce or parsley. Just label everything clearly and use airtight containers to prevent freezer burn.
Can I reuse seed packets for storage?
Yes! Clean, dry packets work great for short-term storage (1–2 years), but for long-term use, transfer seeds to mylar bags or airtight containers. Label them with the seed type and date to avoid mix-ups. Pro tip: Write with a pencil—ink fades over time!
What if my seeds smell musty or look moldy?
Discard them immediately! Musty smells or mold mean the seeds are compromised and won’t grow. To prevent this, always store seeds in cool, dry places (like a pantry or basement) and avoid humidity. If you’re unsure, do a quick viability test (plant a few seeds—if they sprout, the rest are likely good).
Wrapping up and next steps
Proper seed packet storage is your secret weapon for a thriving garden next season—no guesswork, just guaranteed freshness! By sealing out moisture, light, and pests, you’ll preserve viability and save money, turning last year’s packets into this year’s green-thumb wins. 🌱
Ready to take action? Grab those leftover packets today and give them the perfect home—your future garden will thank you! For extra peace of mind, download our free storage checklist to keep everything organized.