
Lawn
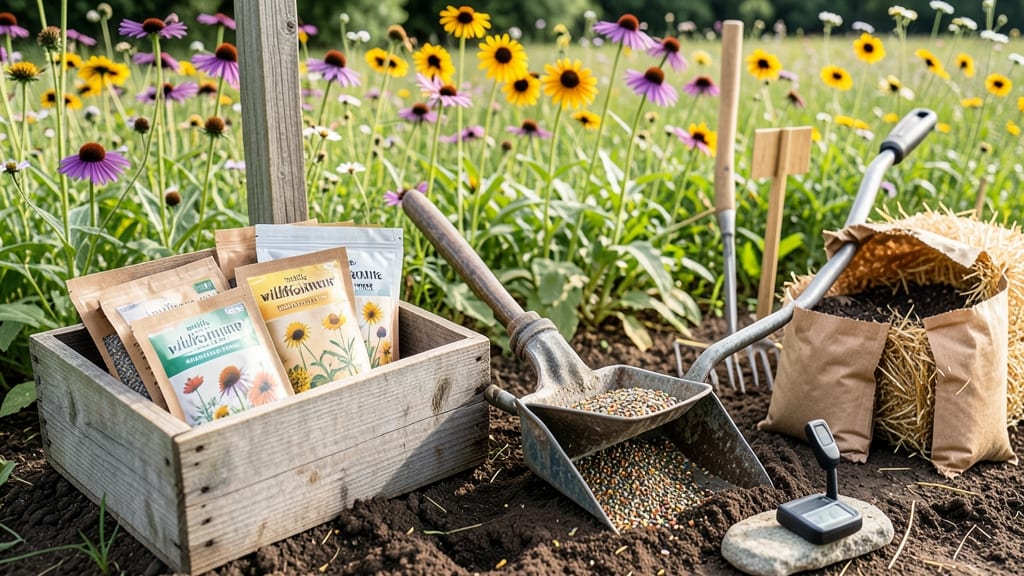
Transforming your yard into a buzzing pollinator paradise starts with the soil. 🌱 The right wildflower habitat seed mix soil improvement turns compacted dirt into a sponge that holds moisture, feeds roots, and invites bees, butterflies, and hummingbirds to visit.
I’ve learned that skipping this step means seeds struggle to germinate and plants bolt before they bloom—so let’s fix that together. Begin with a soil test to check pH (aim for 6.0-7.0) and texture.
Most wildflowers thrive in loose, well-draining soil, so mix in 2-3 inches of compost and 1-2 inches of coarse sand if your soil is heavy clay. Native wildflowers often prefer lean soil—too much fertilizer will encourage weeds over blooms. A simple rake and a few amendments work wonders.
Within 4-6 weeks, you’ll see the first green shoots pushing through, followed by vibrant blooms that attract pollinators by midsummer. The key is patience: wildflowers establish slowly but reward you with years of low-maintenance beauty and ecological benefits. No more mowing—just watch the ecosystem thrive.
This method works for small patches, large meadows, or even container gardens. The secret? Start small, observe what grows best, and let nature do the rest. Ready to turn your yard into a haven for pollinators?
📚 In This Guide
- What you need
- Instructions
- Tips and common mistakes
- Wrapping up and next steps
What you need
- ● Wildflower habitat seed mix: 1–5 lbs (depending on area size; check seed bag for coverage rate). Opt for native, pollinator-friendly blends (e.g., Milkweed, Coneflower, or Goldenrod).
- ● Topsoil or compost: 1–2 inches per 100 sq. ft. (use well-draining, organic-rich soil or a 50/50 mix of topsoil and compost).
- ● Garden rake: 1 medium-sized (8–12" teeth) for leveling soil and removing debris.
- ● Broadcast spreader (or hand-held seeder): 1 unit (adjustable for even seed distribution).
- ● Water source (hose or sprinkler): With a gentle spray nozzle to avoid displacing seeds.
- ○ Organic mulch (optional but recommended): Straw or wood chips (¼ inch thick) to retain moisture and suppress weeds.
- ● Work gloves: 1 pair (heavy-duty for comfort and grip).
- ● Pruners or shears: 1 pair (for trimming invasive plants or weeds beforehand).
- ○ Soil test kit (optional): To check pH and nutrient levels (aim for 6.0–7.0 pH for most wildflowers).
- ● Sunlight assessment: Confirm your area gets full sun (6+ hours/day)—most wildflowers thrive here!
- ● Weather check: Plan for a dry, wind-free day (ideal: 50–75°F) to sow seeds.
- ● Prep the soil: Remove weeds, rocks, and debris before adding soil mix. 🌡️ Loosen top 2–3 inches of soil for better seed-to-soil contact.
- ● Seed mix variety: If your region has drought-prone areas, choose a blend with deep-rooted species like Black-Eyed Susan.
- ● Watering schedule: Keep soil consistently moist (not soggy) for the first 4–6 weeks. ⏰ Water early morning to reduce evaporation.
How to prepare soil for a thriving wildflower habitat
Transform your landscape into a pollinator haven by giving wildflowers the perfect foundation to grow.
🌱 Step 1: Clear and Loosen the Soil
Start by removing any existing vegetation, weeds, or debris from the planting area. Use a broadfork or garden fork to loosen the top 6-8 inches of soil without turning it over. This preserves the natural soil structure while improving aeration and drainage. I find that working in small sections—about 4 feet by 4 feet—makes the process more manageable and helps me avoid compacting the soil further.
Pay attention to how the soil feels as you work. If it's particularly dense or clay-heavy, you’ll notice resistance when pushing the fork in. This is your cue to focus extra effort on breaking up these compacted layers. The goal is to create a loose, crumbly texture that encourages root penetration. Avoid walking on the area once it’s cleared—every step compacts the soil again, undoing your progress.
💧 Step 2: Amend the Soil for Nutrient Balance
Wildflowers thrive in well-draining soil with moderate fertility. Spread a 2-3 inch layer of compost evenly over the loosened soil. For clay-heavy areas, mix in 1 part sand to 3 parts soil to improve drainage. I like to use a garden rake to work the amendments into the top 4-6 inches of soil, ensuring even distribution. This step is critical for preventing waterlogging, which can suffocate wildflower roots and invite fungal diseases.
If your soil is particularly poor, consider adding a thin layer of aged manure or worm castings for extra nutrients. However, avoid over-amending—wildflowers prefer lean soil, and too much fertilizer can encourage rapid leaf growth at the expense of blooms. Think of this as a gentle boost, not a heavy feeding. You’ll see the difference in how easily the soil crumbles when you squeeze a handful—it should hold together but still fall apart with light pressure.
☀️ Step 3: Level and Prepare for Seeding
Once the soil is amended, use a level or a straight board to create a smooth, even surface. This ensures seeds make consistent contact with the soil, which is essential for even germination. I like to drag a wooden board back and forth over the area to break up any remaining clumps and create a fine, seed-friendly texture. If the soil feels too dry, lightly mist it with water to settle the amendments without creating puddles.
For larger areas, consider using a lawn roller to press the soil gently. This helps eliminate air pockets and ensures good seed-to-soil contact. The surface should be firm enough to hold a footprint but still soft enough to accept seeds without resistance. This is the moment to step back and admire your progress—you’re laying the groundwork for a vibrant, pollinator-friendly ecosystem.
✂️ Step 4: Test Soil Moisture Before Seeding
Before scattering your wildflower seed mix, check the soil moisture by digging a small hole—about 2 inches deep. If the soil is dry, water it gently but thoroughly until moisture reaches 4-6 inches deep. Wildflower seeds need consistent moisture to germinate, but they hate soggy conditions. I use a soaker hose or drip irrigation for this step to avoid disrupting the soil surface. The goal is to moisten the soil evenly without creating runoff.
You’ll know the moisture is right when the soil feels like a damp sponge—it holds together when squeezed but doesn’t drip water. Overwatering at this stage can lead to seed rot or fungal issues, so resist the urge to oversaturate. Think of this as a gentle drink, not a flood. Once the soil is prepped, you’re ready to scatter your wildflower seeds and watch nature take over.
Tips & tricks for perfect wildflower habitat soil prep
Creating the ideal foundation for wildflowers isn't just about following steps—it's about understanding the subtle details that make all the difference. Here's what I've learned after prepping countless pollinator-friendly gardens.
Tool Selection Matters: A broadfork is your best friend for Step 1, but if you don't have one, a sturdy garden fork works just fine. The key is to work the soil vertically without turning it over—this preserves the natural soil structure while improving aeration. I've found that using a fork with tines spaced about 3 inches apart gives me better leverage for breaking up compacted layers. For particularly stubborn clay soil, consider renting a soil aerator from your local garden center—it can save hours of backbreaking work.
Amendment Strategy: When adding the 2-3 inch layer of compost in Step 2, think about the texture you're creating. The goal is to create a loose, crumbly texture that mimics natural forest floor conditions. For clay-heavy soils, I've had success with a 1:3 sand-to-soil ratio, but I always test first by squeezing a handful—it should hold together but still crumble easily. Pro tip: Spread the compost in the evening so it has time to settle before you work it in the next morning, preventing clumping.
Leveling Technique: In Step 3, when you're creating that smooth surface for seeding, don't underestimate the power of a simple wooden board. Drag it back and forth across the area to break up any remaining clumps—this creates the perfect seed bed texture. For larger areas, I've found that using a lawn roller set to its lightest pressure works wonders for eliminating air pockets while still maintaining that seed-friendly texture. The surface should be firm enough to hold a footprint but still soft enough to accept seeds without resistance.
Moisture Management: The 2-inch deep moisture check in Step 4 is crucial, but don't rely solely on the depth measurement. Pay attention to how the soil feels when you squeeze it—it should hold together like a damp sponge without dripping water. I've learned the hard way that overwatering at this stage can lead to seed rot, so I always use a soaker hose on the gentlest setting. For clay soils, you might need to water more frequently but in smaller amounts to prevent runoff.
Pro Tips for Wildflower Habitat Seed Mix Soil Improvement
- Creating the ideal foundation for wildflowers isn't just about following steps—it's about understanding the subtle details that make all the difference.
- Tool Selection Matters: A broadfork is your best friend for Step 1, but if you don't have one, a sturdy garden fork works just fine.
- Amendment Strategy: When adding the 2-3 inch layer of compost in Step 2, think about the texture you're creating.
Frequently asked questions
Got questions about transforming your soil into a thriving wildflower haven?
Here are answers to the most common ones—so you can dive right in with confidence!
What’s the best time of year to plant wildflower seed mixes for optimal growth?
For most regions, late summer to early fall (August–September) is ideal—seeds germinate in cooler weather and establish roots before winter. In warmer climates, winter planting (October–December) works too. Avoid spring planting unless you’re in a high-desert area, as summer heat can stress young seedlings.
Can I use wildflower seed mixes in poor or compacted soil?
Wildflowers are hardy and often thrive in mediocre soil—but improving it first boosts success. Loosen compacted soil with a rake or aerator, and mix in compost or organic matter (like aged manure) to help seeds germinate faster. Avoid heavy clay? Add sand or perlite to improve drainage.
How often should I water after planting wildflower seeds?
Keep soil consistently moist (not soggy) for the first 2–4 weeks—water lightly daily or every other day. Once seedlings sprout, reduce to 1–2 times per week (deep watering). After establishment (6–8 weeks), wildflowers are drought-tolerant—overwatering can harm them!
What’s the difference between a wildflower seed mix and native wildflower seeds?
Wildflower seed mixes
often include a blend of native and non-native species for color variety, while native-only mixes support local ecosystems better (and require less water/fertilizer). If pollinators are your goal, native seeds win—but mixes work for ornamental gardens. Check labels for regional suitability!
Why aren’t my wildflower seeds germinating? Troubleshooting tips.
Try these fixes if seeds aren’t sprouting:
- Too deep: Most wildflower seeds need light—scratch them ¼ inch into soil max.
- Wrong timing: Plant when soil temps are 50–70°F (check your zone).
- Poor contact: Lightly press seeds into soil or use a starter fertilizer for nutrients.
- Weeds winning: Pre-emergent herbicides can block seeds—spot-treat weeds instead.
Still stuck? Test soil pH (6.0–7.0 is best) or try a fresh batch of seeds.
Wrapping up and next steps
Transforming your space into a thriving wildflower habitat isn’t just rewarding—it’s a gift to pollinators and the planet! 🌸 By focusing on soil improvement and the right wildflower habitat seed mix, you’ve taken the first steps toward a vibrant, low-maintenance ecosystem.
Now, watch as your garden bursts with color, supports local wildlife, and becomes a haven for bees, butterflies, and birds.
Ready to see your efforts bloom? Start small—plant a test patch, observe what thrives, and expand over time. Every seed sown is a step toward a greener future! 🌱