
Lawn
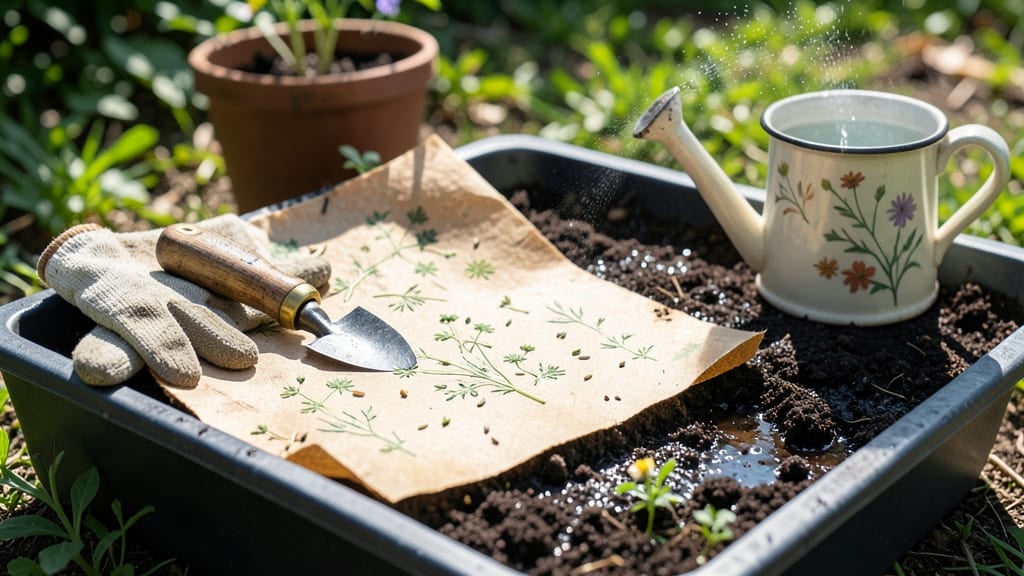
Seed paper planting instructions are like giving your herbs a head start—no soil, no mess, just 7 days to sprouts. 🌱 I’ve tried this method twice, and the first time I was skeptical, but those tiny green shoots appearing in my windowsill proved it works. The best part? You’re reducing waste while growing fresh herbs right on your desk. You’ll need just a few things: your seed paper, a shallow tray, water, and a spray bottle. Keep the paper damp (not soggy) and place it where it gets bright, indirect light—a sunny windowsill or under a grow light. The paper breaks down naturally, so you won’t have to transplant later. Within a week, you’ll see delicate sprouts pushing through. Keep the paper moist and watch as your herbs grow into lush, ready-to-harvest plants. The paper even biodegrades, so you can plant it directly into soil when the time comes. This method is perfect for beginners or anyone short on garden space. Just avoid overwatering—mold is the biggest enemy here. Ready to grow herbs without the hassle?
📚 In This Guide
- What you need
- Instructions
- Tips and common mistakes
- Wrapping up and next steps
What you need
- ● Seed paper – Choose a pre-made sheet with embedded herb seeds (e.g., basil, parsley, or thyme). A single sheet (approx. 4" x 6") is perfect for a small project.
- ● Water spray bottle – A fine-mist sprayer (8–16 oz) works best to keep the paper moist without oversaturating it.
- ● Shallow tray or container – Use a plastic or ceramic dish (6"–8" wide) with drainage holes or a tray with a water reservoir (like a propagator).
- ● Plastic wrap or clear lid – A humidity dome keeps moisture locked in. A ziplock bag or cling film also works!
- ○ Scissors or craft knife – For trimming the seed paper to size (optional but handy).
- ● Grow lights or sunny windowsill – Seed paper thrives in bright, indirect light (6+ hours/day). A small LED grow light is ideal for low-light spaces.
- ● Plant labels or toothpicks – Mark your herbs if growing multiple varieties to avoid mix-ups!
- ● Compost or potting mix – For transplanting seedlings later (if you want to keep them growing beyond the paper stage).
- ● Tweezers – Gently handle delicate seedlings when transferring them to soil.
- ● A clean workspace – Wipe down surfaces to avoid contamination.
- ● Patience (7+ days!) – Seed paper germinates slower than soil, but the wait is worth it.
- ● Consistent care – Check moisture levels daily (overwatering is the #1 killer of seed paper!).
How to plant and germinate seed paper in 7 days
Here's the simple, soil-free method I've used to grow herbs in just a week.
🌱 Step 1: Prepare Your Seed Paper for Planting
Start by placing your seed paper in a shallow tray or dish. Add just enough lukewarm water to fully saturate the paper—it should feel damp but not dripping. I like to use a spray bottle for even moisture distribution. Let it soak for 5-10 minutes until the water absorbs completely. This activates the seeds inside the paper fibers.
Here's the thing—don't over-soak. If water pools at the bottom, the paper will become waterlogged, and seeds may suffocate. You'll know it's ready when the paper feels uniformly moist like a wrung-out sponge. This step is critical for even germination.
💧 Step 2: Create a Humid Germination Environment
Once soaked, place the seed paper on a clear plastic wrap or inside a humidity dome. I use a small plastic container with a lid to trap moisture. The goal is to maintain 80-90% humidity—this mimics the tropical conditions seeds love. Set this up in a warm spot (around 70-75°F) like a sunny windowsill or under a grow light.
Check daily but resist opening the container too often. Every time you peek, you lose precious humidity. A quick glance is enough to confirm moisture levels. You'll see tiny green sprouts appear in 3-5 days—that's your signal everything's working.
☀️ Step 3: Transition to Light and Air Circulation
After 7 days, when seedlings show first true leaves (not just the initial sprout), remove the cover and move them to bright, indirect light. Direct sun now can scorch the delicate seedlings. I place mine under a south-facing window or under grow lights for 12-14 hours daily. You'll notice leaves turning darker green and stems thickening as they strengthen.
This is the moment that matters: start misting the paper lightly with water every 2-3 days instead of soaking. The roots will begin growing into the paper, which will eventually decompose. Watch for signs of stress—yellowing leaves mean too much water, while wilting means it's dry.
🪴 Step 4: Transplant or Continue Growing in Paper
For herbs you want to keep growing in the paper, simply continue misting and place in moderate sunlight. The paper will break down naturally, feeding the plants as they grow. If you're transplanting, gently fold the paper around the roots and place it in soil. The paper will decompose, leaving no trace.
I know it seems weird to plant something that will dissolve, but trust me—this method works beautifully. The paper provides structure while roots establish, and it disappears without harm. Just be patient; some herbs like basil may take 2-3 weeks to fully transition to soil if you choose to transplant.
Tips & tricks for perfect seed paper germination
Common pitfalls—and how to sidestep every one when growing herbs from seed paper.
Moisture Matters: In Step 1, that 5-10 minute soak is your golden window. Use a spray bottle to distribute water evenly—pooling creates soggy paper that suffocates seeds. I test readiness by gently pressing the paper: it should feel like a wrung-out sponge, not a dripping washcloth. Too dry? Add more water. Too wet? Pat with a paper towel and let sit for 2 minutes before proceeding.
Humidity Hack: The 80-90% humidity in Step 2 is non-negotiable. If you don't have a humidity dome, create one with clear plastic wrap and a rubber band. Place a small dish of water inside to boost moisture further. Pro tip: Set up near a humidifier if you have one—this mimics tropical conditions perfectly. Watch for condensation on the plastic—this confirms you've got the right environment.
Light Transition: When moving to Step 3's bright, indirect light, position your seedlings within 12 inches of the window. South-facing gets the best natural light, but east or west works too. If using grow lights, keep them 6-12 inches above the seedlings. The key is gradual exposure—start with 2-3 hours on day 1, then increase to 12-14 hours by day 3 to prevent shock.
Paper Preservation: Remember that seed paper will eventually decompose. In Step 4, if transplanting, fold the paper around roots like a protective sleeve. For herbs staying in paper, mist only the top—water should never pool. The paper's cellulose breaks down slowly, providing nutrients as it decomposes, but too much water accelerates this process and can weaken seedlings.
Pro Tips for Seed Paper Planting Instructions
- Common pitfalls—and how to sidestep every one when growing herbs from seed paper.
- Moisture Matters: In Step 1, that 5-10 minute soak is your golden window.
- Humidity Hack: The 80-90% humidity in Step 2 is non-negotiable.
Frequently asked questions
Got questions about growing your own herbs with seed paper? Here are some of the most common ones—and their simple solutions!
How do I know if my seed paper is ready to plant?
Your seed paper is ready when it’s completely dry (usually 24–48 hours after making it). Look for a crisp texture—like origami paper—and no damp spots. Plant it as soon as possible to avoid mold or seed dormancy. If stored properly in a cool, dry place, it can last 1–2 months before planting.
Can I plant seed paper in winter or cold climates?
Yes! Seed paper thrives in consistent moisture and warmth (60–75°F). In cold weather, start indoors near a sunny window or use a seedling heat mat (70°F) to speed germination. Once sprouted, transplant outdoors after the last frost or use a greenhouse. Avoid freezing temps—herbs like basil and cilantro won’t survive frost.
What if my seed paper won’t germinate?
Try these fixes:
- Check moisture: Keep the paper damp but not soggy (like a wrung-out sponge). Mist lightly 2x daily.
- Warmth matters: Place near a heat source (e.g., under grow lights) or use a seedling tray.
- Light exposure: Once sprouted, move to bright, indirect light (south-facing window or grow lights).
- Seed viability: If older than 6 months, test a few seeds in soil to confirm they’re still good.
Can I reuse seed paper if germination fails?
If seeds don’t sprout, don’t toss it. Cut the paper into smaller pieces and:
- Plant in potting soil (press lightly into the top layer).
- Use as mulch in garden beds to retain moisture.
- Compost it—it’s biodegradable and nutrient-rich!
Are there alternatives to seed paper for beginners?
If seed paper feels tricky, try these easy swaps:
- Seed tape: Pre-spaced seeds on biodegradable tape (great for rows!).
- Jiffy pellets: Peat-based discs that expand with water—perfect for herbs.
- Soil blocks: Compressed soil cubes for direct planting (no pots needed!).
- Eggshell starters: Plant seeds in cracked eggshells, then transplant with the shell.
Wrapping up and next steps
Seed paper is a creative, eco-friendly way to grow herbs quickly—no soil or gardening experience needed! 🌱 With just a few simple steps, you’ll have fresh basil, thyme, or parsley sprouting in under a week.
Whether you’re a beginner or a green thumb looking for a low-maintenance project, this method proves that sustainability and simplicity go hand in hand.
Now that you’re ready to plant, grab your seed paper and give it a try! Tag us in your gardening journey—we’d love to see your green thumbs in action! 🌿