
Flowers
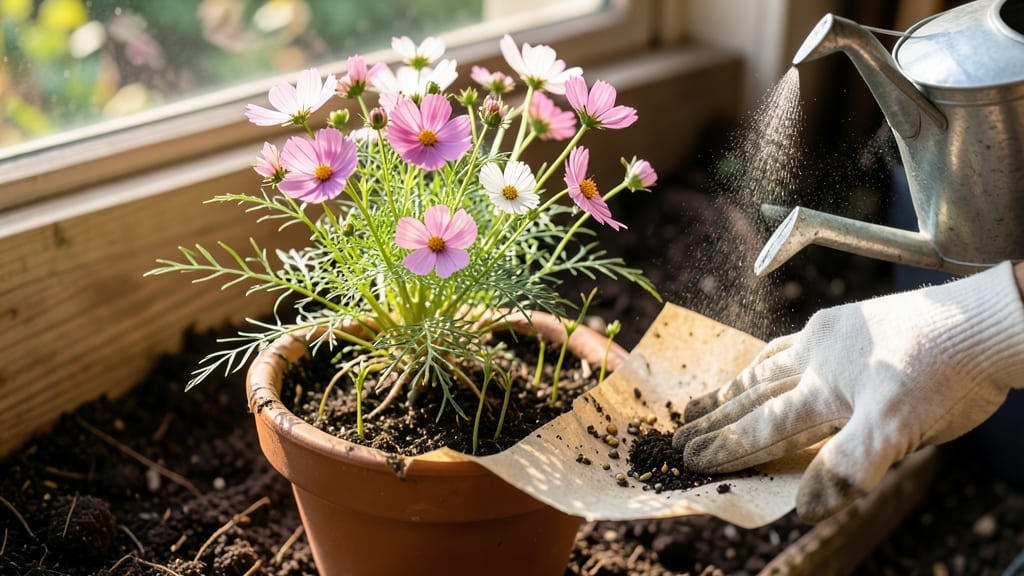
Growing flowers from seed paper turns your zero-waste blooms into a living gift that keeps giving all season. 🌸 The magic starts with these delicate sheets—each one packed with seeds and fiber—waiting to transform into vibrant petals with just water and sunlight.
You’ll need nothing more than a shallow tray, well-draining soil mix, and a gentle spray bottle to keep everything moist. Unlike traditional seeds, these paper flowers germinate faster and thrive in partial shade, making them perfect for beginners or busy gardeners.
The first sprouts appear in just 5-7 days, and by week three, you’ll have lush, full blooms ready to brighten any space.
These aren’t just pretty faces—they’re practical too. Use them as long-lasting centerpieces, wedding favors, or even pressed flowers once they fade. The paper decomposes naturally, leaving only the roots behind, so you can replant the soil for another round of growth.
Fair warning: once you try this, you’ll want to make seed paper for every occasion. The trick to success? Patience and consistent moisture—no fancy tools required. Let’s get those petals growing!
📚 In This Guide
- What you need
- Instructions
- Tips and common mistakes
- Wrapping up and next steps
What you need
- ● Seed paper: 1–2 sheets (choose wildflower blends or herbs like basil, thyme, or sunflowers for vibrant blooms). Look for 100% post-consumer recycled paper embedded with seeds.
- ● Water: Distilled or boiled (cooled) to prevent ink smudging.
- ○ Non-toxic glue or flour paste: 1–2 tbsp (optional for extra hold). Mix 1 part white glue with 2 parts water or blend 1 cup flour + ½ cup water for a natural option.
- ● Petals or thin paper: 3–5 sheets (use tissue paper, coffee filters, or scrapbook paper in bright colors). Cut into flower shapes (templates help!).
- ● Twine or string: 6–12 inches (for stems). Jute or hemp adds a rustic touch.
- ● Scissors: Sharp pair for clean cuts.
- ● Pencil or marker: For sketching designs on petals.
- ● Glitter or biodegradable confetti: For a festive touch (sparingly!)
- ● Dried flowers or leaves: To layer texture into your blooms.
- ● Clear sealant spray: (Biodegradable!) To protect finished flowers from rain.
- ● Planting pot or soil: If you plan to plant the seed paper directly after drying.
Step-by-Step guide to crafting and growing seed paper flowers
Transform recycled paper into living art that blooms beautifully—here's how to make and nurture these eco-friendly floral masterpieces.
🌱 Step 1: Gather Materials and Prepare the Base
Collect 4 sheets of seed paper (pre-made or homemade with flower seeds embedded), 1 cup water, and a non-toxic glue like flour paste or water-based adhesive. Place the seed paper sheets on a clean, flat surface—avoid glossy paper, as seeds won’t adhere well. For homemade seed paper, blend 2 cups dried flower seeds (like cosmos or marigold) with 1 cup recycled paper pulp and 1 cup water in a blender until smooth.
Spread the mixture evenly across a baking sheet, about 1/8-inch thick, using a spatula. Let it dry completely in a shaded area for 24-48 hours. Once dry, cut into 4-inch square sheets—this size works perfectly for flower shapes. If using pre-made seed paper, skip blending and proceed to shaping.
✂️ Step 2: Shape and Assemble the Flower Petals
Use flower-shaped cookie cutters or freehand draw petal outlines on the seed paper with a pencil. Cut along the lines carefully—sharp scissors or a craft knife work best. For a layered look, create 3-4 petal layers per flower, varying sizes slightly. Press the cut petals lightly to reactivate any adhesive if needed.
Arrange petals in a sunburst pattern, starting with the largest at the center and fanning outward. Secure layers with a small dab of glue between each petal, ensuring the seed-coated side faces outward. This ensures seeds remain viable for planting later. For extra durability, add a thin strip of paper as a stem base before assembling.
💧 Step 3: Hydrate and Plant for Germination
Place your assembled seed paper flowers in a shallow tray and mist evenly with water until the paper feels slightly damp but not soggy. Cover the tray with a clear plastic dome or wrap to retain moisture and warmth. Keep the tray in indirect light (like a north-facing windowsill) for 3-5 days—this mimics natural rainfall and kickstarts germination.
Check daily for moisture; remove the cover once you see tiny green sprouts emerging from the edges. At this stage, transplant each flower into its own small biodegradable pot filled with moist seed-starting mix. Press the paper gently into the soil so it stays in place—roots will grow through the paper naturally. Water lightly from below to avoid dislodging seeds.
☀️ Step 4: Transition to Outdoor Growth
After 2-3 weeks, when seedlings are 1-2 inches tall with 2-3 true leaves, acclimate them to outdoor conditions. Place pots in a sheltered, shaded spot for 1-2 hours the first day, gradually increasing exposure over 5-7 days. Choose a location with partial sun (4-6 hours daily) to prevent wilting—full sun can scorch tender new growth.
Water at the base every 2-3 days, ensuring the soil stays evenly moist but not waterlogged. Once flowers reach 3-4 inches tall, transplant them into the ground or larger containers. Space them 6-8 inches apart to allow airflow and prevent fungal issues. Mulch lightly around the base to retain moisture and suppress weeds.
🌿 Step 5: Maintain and Enjoy Long-Lasting Blooms
Seed paper flowers thrive in well-draining soil with moderate watering. Fertilize lightly every 4-6 weeks with a balanced organic fertilizer (like 10-10-10) to encourage vibrant blooms. Deadhead spent flowers regularly to prolong the blooming season—simply pinch off faded blooms with your fingers or small pruners.
These flowers will continue to grow and spread, creating a self-sustaining garden that lasts all season. As they mature, you can replant cuttings or allow them to self-seed for next year’s blooms. The best part? When the season ends, simply compost the paper—it breaks down completely, leaving no waste behind.
Tips & tricks for perfect seed paper flowers
Real talk: The magic of seed paper flowers lies in the details—here's how to avoid common pitfalls and create blooms that thrive.
Paper Quality Matters: For homemade seed paper, use 100% post-consumer recycled paper without glossy coatings—these prevent seeds from adhering properly. I learned this the hard way after my first batch failed to sprout. If using pre-made seed paper, check the label for seed density—higher concentrations yield more reliable germination. The 1/8-inch thickness in Step 1 is critical; thinner layers dry too quickly and may not hold seeds effectively.
Layering Technique: When assembling petals in Step 2, alternate the direction of each layer for structural integrity. I've found that starting with the largest petal at the center creates a natural focal point, while varying sizes by 1/4-inch increments adds dimension. Press each layer firmly against the previous one to prevent shifting during hydration—this ensures your flower maintains its shape when planted.
Germination Environment: The 3-5 day germination period in Step 3 requires precise moisture control. Use a spray bottle with a fine mist setting to avoid oversaturating the paper—soggy seed paper can develop mold. Place a small dish of water near the tray to maintain humidity without direct contact. I've had success using a clear plastic cloche instead of plastic wrap, as it allows for better airflow while retaining warmth.
Transplanting Hack: When moving seedlings to pots in Step 3, press the seed paper gently into the soil rather than burying it completely. The paper should be half-submerged to allow roots to grow through while keeping seeds exposed to light. This creates a natural transition that mimics how seeds would germinate in soil without paper. Use biodegradable pots to eliminate transplant shock when moving to larger containers.
Pro Tips for Seed Paper Flowers
- Real talk: The magic of seed paper flowers lies in the details—here's how to avoid common pitfalls and create blooms that thrive.
- Paper Quality Matters: For homemade seed paper, use 100% post-consumer recycled paper without glossy coatings—these prevent seeds from adhering properly.
- Layering Technique: When assembling petals in Step 2, alternate the direction of each layer for structural integrity.
Frequently asked questions
Got questions about growing your own seed paper flowers? You’re not alone! Here are some of the most common queries—and their easy answers—to help you bloom with confidence.
How long does it take for seed paper flowers to sprout?
Most seed paper flowers sprout within 7–14 days under ideal conditions—warmth (65–75°F), consistent moisture, and sunlight (or a grow light). Pro tip: Keep the paper damp (not soggy) and place it in a shallow tray until sprouts appear. Patience is key—some delicate varieties like love-in-a-mist may take a little longer!
Can I plant seed paper flowers directly in the ground?
Seed paper is biodegradable, so you can plant it straight into soil, pots, or even hanging planters. Just press it gently into moist earth (or a seed-starting mix) and keep it hydrated. For outdoor planting, wait until nighttime temps stay above 50°F to avoid frost damage. Bonus: No need to remove the paper—it’ll dissolve naturally as roots grow!
What if my seed paper flowers don’t grow?
Don’t worry—seed paper can be finicky! Common issues include:
No sprouts? Check moisture (too dry = dormant seeds) or warmth (too cold = delayed growth). Try misting daily and moving to a sunnier spot.
Yellowing or wilting? Overwatering or poor drainage might be the culprit. Let the soil dry slightly between waterings.
Mold or fungus? Reduce humidity and improve airflow by spacing plants apart or using a fan lightly.
Troubleshooting tip: If all else fails, gently tear open the paper and replant the seeds in fresh, sterile soil.
Can I use seed paper flowers indoors year-round?
Yes! Many varieties thrive indoors with 12–16 hours of light daily (grow lights work great). Choose low-light tolerant flowers like bachelor’s buttons or cosmos for best results. Place your paper in a shallow tray with water, then transfer to pots once sprouted. Remember: Indoor plants may grow slower—rotate them weekly for even light exposure!
Are there alternatives to seed paper for eco-friendly planting?
If seed paper isn’t your style, try these zero-waste options:
- Seed bombs: Clay and herb mixes you can toss into gardens or wild areas (great for pollinators!).
- Recycled paper seed tapes: Pre-spaced seeds on dissolvable paper strips for easy planting.
- Upcycled containers: Use egg cartons, coffee filters, or even old book pages as seed starters.
Eco tip: Repurpose tea bags (used, unflavored) as mini seed pots—they’re compostable too!
Wrapping up and next steps
Seed paper flowers aren’t just a creative way to brighten up your space—they’re a sustainable and rewarding project that anyone can enjoy! Whether you’re a gardening newbie or a seasoned green thumb, these zero-waste blooms bring joy while giving back to the planet. 🌱
Ready to grow your own? Start small—try making a few seed paper flowers this weekend, then expand your garden with confidence. Every petal you plant is a step toward a greener, more beautiful world. Happy growing! 🌸