
Lawn
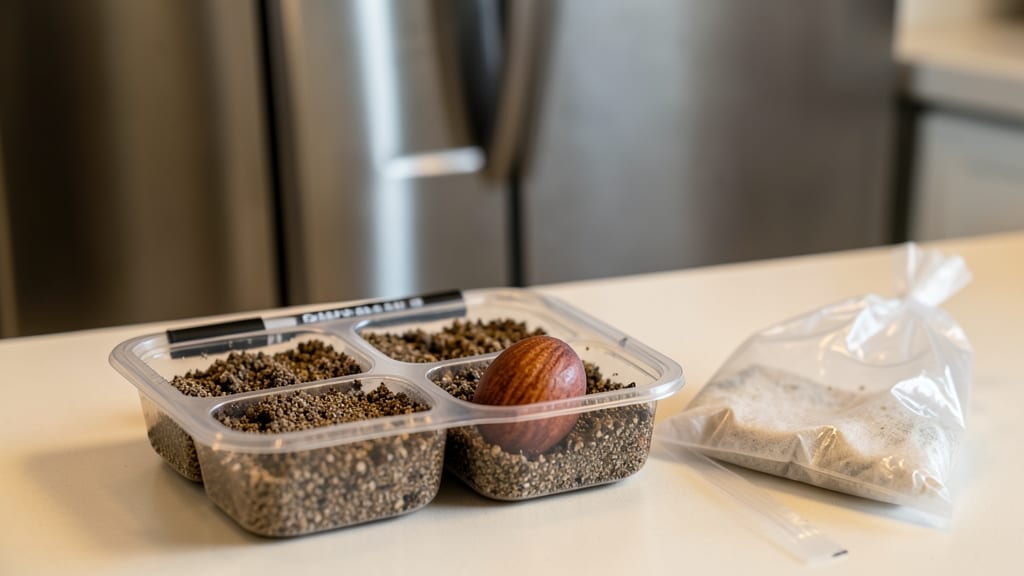
Peach seed stratification in cold, moist sand is the secret to breaking their stubborn dormancy—something I learned after my first batch of seeds sat dry and dormant for months. 🌱 The process mimics winter's natural conditions, tricking seeds into thinking spring has arrived when they're still tucked safely underground. Without this step, germination rates plummet, and you're left staring at empty seed trays by spring.
You'll need just three simple supplies: peach pits (cleaned and dried), coarse sand or perlite, and a sealed container with a lid. The sand stays damp like a wrung-out sponge—not soggy, not bone-dry—while the container spends 60-90 days in your refrigerator's crisper drawer.
This cold, moist environment is where the magic happens, but timing matters: start in late fall for spring planting, or early spring if you're aiming for summer growth.
After stratification, germination takes 2-4 weeks in warm, bright conditions—though some seeds play hard to get and need another month. The first green shoots are worth the wait, though: you'll end up with sturdy seedlings that outpace store-bought trees in both root strength and disease resistance.
Just be patient with slow starters, and avoid the temptation to overwater once they sprout.
This method works for other stone fruit seeds too—plums, cherries, and apricots all benefit from the same cold treatment. The key is consistency: check moisture weekly, and resist the urge to rush the process. Your future peach tree's success starts with these few months of careful prep.
📚 In This Guide
- What you need
- Instructions
- Tips and common mistakes
- Wrapping up and next steps
What you need
- ● Fresh peach seeds: 3–5 clean, plump seeds (harvested from organic or pesticide-free fruit for best results). Pro tip: 🌱 Rinse seeds thoroughly to remove fruit residue before use.
- ● Paper towels or coffee filters: 2–3 sheets (unbleached, seed-free).
- ● Plastic zip-top bags: 1–2 quart-sized bags (resealable, with a tight seal).
- ○ Spray bottle (optional but helpful): 4–8 oz capacity for gentle moisture control.
- ○ Refrigerator or cold stratification setup: A fridge with a crisper drawer (40–50°F/4–10°C ideal) or a DIY cold box (see optional tools).
- ● Pencil or marker: For labeling bags with seed type and date.
- ● Germination tray or small container: For transferring seeds post-stratification (e.g., a shallow dish with drainage holes).
- ● Thermometer: To monitor fridge temps (ensure consistency!).
- ● Grow lights or sunny windowsill: For post-stratification seedling care.
- ● Hydrogen peroxide (3%) or cinnamon: To prevent mold if seeds show signs of spoilage.
- ● Notebook or app: To track stratification progress (e.g., Seed to Seed or a simple spreadsheet).
How to stratify peach seeds for guaranteed spring germination
This cold-moisture trick breaks dormancy naturally—just like wild peaches do.
🌱 Step 1: Extract and Clean the Seeds
Peach pits contain a hard outer shell that must be removed before stratification. Use a sharp knife to carefully slice open the pit along its seam, then pry apart the two halves. Inside, you'll find the seed—it should appear smooth and tan, not shriveled or discolored. Remove any remaining fruit flesh clinging to the seed, as fermentation can introduce mold during stratification.
I like to soak the cleaned seeds in lukewarm water for 24 hours first. This softens the seed coat slightly and helps flush out any residual sugars that might attract pests. After soaking, pat them dry with a paper towel—you want them damp but not dripping. Store them in a sealed container lined with a damp paper towel until you're ready to stratify.
💧 Step 2: Prepare the Cold-Moisture Stratification Mix
Peach seeds need a moist, chilled environment to mimic winter conditions. In a quart-sized container (large enough for 4 seeds), layer the bottom with 2 inches of moistened perlite or coarse sand. This provides both drainage and aeration—critical for preventing rot. The mix should feel like a wrung-out sponge: damp enough to hold moisture but not soggy.
Place the damp paper towel with your seeds on top of the perlite layer. Cover the seeds with an additional 1 inch of the moist mix, then seal the container with plastic wrap or a lid. Poke a few small holes in the lid if using one—you want airflow but minimal moisture loss. Label the container with the date and store it in the refrigerator.
☀️ Step 3: Stratify for 6-8 Weeks at 35-40°F
The magic happens at refrigerator temperatures. Peach seeds require 6-8 weeks of cold stratification to break dormancy. Check the seeds weekly by gently lifting the mix—it should remain consistently moist, never dry or waterlogged. If the top layer feels dry, mist it lightly with water; if it feels soggy, uncover it for a day to air out.
Here's the thing—you won't see any visible changes during this time. The seed is quietly undergoing biochemical processes that prepare it for germination. When you're ready to plant, the seeds will be primed and ready to sprout within 2-4 weeks under the right conditions. If you forget to check, don't worry: peach seeds can tolerate up to 12 weeks of cold treatment without harm.
🌿 Step 4: Plant Stratified Seeds in Warmth
When your stratification period ends, fill 2-3 inch deep pots with a sterile seed-starting mix. Plant each seed ½ inch deep—deeper planting delays germination because the seedling must push through more soil. I like to use small biodegradable pots because they eliminate transplant shock later on. Water the pots gently until the soil is evenly moist but not saturated.
Place the pots in a warm, bright location. Peach seeds germinate best at 70-75°F, so a seedling heat mat helps speed up the process. Keep the soil consistently moist—never let it dry out completely, but avoid soggy conditions. Germination can take 2-4 weeks, so patience is key. Once sprouts appear, move them to a sunny window or under grow lights for 14-16 hours of light daily.
⏰ Step 5: Harden Off Seedlings Before Outdoor Planting
Peach seedlings grow slowly at first, so they need time to acclimate before facing outdoor conditions. About 4-6 weeks after germination, start hardening them off by placing them outside in a sheltered spot for 1-2 hours the first day. Gradually increase their outdoor time over 10-14 days, eventually leaving them out overnight.
Real talk: peach trees grown from seed take 5-7 years to bear fruit, but the journey is worth it for the unique varieties you'll create. The stratification process ensures you'll have strong, viable seedlings ready for planting in spring—no more wasted pits or failed germination attempts. Once hardened off, transplant them into the ground after the last frost date in your area.
Tips & tricks for perfect peach seed stratification
A few subtle adjustments make all the difference between seeds that sprout and seeds that fail. Here's what I've learned after years of trial and error.
Seed Selection: Choose only plump, smooth seeds with no cracks or discoloration—these are your best candidates for successful germination. I've found that seeds from fully ripe, firm peaches (not soft or overripe) perform best. If you're unsure, crack open a few pits to inspect the seeds before committing to the full stratification process.
Moisture Balance: During the 24-hour soak in Step 1, use lukewarm water—not hot or cold. The goal is to soften the seed coat without shocking the seed. After soaking, the paper towel should be damp but not dripping when you handle the seeds. Too much moisture creates anaerobic conditions that can lead to mold, while too little prevents proper hydration for stratification.
Stratification Container: The quart-sized container in Step 2 is perfect for 4 seeds, but if you're working with more, use separate containers rather than overcrowding. I've seen seeds fail to germinate simply because they were packed too tightly in one container—proper airflow is just as important as moisture. For larger batches, consider using small plastic containers with lids that have ventilation holes.
Temperature Consistency: While 35-40°F is ideal for stratification, most home refrigerators maintain this range reliably. If you're concerned about temperature fluctuations, place your container on the middle shelf where temperatures are most stable. Avoid the crisper drawer—it can get too cold and potentially damage the seeds. The consistent chilling mimics winter conditions perfectly, breaking dormancy without stressing the seeds.
Pro Tips for Peach Seed Stratification
- A few subtle adjustments make all the difference between seeds that sprout and seeds that fail. Here's what I've lear...
- Seed Selection: Choose only plump, smooth seeds with no cracks or discoloration—these are your best candidates for su...
- Moisture Balance: During the 24-hour soak in Step 1, use lukewarm water—not hot or cold. The goal is to soften the se...
Frequently asked questions
Got questions about peach seed stratification? You’re not alone! Here are answers to the most common concerns—so you can prep those seeds like a pro and avoid germination headaches next spring.
Why do peach seeds need stratification at all?
Peach seeds (like many stone fruits) have a hard, protective coat that blocks water and oxygen—nature’s way of delaying germination until conditions are ideal. Stratification mimics winter’s cold-moisture cycle, breaking dormancy so seeds sprout reliably when planted. Without it, you might wait years (or never see growth!).
How long should I stratify peach seeds?
For best results, keep seeds in the fridge (33–41°F) for 8–12 weeks. Check moisture weekly—seeds should stay damp but not soggy. Some growers extend stratification to 16 weeks for extra reliability, especially in warmer climates. Pro tip: If you forget, don’t panic! Seeds can handle up to 6 months in cold, moist conditions.
Can I use the freezer instead of the fridge?
While the freezer (0°F) works in a pinch, it’s riskier. Freezing can damage seed viability if cycles aren’t consistent. Stick to the fridge for steady, safe stratification. Alternative: Bury seeds in a insulated container outdoors (where temps dip below 40°F) for a natural approach—just protect them from pests!
What if my seeds mold or rot during stratification?
Mold or foul smells mean over-moisture or poor airflow. Drain excess water immediately, then re-pack seeds in a fresh paper towel or vermiculite. If mold spreads, discard the batch and start fresh. Prevent it: Use a breathable container (like a sealed plastic bag with holes) and avoid tap water—distilled or rainwater is gentler.
Should I plant stratified seeds right after or let them dry out?
Plant them as soon as they finish stratification (no drying needed!). Seeds lose viability quickly once warm. For spring planting, stratify in late fall/winter, then pop them into soil when daytime temps hit 60°F+. Bonus: Soak seeds in warm water for 24 hours before planting to kickstart germination.
Still stumped? Drop your peach seed struggles in the comments—we’ve got troubleshooting tricks up our sleeves!
Wrapping up and next steps
Mastering peach seed stratification unlocks the secret to growing your own fruit tree from scratch—no nursery required! 🌱 By mimicking winter’s chill and moisture, you’ve given those tiny seeds the best shot at sprouting into vibrant seedlings next spring.
Whether you’re a gardening newbie or a seasoned green thumb, this method is your ticket to reliable, low-cost germination.
Ready to watch your efforts bloom? Plant those stratified seeds in well-draining soil and keep them cozy indoors. Before you know it, you’ll be harvesting homegrown peaches—and maybe even sharing the joy with neighbors! 🍑✨