
Lawn
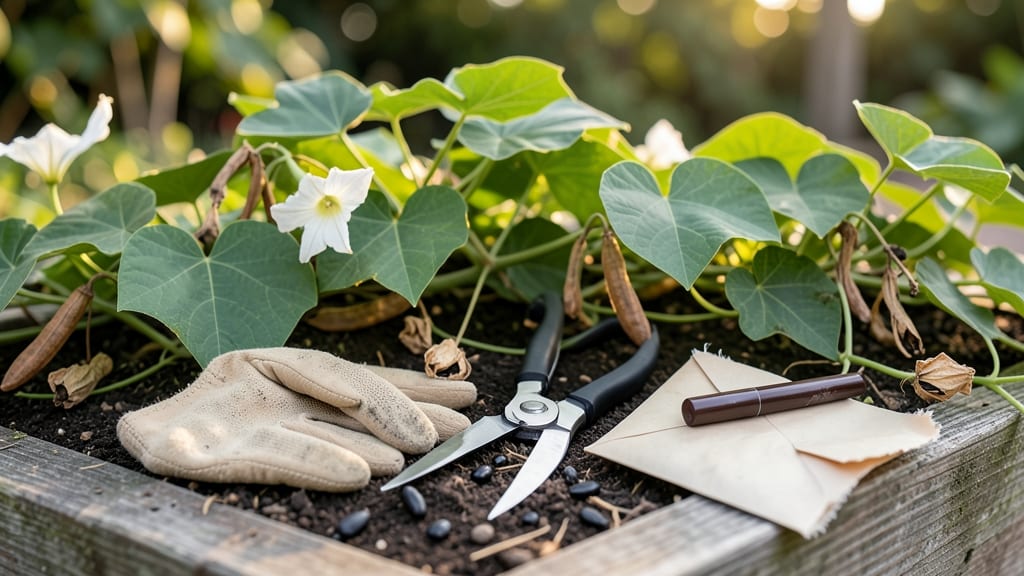
Moonflower seed pods open with a satisfying pop that signals it’s time to harvest. 🌙 These delicate, lantern-like pods hold the secret to growing more of these enchanting night-blooming vines—without buying new seeds.
The key lies in timing: pods turn brown and papery when ripe, then split open on their own, revealing glossy black seeds ready for collection.
Harvesting couldn’t be simpler: just pinch the pods between your fingers, and the seeds spill out like tiny treasures. Store them in a cool, dry place until planting—moonflower seeds stay viable for years if kept dry.
The magic happens when you plant them in warm soil after the last frost; within weeks, you’ll see those familiar heart-shaped leaves emerging.
What makes this process special is the zero-waste cycle—no digging, no mess, just nature’s own packaging. You’ll end up with lush vines that climb fences or trellises, producing those iconic white blooms that open at dusk and close by dawn.
The only challenge? Resisting the urge to harvest all the seeds at once—save a few for next year’s garden.
Works best in zones 9-11, but with a little patience, you can even start seeds indoors for cooler climates. The real reward? A garden that keeps giving, year after year, with minimal effort. Let’s get those pods popping!
📚 In This Guide
- What you need
- Instructions
- Tips and common mistakes
- Wrapping up and next steps
What you need
- ● Mature moonflower seed pods – Ensure they’re fully dry and brown (harvest in late fall/winter). Quantity: 5–10 pods per batch (adjust based on your needs).
- ● Heavy-duty scissors or pruning shears – For cleanly cutting stems (blade length: 4–6 inches).
- ● Brown paper bags or breathable fabric sacks – Size: Large enough to hold pods without crushing (12x18 inches or larger).
- ○ Newspaper or cardboard – For a clean, dry workspace (optional but recommended).
- ● Glove – A pair of gardening gloves to protect your hands from prickly stems.
- ○ Small paintbrush or soft-bristle brush – For gently dislodging stubborn seeds (optional but helpful).
- ● Seed-saving envelopes or jars – For storing seeds long-term (label with the harvest year!).
- ● Fine mesh sieve – To separate seeds from chaff if pods are overly fibrous.
- ● Spray bottle with water – A light mist can encourage reluctant pods to pop open.
- ● Camera or phone – Capture the magical moment of pods bursting open!
Step-by-step guide to harvesting moonflower seeds naturally
Here’s how to collect seeds without waste—just let nature do the work.
🌿 Step 1: Identify Ripe Seed Pods
Moonflower seed pods turn from green to a dry, papery brown when ready. Look for pods that feel light when gently squeezed—they’ll rattle slightly inside. Avoid pods still attached to stems or showing any green; those aren’t mature yet.
I check pods in the morning after dew dries, as moisture can delay the natural opening process. If you see tiny cracks or splits along the seams, that’s your signal to act quickly—pods pop open within hours once fully ripe.
🌱 Step 2: Prepare Your Harvesting Surface
Spread a large, lightweight fabric (like an old sheet or mesh bag) under the plant. This catches seeds as pods burst open without damaging them. A dark-colored surface works best—seeds stand out against the contrast, making collection easier.
I avoid using paper or cardboard because seeds can stick to damp surfaces. Keep the fabric taut but not stretched tight; you’ll want seeds to roll freely when pods release them.
☀️ Step 3: Trigger the Natural Pop-Open Process
On a dry, sunny day, gently shake the plant’s stems or tap the pods with your fingers. The pods should split open with a soft pop, releasing seeds onto your fabric. If pods resist, leave them overnight—they’ll open naturally when temperatures rise.
Don’t force open unripe pods. They’ll crumble and spill immature seeds that won’t germinate. Watch for seeds to scatter freely; if pods stay closed, wait another day for full ripeness.
🪴 Step 4: Collect and Store Seeds
Once pods release seeds, carefully gather them into a paper envelope or small mesh bag. Store in a cool, dry place (like a seed jar) until ready to plant. Label with the harvest date—moonflower seeds stay viable for 2-3 years if kept dry.
I add a silica gel packet to my seed storage to absorb any lingering moisture. This prevents mold and keeps seeds fresh for next season’s planting.
⏰ Step 5: Clean Up and Prepare for Next Season
After harvest, trim any remaining empty pods from the plant to redirect energy to next year’s growth. Compost leftover plant debris—it enriches soil naturally without waste.
Here’s the thing—moonflower vines die back after seed production, so prune stems to ground level. This encourages new shoots in spring and keeps your garden tidy.
Tips & tricks for perfect moonflower seed pod harvesting
These little tricks will help you turn seed collection into a seamless, rewarding experience—no wasted effort or missed seeds.
Timing is Everything: Morning is your best bet for harvesting moonflower seeds. The dew has dried, but the pods haven't fully expanded from overnight moisture. I've found that pods opened within 2-3 hours after dew evaporated—this is when they're most likely to pop open naturally. If you're harvesting later in the day, be patient and check again the next morning.
Surface Selection Matters: Dark-colored fabrics work best for catching seeds because they create contrast, making it easier to spot the tiny black seeds against the surface. An old black bedsheet or a dark-colored mesh bag works perfectly. I've also used a dark-colored tarp in larger gardens—it's easy to shake out seeds afterward without losing any to the wind. Avoid white or light-colored fabrics, as seeds can blend in and become nearly invisible.
The Gentle Touch Technique: When triggering the pods to open, use a feather duster or soft paintbrush to gently tap the pods instead of your fingers. This prevents accidentally crushing unripe pods or damaging the plant structure. I've seen beginners get frustrated when pods don't open—often because they were too rough. A light touch is key, especially when working with delicate moonflower vines.
Storage Wisdom: While moonflower seeds stay viable for 2-3 years, I've found that adding a small silica gel packet to your seed storage container makes all the difference. The packet absorbs any lingering moisture that could cause mold or premature germination. I store mine in small paper envelopes with the date written on them—this helps me keep track of how fresh they are for planting.
Pro Tips for Moonflower Seed Pods
- These little tricks will help you turn seed collection into a seamless, rewarding experience—no wasted effort or missed seeds.
- Timing is Everything: Morning is your best bet for harvesting moonflower seeds.
- Surface Selection Matters: Dark-colored fabrics work best for catching seeds because they create contrast, making it easier to spot the tiny black seeds against the surface.
Frequently asked questions
Got questions about harvesting moonflower seed pods? You’re not alone! Here’s a quick guide to the most common curiosities—plus tips to make your zero-waste process a breeze.
How do I know when moonflower seed pods are ready to harvest?
Moonflower seed pods are ready when they turn tan or light brown and start splitting open on their own (usually late summer to early fall). If the pods are still green or firm, they need more time—wait until they’re dry and brittle to the touch. Pro tip: Harvest on a dry, sunny morning to avoid humidity issues!
Do I need to wear gloves when handling moonflower seed pods?
While moonflower pods aren’t toxic, they can be sticky and may irritate sensitive skin. Wearing thin gloves (like nitrile or cotton) helps protect your hands from sap and makes the process cleaner. If you’re allergic to Ipomoea plants, test a small area first. Safety first!
What’s the best way to store harvested moonflower seeds?
Store seeds in a paper envelope or breathable container (like a mesh bag) in a cool, dry place. Avoid plastic bags—moisture can cause mold. Label them with the harvest date, and keep them out of direct sunlight. Seeds stay viable for 1–2 years if stored properly. Pro tip: Add a silica gel packet to absorb excess moisture!
Why won’t my moonflower seed pods open naturally?
Pods may resist opening if they’re too moist or harvested too early. Try these fixes:
- Let them dry indoors for 2–3 days in a warm, dark spot.
- Gently squeeze the pod between your fingers to encourage splitting.
- Check for pests (like weevils)—discard damaged pods.
Can I use moonflower seeds for anything other than planting?
Beyond gardening, moonflower seeds can be:
- Used in DIY crafts (e.g., seed paper, jewelry).
- Added to wildlife feeders for birds (though they’re not a primary food source).
- Composted for nutrient-rich soil.
Wrapping up and next steps
Harvesting moonflower seed pods is a rewarding way to embrace zero-waste gardening while enjoying nature’s clever design! 🌙 With just a few simple steps—patience, the right timing, and a gentle touch—you can effortlessly collect seeds for future planting or creative projects.
Whether you’re a seasoned gardener or a curious beginner, this method proves that sustainability starts with small, mindful actions.
Ready to put your newfound knowledge to work? Start by identifying moonflowers in your garden or local green spaces, then follow the natural pop-open technique to harvest seeds with ease. Share your zero-waste wins with fellow plant lovers—your efforts might just inspire others to grow (literally and figuratively)! 🌱