
Planting
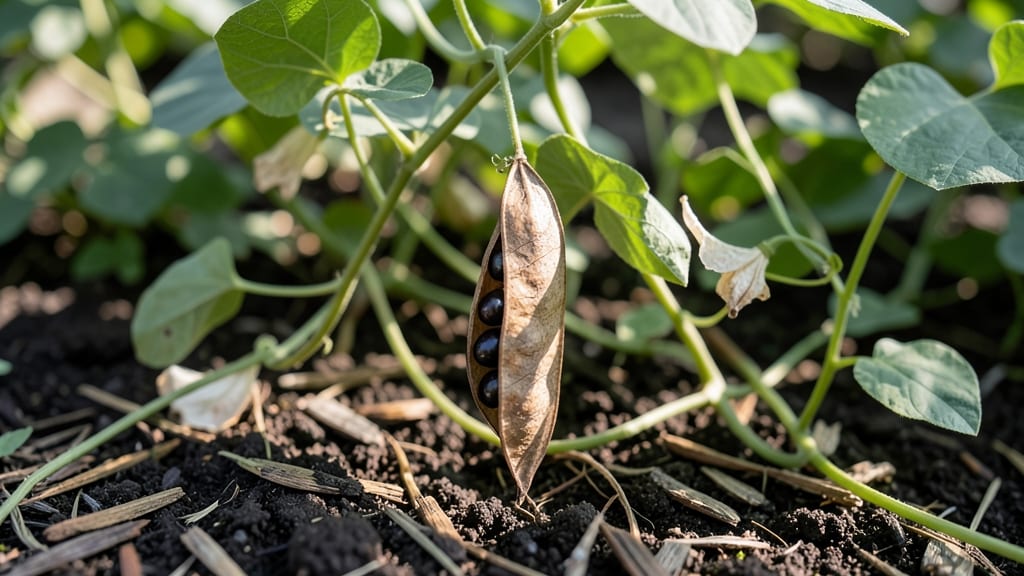
Harvesting the moonflower plant seed pod at the right moment makes all the difference—wait too long, and they burst open before you can collect them. 🌙 I’ve learned the hard way that these delicate pods need careful timing, especially if you want those dreamy white blooms in just 60 days after planting.
The key is knowing when they’re ripe (not too soft, not too dry) and how to handle them without damaging the seeds inside.
Once you’ve got those pods in hand, drying them properly is just as critical as harvesting. Spread them out in a cool, dry place for about 2 weeks, turning them occasionally to prevent mold.
Then comes the fun part: cracking open the pods to reveal the flat, dark seeds—each one a promise of next summer’s moonlit blooms. Just be gentle; these seeds bruise easily, and damaged ones won’t sprout.
Cold-stratifying the seeds for 4-6 weeks in the fridge mimics winter’s natural chilling period, tricking them into thinking they’ve survived a season. Plant them ½ inch deep in well-draining soil after stratification, and keep the soil consistently moist until germination.
With patience, you’ll see those first delicate tendrils pushing through the soil in 2-3 weeks, leading to blooms that open only under the moonlight.
Even the best gardeners face challenges—like seeds that refuse to sprout or plants that flop instead of climbing. But with the right timing and care, moonflowers reward you with vibrant, fragrant blooms that turn your garden into a nighttime spectacle.
Here’s how to avoid the most common pitfalls and set yourself up for success.
📚 In This Guide
- What you need
- Instructions
- Tips and common mistakes
- Wrapping up and next steps
What you need
- ● Moonflower seeds (Ipomoea alba) – 5–10 seed pods (or ~20–30 individual seeds; pods contain 2–4 seeds each). Opt for organic, non-GMO seeds for best results.
- ● Cold-stratification supplies: Refrigerator or cold frame (maintain 35–45°F (2–7°C) for 60 days).
- ● Paper towels or damp peat moss (for moisture retention).
- ● Plastic bag or airtight container (to create humidity).
- ● Planting containers: Seed-starting trays (with drainage holes) OR
- ● Small pots (3–4 inches deep) filled with seed-starting mix.
- ● Growing medium: High-quality potting soil (sterilized, well-draining, and peat-based). Avoid garden soil—it’s too dense!
- ● Spray bottle (for gentle watering).
- ● Grow lights or sunny windowsill (south-facing, 6+ hours of light/day after germination).
- ● Plant labels (to track stratification dates).
- ● Humidity dome or plastic wrap (to speed up germination).
- ● Fertilizer (balanced 10-10-10 or fish emulsion once seedlings sprout).
- ● Trellis or stakes (for supporting vines once planted outdoors).
- ○ Heat mat (optional for faster germination if your home is chilly).
How to grow moonflower vines from seed pods
Cold-stratification unlocks these fast-growing vines—here's how to coax dramatic blooms from seed in just two months.
🌱 Step 1: Harvest and Prepare Fresh Seed Pods
Collect fully mature moonflower seed pods when they turn brown and begin splitting open naturally. I always harvest mine in late fall after the first frost—this ensures maximum germination success. Gently twist each pod to release the large, flat seeds inside. Don't wash them; the natural oils on the seed coat help with moisture regulation during stratification.
Spread the seeds on a paper towel to dry completely for 24 hours. This prevents mold during the cold treatment. Store them in a labeled paper envelope in your refrigerator's crisper drawer where temperatures stay consistently between 34-40°F. The cold period mimics winter conditions and breaks seed dormancy—a critical step for moonflowers that won't germinate otherwise.
⏰ Step 2: Cold-Stratify for 60 Days
Place the dried seeds in a small container with a damp (not wet) paper towel at the bottom. I use a plastic bag with tiny holes poked in it—just enough to allow airflow while maintaining humidity. Seal it and place it back in the refrigerator for exactly 60 days. Check the seeds every two weeks by gently pressing a seed between your fingers—it should feel slightly softer but still hold its shape.
This cold treatment ensures you'll see germination within 7-14 days after removing them from stratification. I mark my calendar 60 days out from harvest date so I don't forget to move them to warmer conditions. The refrigerator's consistent temperature is key—fluctuating temps can confuse the seeds and delay germination.
☀️ Step 3: Sow Stratified Seeds in Warm Soil
After 60 days, remove the seeds and plant them ½ inch deep in well-draining potting mix. I use a heat mat set to 75-80°F under my seed trays to encourage rapid germination. Moonflower seeds are large, so I plant just 2-3 seeds per cell in a 4-inch pot—thinning later prevents root competition. Water gently until moisture reaches 1 inch deep, then maintain even dampness without soggy conditions.
Place the trays in bright, indirect light immediately. You'll see the first sprouts within 5-7 days—look for the seed coat splitting open to reveal the first true leaves. Avoid direct sunlight at this stage; seedlings can scorch easily. The heat mat keeps soil temps warm enough to prevent leggy growth while the seeds establish roots.
🌿 Step 4: Transplant and Train Vines
When seedlings develop 3-4 sets of true leaves (about 4-6 weeks after sowing), transplant them into individual 1-gallon containers or directly into the garden after all frost danger has passed. Moonflowers need full sun for maximum vine growth, so choose a location with 6+ hours of direct sunlight daily. I stake each plant immediately with 6-foot tall trellises—these vines grow aggressively and need support to climb.
Pinch back the main stem when it reaches 12 inches to encourage bushier growth. This creates more lateral branches where flowers will develop. Water deeply 2-3 times per week, letting the top 2 inches of soil dry between waterings. The large leaves transpire heavily, so consistent moisture prevents wilting during hot afternoons.
✂️ Step 5: Deadhead and Extend the Blooming Season
Moonflowers bloom only at night, so you'll rarely see them open during the day. The large white blooms appear in late afternoon and fade by morning. To prolong flowering, deadhead spent blooms by removing the entire flower stem back to the nearest leaf node. This redirects the plant's energy into producing new flowers rather than setting seed.
In cooler climates, I treat moonflowers as annuals, but in zones 8-11, they may self-seed prolifically. If you want to save seeds for next year, allow a few flowers to mature completely before harvesting the pods. The vines die back in winter but often resprout from the base in spring if given protection from frost.
Tips & tricks for perfect moonflower seed germination
Moonflowers demand patience—but these small adjustments make all the difference between thriving vines and frustrating failures.
Timing Secret: The 24-hour drying period in Step 1 isn't just about preventing mold—it's about creating the perfect seed coat condition. Seeds dried too quickly may crack during stratification, while seeds dried too slowly risk mold. Aim for a crisp paper towel after drying; seeds should feel light but not brittle when gently squeezed. This balance ensures the seed's natural oils remain intact for successful cold treatment.
Temperature Matters: While the 34-40°F range in Step 1 is ideal, your refrigerator's crisper drawer might fluctuate. Place a thermometer inside with your seeds to monitor temps—consistency is more important than hitting exact numbers. If your fridge runs warmer, move seeds to the coldest shelf instead. The key is avoiding temperature swings that confuse the seeds' dormancy cycle.
Heat Mat Hack: In Step 3, that 75-80°F heat mat isn't just about speed—it's about preventing leggy seedlings. Without proper warmth, moonflower sprouts stretch toward light, becoming weak and spindly. If you don't have a heat mat, place seed trays on top of your refrigerator (not inside) for gentle radiant heat. Just avoid direct sunlight during this stage—the combination of heat and light causes scorch marks on delicate seedlings.
Transplanting Strategy: When moving seedlings in Step 4, focus on root health over size. Even if your plants have only 3 sets of leaves (the minimum), transplant them if roots are circling the pot. Moonflowers establish quickly once in good soil—don't wait for perfect size. Water thoroughly before transplanting to reduce shock, and use a small trowel to create deep planting holes that accommodate the root ball without bending.
Pro Tips for Moonflower Plant Seed Pod
- Moonflowers demand patience—but these small adjustments make all the difference between thriving vines and frustratin...
- Timing Secret: The 24-hour drying period in Step 1 isn't just about preventing mold—it's about creating the perfect s...
- Temperature Matters: While the 34-40°F range in Step 1 is ideal, your refrigerator's crisper drawer might fluctuate. ...
Frequently asked questions
Got questions about moonflower seed pods? You’re not alone! Here are answers to the most common queries—from planting tips to troubleshooting—so you can grow these enchanting night-bloomers with confidence.
How long do moonflower seed pods take to sprout after planting?
With cold stratification (4–6 weeks in the fridge), moonflower seeds typically sprout in 7–21 days after planting outdoors. Keep soil consistently moist (not soggy) and place pots in a warm, sunny spot. Patience pays off—these beauties reward you with fast growth once they break dormancy!
Can I skip cold stratification for moonflower seed pods?
Technically yes, but expect slower, uneven germination (or none at all!). Stratification mimics winter’s chill, breaking seed dormancy. For best results, always cold-stratify for 4–6 weeks. Pro tip: Mix seeds with damp peat moss in a sealed bag—no fancy equipment needed!
When is the best time to plant moonflower seed pods for summer blooms?
Aim to plant 60–70 days before your last frost date (spring) or 8–10 weeks before summer heat arrives (late winter for warm climates). Moonflowers thrive in heat but need time to establish roots. For a second flush of blooms, try a fall planting in mild zones!
Why aren’t my moonflower seed pods opening or producing flowers?
Common culprits:
- Insufficient sunlight: Moonflowers need 6+ hours of direct sun daily.
- Poor soil drainage: Roots rot in soggy soil—amend with compost.
- Overcrowding: Thin seedlings to 12–18 inches apart for airflow.
- No stratification: Double-check your cold treatment!
Are there alternatives to moonflowers for fast-growing night blooms?
Yes! Try these low-maintenance night-blooming plants:
- Evening Primrose (Oenothera) – Blooms in 50–60 days; drought-tolerant.
- Four O’Clocks (Mirabilis jalapa) – Vibrant colors; thrives in heat.
- Nicotiana (Flowering Tobacco) – Fragrant blooms in 45–70 days.
Wrapping up and next steps
Growing moonflower seed pods with cold stratification is a rewarding journey that brings vibrant, dreamy blooms in just 60 days! By following the right steps—from selecting healthy seeds to mimicking winter’s chill—you’ll unlock faster germination and lush, fragrant flowers that thrive in your garden.
Whether you’re a seasoned gardener or a curious beginner, this method makes it easy to harness nature’s magic with minimal effort.
Ready to transform your space? Start your moonflower seeds today—plant them in a sunny spot, nurture their growth, and soon you’ll be rewarded with enchanting nighttime beauty. Happy planting! 🌙✨