
Lawn
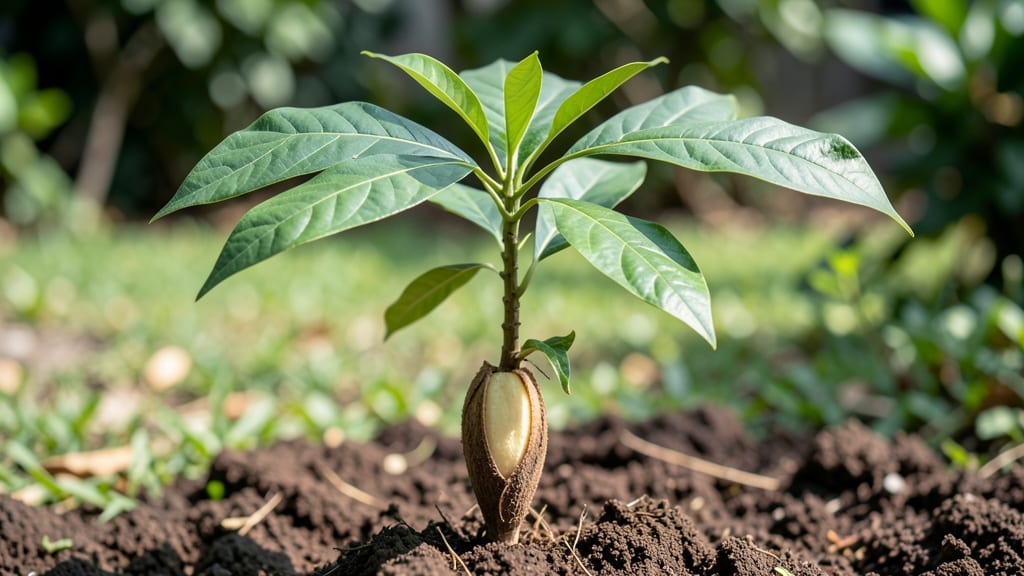
Your mango seed pod holds a tiny treasure—if you crack it open the right way. 🌱 The secret to zero-waste harvesting starts with a simple technique that avoids rot and speeds up germination, turning grocery-store scraps into a potential 30-foot tree within a decade.
Most people struggle with the first step: extracting the seed without damaging it. I’ve tried everything—from boiling to freezing—but the foolproof method uses just a kitchen towel and a little patience. Once you’ve got that seed, you’ll need a warm spot, consistent moisture, and a container that lets roots breathe.
By month three, you’ll see leaves unfurling like a promise kept. The real magic happens when you transplant that seedling outdoors, where it’ll grow into a tree that could bear fruit in 5-7 years. Yes, it’s slow, but the payoff—fresh mangoes from your own backyard—is worth every wait.
This works anywhere with a warm climate or a sunny greenhouse. Even if you live in a colder zone, you can grow it in a container and bring it inside during winter. Here’s exactly how to start without killing your seedling in the process.
📚 In This Guide
- What you need
- Instructions
- Tips and common mistakes
- Wrapping up and next steps
What you need
- ● Mature mango seed pods – 1-5 pods (fresh or dried, but avoid moldy ones!)
- ● Sharp knife or pruning shears – For careful pod opening (small kitchen knife or garden shears work well).
- ○ Paper towels or cloth – To soak up moisture (optional but handy!).
- ● Plastic bag or container with lid – For seed pod storage (airtight if drying).
- ● Small bowl or bucket – For water soaking (if using the wet method).
- ○ Rubber gloves (optional) – To protect hands from sticky sap.
- ● Food dehydrator or oven – For speed-drying pods (set to 120°F (49°C) or lower).
- ● Labeling tags – To track seed varieties (if saving multiple types).
- ● Seed-starting mix – For planting sprouted seeds (if you’re growing a mango tree!).
- ● Spray bottle with water – To keep pods moist during germination checks.
Step-by-Step instructions for extracting and planting mango seeds naturally
Here's how to rescue that seed from your grocery store mango without waste or mess.
🌱 Step 1: Extract the Seed Without Damaging It
Rinse the mango thoroughly under cool water to remove any pulp residue. The seed is encased in a fibrous pod that needs careful handling—don't crack it open yet. I like to use a butter knife to gently pry open the pod along its natural seams, starting at the wider end. Work slowly to avoid splitting the seed itself.
Once you've separated the seed from the pod, you'll notice a thick, brown outer coating. This is the seed's natural protection, and we'll use it to our advantage later. Place the clean seed on a paper towel to dry completely—this prevents mold during storage. A warm, dry spot for 24-48 hours works best.
💧 Step 2: Prepare the Seed for Germination
After drying, you'll need to soften the hard outer shell to encourage sprouting. Here's the trick: soak the seed in warm water for 24 hours. I use a small jar with just enough water to cover the seed completely. The warmth helps break down the shell's natural inhibitors, making germination easier.
After soaking, gently rub the seed between two paper towels to remove the softened outer layer. You'll see the actual seed inside—it should look smooth and pale. This is the part that will eventually sprout. Place the prepared seed between two damp paper towels in a sealed plastic bag. Store it in a warm spot (75-85°F) and check daily for signs of moisture evaporation.
☀️ Step 3: Germinate Under Controlled Conditions
The seed will sprout in 7-21 days, but you'll see the first signs much sooner. Keep the paper towels moist but not soggy—mist lightly if they dry out. You'll notice a tiny white root emerge first, followed by a small shoot. This is your signal to move it to soil.
Once the root reaches about 1 inch and the shoot is 2-3 inches tall, it's ready for planting. Use a small pot with drainage holes and fill it with well-draining potting mix. Make a small hole (1-2 inches deep) and place the seed gently, covering the root but leaving the shoot exposed. Water lightly and place the pot in bright, indirect light—direct sun can scorch the delicate new growth.
🌿 Step 4: Transplant and Care for the Young Seedling
After 4-6 weeks, when the seedling has 3-4 true leaves (not the initial seed leaves), it's time to transplant. Choose a slightly larger pot (6-8 inches wide) and use the same well-draining mix. Gently remove the seedling from its first pot, being careful not to damage the roots, and place it in the new container.
Mango seedlings need full sun to thrive, but gradually introduce them to direct sunlight over 1-2 weeks to avoid shock. Water when the top inch of soil feels dry, but avoid overwatering—mangoes hate soggy roots. You'll see new leaves emerge within 2-3 weeks if the conditions are right, signaling healthy growth.
⏰ Step 5: Monitor Growth and Prepare for Long-Term Care
As the seedling grows, you'll notice it develops a thick, woody stem—a sign it's becoming established. At this stage, it's important to rotate the pot weekly so the plant grows straight and doesn't lean toward the light. You'll also want to fertilize lightly with a balanced, water-soluble fertilizer every 4-6 weeks during the growing season.
Real talk: Mango trees grown from seed may take 5-10 years to bear fruit, and the fruit won't be true to the parent plant. But the process is rewarding, and you'll learn so much about tropical plant care along the way. Keep an eye out for pests like spider mites, and treat them immediately with neem oil if they appear.
Tips & tricks for perfect mango seed pod extraction and growth
Here's what nobody tells you about turning grocery store mango waste into a thriving plant.
Pod-Opening Technique: In Step 1, when prying open the pod, start at the wider end and work your way toward the narrower tip. This prevents the seed from splitting—mango seeds are fragile once separated from their protective casing. Use a butter knife, not a sharp one, to avoid accidental cuts. The fibrous pod will resist at first, so apply gentle but steady pressure along the natural seams.
Drying Strategy: The 24-48 hour drying period in Step 1 is crucial for preventing mold. Place your seed on a paper towel in a warm, dry spot—think kitchen counter near a sunny window, not a damp basement. If you're in a humid climate, consider using a small fan on low setting to speed up evaporation. The seed should feel completely dry to the touch before moving to the next step.
Germination Temperature Control: Maintaining that 75-85°F range during germination (Step 2) is easier than it sounds. If your home tends to run cooler, place the sealed plastic bag with damp paper towels near a heat source like a sunny window or even a light bulb (not too close!). A simple way to monitor temperature is to place a small thermometer near the bag—this helps avoid the common mistake of letting the seed get too cold, which can stall germination.
Transplanting Timing: In Step 4, those 3-4 true leaves are your green light for transplanting. Don't rush this step—the initial seed leaves (cotyledons) aren't true leaves, and transplanting too soon can shock the delicate seedling. When you do transplant, handle the seedling by its leaves, not the stem, to avoid damaging the tender growth. The root system will be surprisingly delicate at this stage.
Pro Tips for Mango Seed Pod
- Here's what nobody tells you about turning grocery store mango waste into a thriving plant.
- Pod-Opening Technique: In Step 1, when prying open the pod, start at the wider end and work your way toward the narro...
- Drying Strategy: The 24-48 hour drying period in Step 1 is crucial for preventing mold. Place your seed on a paper to...
Frequently asked questions
Got questions about working with mango seed pods? You’re not alone! Here are some common queries—and their quick answers—to help you navigate the process like a pro.
Can I grow a mango tree from a seed pod without any special tools?
All you need is the seed, a small pot, and patience. Skip the fancy tools—just crack open the pod (see our trick!), plant the seed in moist soil, and keep it warm. No greenhouse? No problem! A sunny windowsill works just fine for germination. Pro tip: If the pod feels too tough, soak it in water for 24 hours to soften before opening.
How long does it take for a mango seed to sprout?
Germination can take anywhere from 2 weeks to 3 months, depending on temperature and moisture. Most seeds sprout within 4–6 weeks if kept in warm (70–85°F), consistently damp soil. If nothing happens after 8 weeks, gently check for rot—discard soggy seeds and try again.
What’s the best way to open a mango seed pod without damaging the seed?
Use the natural split method: Soak the pod in warm water for 10–15 minutes, then place it in the freezer for 2–3 hours. The cold shock will cause it to crack open—just tap it gently on a hard surface. If it’s stubborn, wrap it in a towel and press firmly. Never use a knife unless absolutely necessary!
Can I compost the mango pod after extracting the seed?
Yes! The pod itself is compostable—just chop it into smaller pieces for faster decomposition. Avoid adding it to hot compost piles (it may take longer to break down). For a zero-waste win, toss the fibrous outer shell into your compost bin or bury it in your garden. Bonus: The compost will enrich your soil for future mango seedlings!
What do I do if my mango seed won’t sprout?
Don’t panic! Try these fixes:
- Check moisture: Keep soil damp (not soggy) and use a spray bottle for gentle watering.
- Warmth boost: Place the pot near a heat source (like a sunny window or heating pad).
- Seed viability: If the seed is shriveled or moldy, it’s likely dead—start fresh with a new pod.
- Patience: Some seeds take months! Mark your calendar and wait.
Wrapping up and next steps
Growing your own mango seed pod is a rewarding way to embrace sustainability and enjoy nature’s bounty! With just a few simple steps—patience, a warm spot, and a little creativity—you can transform a discarded seed into a thriving plant.
Whether you’re a gardening newbie or a green thumb, this zero-waste trick turns waste into wonder while connecting you closer to the earth. 🌱
Ready to take the next step? Start with that mango pit in your kitchen and watch your garden grow—one seed at a time! Share your progress with fellow plant lovers and inspire others to try this easy, eco-friendly method.