
Lawn
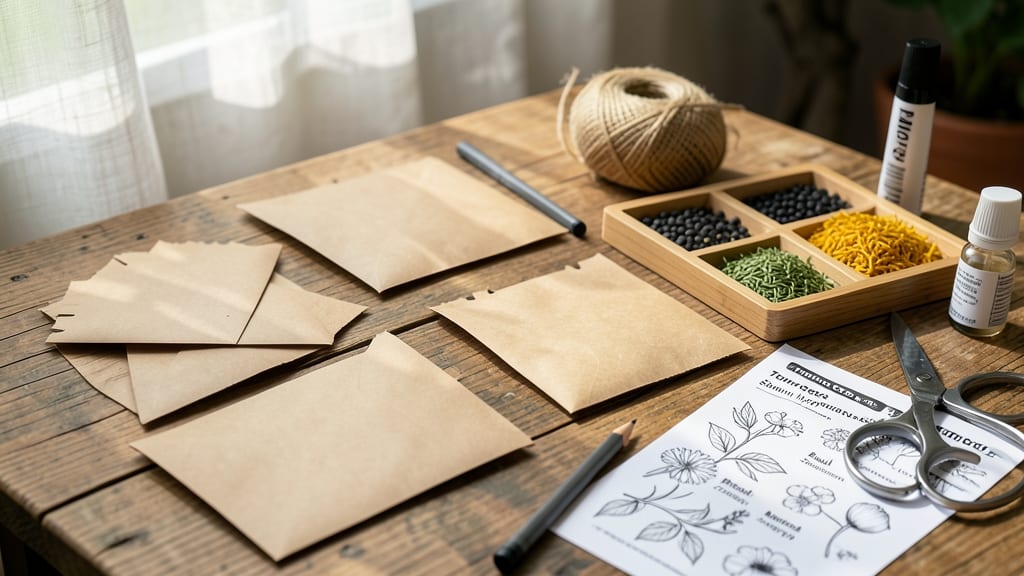
Making seed packets turns your garden's leftovers into next year's starters—no twist ties or wasted paper needed. 🌱 I learned this trick after saving seeds from my heirloom tomatoes, and now I stockpile packets that cost pennies to make.
The best part? You'll never buy seeds again for your favorite varieties, and you'll cut plastic waste by keeping the cycle closed.
All you need are pillowcase envelopes (or even folded paper), a pencil, and a dry, dark spot for storage. Label each packet with the plant name, year, and germination notes—trust me, you'll forget what "Big Beef" was by next spring.
For extra protection, add a silica gel packet to keep moisture out, which preserves viability for 3-5 years for most seeds.
Once sealed, these packets become your garden's time capsule. Imagine opening them next winter and planting varieties you can't find in stores—heirloom beans, disease-resistant tomatoes, or rare flowers—all ready to grow.
The process takes less than 15 minutes per batch, and the satisfaction of watching your saved seeds sprout is unmatched.
Works for any seed type, from tiny lettuce to large squash. Here's how to do it without a single twist tie—just paper, seeds, and a little patience. Let's get started!
📚 In This Guide
- What you need
- Instructions
- Tips and common mistakes
- Wrapping up and next steps
What you need
- ● Seed paper or recycled paper: 1–2 sheets (8.5" x 11" or A4), 100% post-consumer waste (e.g., printer paper, newspaper, or seed-embedded paper).
- ● Non-toxic glue: 1 small bottle (e.g., Mod Podge or white school glue—avoid PVA with high acidity).
- ● Seeds: 1–2 tbsp of your chosen variety (e.g., wildflowers, herbs, or veggies). Tip: Use organic, untreated seeds for best results! 🌱
- ● Water: Small bowl or spray bottle for dampening.
- ● Scissors or paper cutter: For clean edges (a craft knife works too!).
- ● Rolling pin or smooth bottle: To flatten the paper evenly.
- ○ Twine or hemp string: 1–2 feet (for sealing, optional but adds rustic charm).
- ○ Stencil or template: Optional—cut shapes (hearts, squares) for creative flair!
- ● Drying rack or flat surface: Cover with parchment paper to prevent sticking.
Step-by-step instructions for creating zero-waste seed pods
Here's how to transform harvested seeds into professional-quality, twist-free packets—no fancy tools required.
🪴 Step 1: Harvest and Dry Seeds Completely
Collect mature seeds from your plants and spread them in a single layer on a clean, dry surface. I use a baking sheet lined with parchment paper because it prevents moisture buildup and makes cleanup effortless. Let them dry for 7-10 days in a warm, dry spot with good airflow—75-80°F works best. You'll know they're ready when the seed coats feel brittle and break easily between your fingers.
This drying phase is critical. If seeds remain damp, they'll mold inside the packets. I tap the seeds gently against the paper to separate them from any remaining plant debris. A fine-mesh strainer works well for this if you have a lot of seeds.
📝 Step 2: Gather Packaging Materials
You'll need 4-6 sheets of kraft paper (about 4x6 inches each), a small envelope for labels, and a beeswax or flour-based sealant (like beeswax wraps or homemade flour paste). I cut my kraft paper into 3x4-inch rectangles—small enough to fit standard seed packets but large enough to hold 1-2 teaspoons of seeds. The envelope should be just big enough to hold the packet and label.
For the sealant, I mix 1 part beeswax with 2 parts pine resin and 1 part jojoba oil in a double boiler until melted. This creates a flexible, water-resistant seal that lasts years. If you're short on time, a simple flour-water paste works too—just mix equal parts flour and water until it thickens into a paste.
✂️ Step 3: Assemble and Seal the Packets
Place 1 teaspoon of seeds in the center of each kraft paper rectangle. Fold the paper in half lengthwise, then fold the sides inward like an envelope—this creates a twist-free, flat packet that stores neatly. Brush the open edge with your sealant, then press a second sheet of paper over it to create a double seal. Let it dry completely before handling.
I label each packet immediately with the seed type, harvest date, and germination instructions using a fine-tip permanent marker. For extra durability, I place the labeled packet inside the small envelope and seal that with another dab of wax. This double protection keeps seeds dry and legible for years.
📑 Step 4: Store and Organize for Next Season
Store the sealed packets in a cool, dark place—I use a glass jar with a tight lid in my pantry. The darkness prevents light-induced germination, while the cool temperature slows moisture loss. Check them annually: if the sealant feels dry or cracked, re-seal with fresh wax. You'll see condensation inside if moisture is an issue—fix it immediately by transferring seeds to a new packet.
For organization, I sort packets by plant family or bloom time. A simple mason jar divided into sections works perfectly. This system keeps my seed collection tidy and makes it easy to grab what I need when planning next year's garden.
Tips & tricks for perfect seed pods
These little details make all the difference between seed packets that last and ones that fail—here's what I've learned after years of perfecting my system.
Drying is Non-Negotiable: The 7-10 day drying period at 75-80°F isn't just a suggestion—it's the secret to preventing mold. I've ruined batches by rushing this step, and trust me, you don't want to deal with musty seeds later. For faster drying, place your baking sheet near a sunny window (just avoid direct sunlight that can overheat). If you're in a humid climate, consider using a small fan on low to improve airflow without disturbing the seeds.
Paper Prep Matters: When cutting your kraft paper to 3x4-inch rectangles, use a sharp knife or paper cutter for clean edges. Uneven cuts make sealing difficult and can create weak spots where moisture seeps in. I like to fold my paper rectangles in half first to create a crease guide—this makes the envelope-style folding in Step 3 much easier. Pro tip: Use a ruler to ensure consistent measurements across all packets.
Sealant Science: The beeswax-pine resin-jojoba oil blend creates the most durable seal, but if you're short on time, the flour-water paste works surprisingly well. For extra protection, I add a tiny drop of essential oil (like lavender) to my sealant—it repels pests naturally. When applying the sealant, work quickly but don't rush; you want an even coat that's thick enough to prevent moisture but thin enough to dry properly. A small silicone brush works perfectly for this.
Organization Hack: Instead of just sorting by plant family, I also color-code my envelopes with a dab of wax in different colors (green for vegetables, purple for flowers, etc.). This visual system makes it instantly obvious where to find what I need. For large collections, I use a clear plastic bin with removable dividers—each section holds packets from one growing season, making inventory management effortless.
Pro Tips for Make Seed Packets
- These little details make all the difference between seed packets that last and ones that fail—here's what I've learned after years of perfecting my system.
- Drying is Non-Negotiable: The 7-10 day drying period at 75-80°F isn't just a suggestion—it's the secret to preventing mold.
- Paper Prep Matters: When cutting your kraft paper to 3x4-inch rectangles, use a sharp knife or paper cutter for clean edges.
Frequently asked questions
Got questions about crafting your own seed packets? You’re not alone! Here are some of the most common queries—and their answers—to help you get started with confidence.
Can I reuse old seed packets for my DIY versions?
Old seed packets make perfect templates for your DIY versions. Just clean them thoroughly, remove any outdated info, and repurpose the design. Pro tip: Use them as stencils for tracing onto new paper or fabric!
How long do homemade seed packets last?
Homemade seed packets can last 1–3 years if stored properly in a cool, dry place (like a sealed jar or airtight container). For longer shelf life, add a silica gel packet to absorb moisture. Always label with the harvest date!
What if my seeds won’t stay inside the packet?
If seeds keep spilling, try these fixes:
- Use a glue stick lightly on the flap for a temporary seal.
- Add a fold at the top to create a pocket.
- Try a drawstring or elastic closure for bulkier seeds.
Are there eco-friendly alternatives to paper packets?
Yes! Skip paper and try:
- Fabric scraps (sewn into pouches).
- Reusable cloth bags (great for bulk seeds).
- Seed paper (embed seeds in recycled paper for planting directly).
How do I label my seed packets without ruining them?
Use archival-safe markers or a stamp pad for labels. For a reusable touch, attach a small tag with twine or a paperclip. Include:
- Seed type
- Harvest year
- Planting instructions (e.g., "Direct sow, 60°F").
Wrapping up and next steps
Creating your own seed packets is a rewarding way to reduce waste, save money, and share the joy of gardening! With just a few simple materials and a little creativity, you can turn your homegrown seeds into beautiful, eco-friendly keepsakes.
Whether you're a seasoned gardener or just starting out, this project is a fun and practical skill to master.
Now that you're ready to craft your seed packets, why not take it a step further? Try experimenting with different seed varieties, designs, or even gifting them to fellow plant enthusiasts. Happy crafting—and may your garden grow wild with possibilities! 🌱✨