
How To
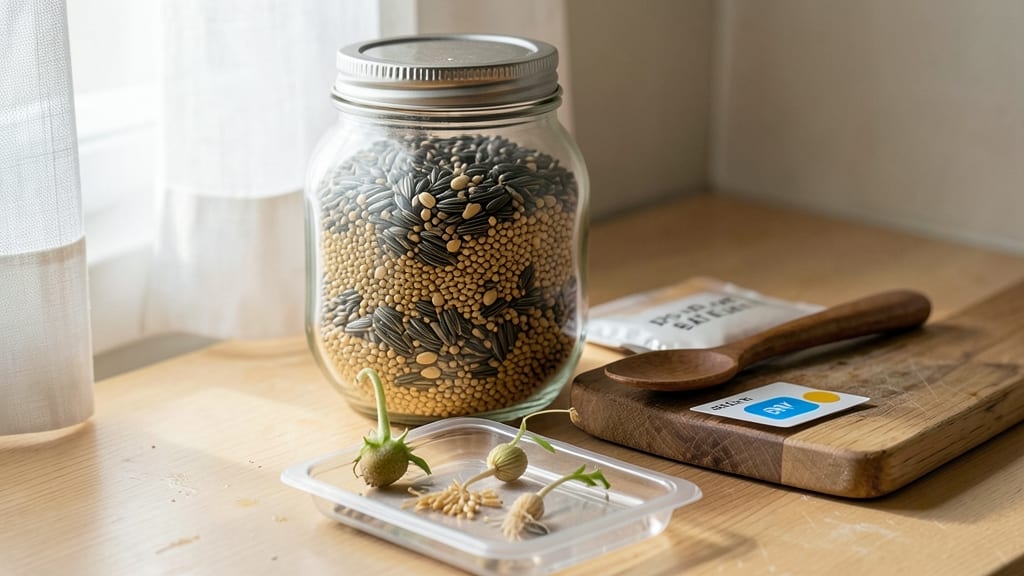
Bird seed sprouting in your storage bin is a frustrating waste—especially when you're planning next winter's feeders. 🌱 The key isn't just keeping it dry; it's controlling moisture, airflow, and temperature from the moment you buy it.
I've thrown out enough damp, moldy seed to know that prevention starts with the right storage setup. Start with airtight containers made of glass, metal, or heavy-duty plastic—nothing porous like cardboard or thin plastic bins.
Store seed in a cool, dark place (like a basement or pantry) where temperatures stay between 40-60°F and humidity never climbs above 10%. A simple hygrometer helps monitor moisture levels without guesswork.
With the right setup, your seed stays fresh for 12+ months—no more sprouting surprises when winter arrives. The payoff? Crisp, nutritious feed that attracts birds reliably all season long. Here's how to set it up right the first time.
Most people overlook the importance of proper drying before storage. Spread seed on a baking sheet in a single layer and let it dry completely for 24 hours at room temperature before transferring to containers.
This simple step prevents trapped moisture that triggers sprouting. I also add a small packet of silica gel or uncooked rice to containers as a moisture absorber—it's a game-changer for humidity-prone areas.
If you've already got damp seed, don't toss it. Spread it on a dry towel in a warm, well-ventilated spot for 1-2 days to dry out completely.
Once fully dry, store it properly to prevent future issues. The goal is to mimic the natural dormancy conditions seeds need to stay viable—cool, dark, and bone-dry.
For large quantities, consider vacuum-sealing bags with oxygen absorbers—they're the gold standard for long-term seed storage. Just remember: even the best containers won't help if your storage area has drafts or fluctuating temperatures. A little planning now saves hours of frustration later when you're scrambling to refill feeders.
📚 In This Guide
- What you need
- Instructions
- Tips and common mistakes
- Wrapping up and next steps
What you need
- ● Air-tight storage containers (1–3, depending on seed volume): 5–20 gallon capacity (adjust based on your needs)
- ● Made of food-grade plastic or metal (avoid cardboard or paper)
- ● Sealable lids with rubber gaskets for extra protection
- ● Silica gel packets (2–5, depending on container size): Unscented, food-safe (for moisture absorption)
- ● Reusable or disposable (check packaging)
- ● Desiccant crystals or rice (1 cup per 5 gallons of seed): Alternative to silica gel (e.g., uncooked rice in a breathable bag)
- ○ Fine-mesh breathable bags (optional but helpful): For storing seed before transferring to containers (e.g., seed-saving bags)
- ○ Food-grade dehumidifier or moisture absorber (for large storage areas): Optional for pantries or basements with high humidity
- ● Oxygen absorbers (1–2 per container): Kills pests and extends shelf life (activate before sealing!)
- ● Vacuum sealer (for long-term storage): Removes air to prevent mold and sprouting (great for bulk seed)
- ● Temperature/humidity monitor: Digital gauge to track ideal conditions (50–60°F, <10% humidity)
- ● Pest deterrents: Bay leaves, cedar blocks, or diatomaceous earth (food-safe in small amounts)
Step-by-step guide to preventing bird seed sprouting
Here's how to preserve your bird seed for months—no more damp, moldy surprises in the feeder.
🪴 Step 1: Choose the Right Storage Container
Use an airtight, food-grade container made of glass, metal, or heavy-duty plastic. I prefer opaque containers because light accelerates oil degradation in seeds, which speeds up sprouting. Make sure the container has a tight-sealing lid—even small gaps let in moisture from the air.
Clean the container thoroughly before use with warm, soapy water and dry it completely. Any residual moisture or food odors can encourage mold growth. Label the container with the seed type and purchase date to track freshness.
💧 Step 2: Dry the Seed Completely Before Storing
Spread the bird seed in a single layer on a clean, dry baking sheet. Place it in a warm, dry location away from direct sunlight for 24-48 hours until completely dry. You'll know it's ready when the seeds feel crisp and there's no moisture left on the surface.
Don't rush this step—even slightly damp seeds will sprout or develop mold within days. If you're in a humid climate, consider using a small fan on low to circulate air and speed up the drying process.
☀️ Step 3: Control Temperature and Humidity
Store the sealed container in a cool, dark place with consistent temperatures between 40-60°F. Ideal spots include a pantry, basement, or refrigerator. Avoid attics, garages, or anywhere temperatures fluctuate wildly—heat and cold cycles break seed shells and encourage sprouting.
Keep the container in a dry area with humidity below 50%. Use a small moisture absorber like silica gel packets if needed. You'll notice condensation on the container walls if humidity is too high—that's your signal to move it to a drier location immediately.
⏰ Step 4: Monitor and Rotate Seed Stock
Check the seed every 2-3 months for signs of sprouting, mold, or pests. Discard any seeds that feel soft, smell musty, or show signs of growth. Fresh seed should maintain its crisp texture and natural color for 6-12 months under proper conditions.
Use the oldest seed first (FIFO method) to prevent buildup of stale stock. If you notice any sprouts forming, return the entire container to drying conditions immediately—even one sprouting seed can contaminate the whole batch.
✂️ Step 5: Prevent Pest Infestations
Inspect the container for signs of pests like weevils or moths before each use. If you find any, freeze the seed for 48 hours to kill eggs and larvae, then return it to storage. Never store seed near pet food or other organic materials that attract pests.
Consider adding a few bay leaves or cedar blocks to the container for natural pest deterrence. These act as mild repellents without chemicals. If you notice holes in seed shells or webbing, discard the entire batch immediately—pests can spread quickly.
Tips & tricks for perfect bird seed preservation
Keeping your bird seed fresh isn't just about luck—it's about understanding the science behind seed storage. Here's what I've learned after dealing with sprouting disasters.
Container Selection Wisdom: While any airtight container works, I've found that glass containers with vacuum seals are the gold standard for long-term storage. The vacuum removes all air, which is the enemy of seed freshness—air contains moisture that triggers sprouting. For plastic containers, look for those with double-sealing lids that create a tighter seal than standard lids.
Drying Technique Refinement: The 24-48 hour drying period in Step 2 is non-negotiable, but here's the secret: use a dehumidifier near your drying area if you live in humid climates. I've seen seeds take twice as long to dry in 70% humidity versus 40%. Place a small fan on low to create gentle airflow—this speeds up evaporation without creating drafts that could spread moisture unevenly.
Temperature Control Nuances: While the instructions specify 40-60°F, I've found that 50°F is the sweet spot for most homes. Below 40°F, seeds can become brittle, and above 60°F, oil degradation accelerates. Use a digital thermometer in your storage area to monitor—some basements naturally stay at perfect seed-preserving temperatures year-round.
Pest Prevention Pro Tip: Beyond bay leaves and cedar blocks, I've had success with food-grade diatomaceous earth (sparingly!) placed in a small mesh bag inside the container. It's a natural desiccant that kills pests by dehydrating them. Just remember: it's only effective against crawling insects, not flying ones like moths, so combine it with the freezing method from Step 5 for comprehensive protection.
Pro Tips for Keep Bird Seed From Sprouting
- Keeping your bird seed fresh isn't just about luck—it's about understanding the science behind seed storage.
- Container Selection Wisdom: While any airtight container works, I've found that glass containers with vacuum seals are the gold standard for long-term storage.
- Drying Technique Refinement: The 24-48 hour drying period in Step 2 is non-negotiable, but here's the secret: use a dehumidifier near your drying area if you live in humid climates.
Frequently asked questions
Got questions about storing bird seed to prevent sprouting? You’re not alone! Here are some of the most common concerns—and their solutions—to help you keep your seed fresh and ready for your feathered friends.
Why does bird seed sprout in storage?
Bird seed sprouts due to moisture and warmth. Even small amounts of humidity or heat can trigger germination. Seeds are alive and packed with nutrients, so they’ll start growing if conditions are right—just like a garden veggie! Store them in cool, dry places (like a pantry or freezer) to stop sprouting in its tracks.
How long can I store bird seed before it goes bad?
Most bird seeds last 6–12 months if stored properly. Sunflower seeds and safflower seeds stay fresh the longest (up to a year), while millet and cracked corn may spoil faster (3–6 months). Check for musty smells, discoloration, or pests—if you spot these, toss it! Label your containers with the purchase date to track freshness.
Are there better containers than plastic bins for seed storage?
Plastic bins work, but glass jars with airtight lids or food-grade buckets are even better. They’re less likely to absorb odors or moisture. For bulk storage, mylar bags with oxygen absorbers (common in seed-saving circles) can extend shelf life years. Just avoid cardboard or paper—it lets moisture creep in!
How do I prevent pests (like mice or insects) from getting to my seed?
Pests love bird seed! Use metal or heavy-duty plastic containers (they can’t chew through them). Add bay leaves or cedar blocks inside for a natural deterrent. Store seed in cool, dark places (like a garage or basement) where pests are less active. Pro tip: Freeze seed for 48 hours before storing to kill any hidden eggs or larvae!
Is freezing bird seed a good long-term solution?
Freezing is great for short-term storage (up to 6 months)—it pauses sprouting and kills pests. For long-term (a year+), use a vacuum sealer + freezer or oxygen absorbers in an airtight container. Just thaw seed slowly in the fridge to avoid condensation (which = moisture = sprouting!). Avoid repeated freeze-thaw cycles.
Wrapping up and next steps
Keeping your bird seed fresh and sprout-free doesn’t have to be a challenge—just follow the dry storage secrets we’ve shared! With the right containers, moisture control, and a few extra tips, you’ll ensure your seed stays ready for feeding whenever you need it. 🌱✨
Now that you’re armed with the knowledge, take the next step: audit your storage setup today! Check for leaks, replace old containers, and label everything clearly. Your feathered friends—and your wallet—will thank you! 🐦💛