
Lawn
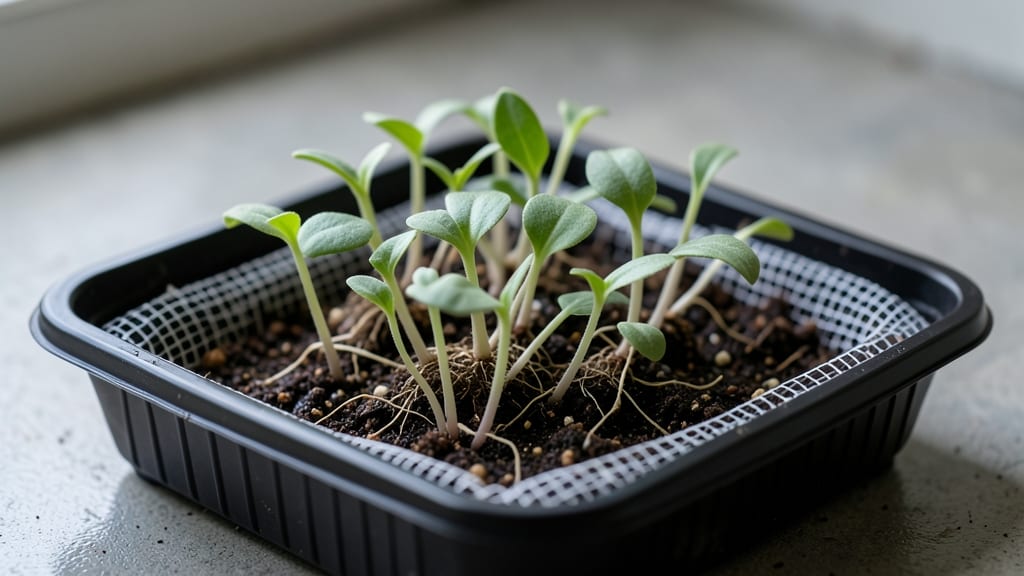
Zinnia seed sprouts emerge faster than you’d think—just 5-7 days if you nail the soil and warmth. 🌱 I’ve learned the hard way that skipping prep means waiting weeks or giving up entirely. The secret isn’t fancy; it’s about moisture, light, and patience (plus avoiding those telltale moldy seeds).
Start with a light, well-draining mix—no heavy clay—and plant seeds ¼-inch deep, just below the soil surface. Keep them cozy at 70-75°F and moist (like a wrung-out sponge), then watch for those first green tips. Overwatering is the #1 killer, so mist instead of soak.
Once sprouts hit 2 inches tall, they’re ready for their first stretch toward sunlight. Thin them to 12 inches apart to avoid crowding, and you’ll have bushy plants bursting with color by summer. The key? Consistent care—no drama, just steady growth.
Works for spring, summer, or even fall starts (just adjust timing for your zone). Here’s how to keep them thriving through every stage—no guesswork, just blooms.
📚 In This Guide
- What you need
- Instructions
- Tips and common mistakes
- Wrapping up and next steps
What you need
- ● Zinnia seeds: 1–2 packets (choose heirloom or hybrid varieties like Benary’s Giant or Profusion for best results).
- ● Seed-starting mix: 1–2 bags (sterilized, peat-free blend or coconut coir for moisture retention).
- ● Containers: Seed trays (72-cell or 28-cell) or
- ● Small pots (3–4 inches deep) with drainage holes.
- ○ Growing medium (optional but helpful): Perlite or vermiculite (1 small bag) for aeration.
- ● Slow-release fertilizer (5–10–10 NPK ratio, 1 tbsp per container).
- ● Spray bottle: 8–16 oz (for gentle watering).
- ○ Misting nozzle (optional): Attaches to a watering can for even moisture.
- ○ Heat mat (optional for indoor starts): 1–2 mats (70–75°F range to speed germination).
- ● Grow lights or sunny windowsill: 1–2 LED lights (12–16 hrs/day) or a south-facing window.
- ● Plastic wrap or humidity dome: 1 sheet (to retain moisture during germination).
- ● Labels & markers: Waterproof tags + permanent marker (to track varieties).
- ● Trowel or small shovel: For transplanting (if moving outdoors later).
- ● Temperature: Ideal germination range: 70–75°F (21–24°C). Avoid drafts or cold spots!
- ● Light: Bright, indirect light for sprouts (direct sun post-germination).
- ● Water: Room-temperature, filtered water (chlorine-free if possible).
- ● Patience: Germination time: 7–14 days (varies by variety).
Step-by-Step instructions for growing healthy zinnia seed sprouts
Let’s turn those tiny zinnia seeds into sturdy, vibrant sprouts ready for transplanting.
🌱 Step 1: Prepare Your Growing Medium and Containers
Fill your seed-starting trays or small pots with a sterile seed-starting mix—never garden soil, as it’s too dense and can harbor pathogens. I like to use biodegradable pots because they eliminate the need for root disturbance later. Moisten the mix until it’s damp but not soggy; squeeze a handful to test—it should hold together without dripping.
Press the soil down lightly with your fingers to remove air pockets, then create small furrows about ¼ inch deep with your finger or a small stick. Space them 1 inch apart to give each seedling room to grow without competition. Here’s the thing—zinnia seeds are tiny, so I use a toothpick to place them one at a time, ensuring even spacing and avoiding overcrowding.
💧 Step 2: Sow Seeds and Maintain Ideal Moisture
Drop 1-2 seeds per furrow, then cover them lightly with a thin layer of soil—just enough to obscure them, no deeper. Mist the surface gently with a spray bottle until the soil looks uniformly damp. Overwatering now will wash seeds away, so less is more. Place the tray in a warm, bright spot (around 70-75°F), like a seedling heat mat or a sunny windowsill.
Cover the tray with a clear plastic dome or plastic wrap to retain humidity, but remove it immediately once sprouts appear (usually in 5-7 days). Watch for condensation on the underside—this means the environment is too humid. If you see mold or fuzzy growth, increase airflow by propping the cover slightly ajar.
☀️ Step 3: Provide Light and Prevent Leggy Growth
As soon as those first true leaves (the second set after the initial seed leaves) appear, move the seedlings under grow lights or to a south-facing window. Zinnias need 14-16 hours of light daily to prevent them from stretching toward the light, which weakens stems. I use a full-spectrum LED grow light kept 2-3 inches above the seedlings, adjusting the height as they grow.
Leggy seedlings (long, thin stems with widely spaced leaves) mean your light source is too far or weak. If this happens, lower the light immediately and rotate the tray daily so all sides get even exposure. You’ll notice stronger seedlings have bold green leaves and compact spacing between growth nodes—this is your goal.
✂️ Step 4: Thin and Harden Off for Transplanting
When seedlings have 2-3 sets of true leaves (about 3-4 weeks after sowing), thin them to the strongest one per pot. Use scissors to snip weaker sprouts at soil level—this prevents disturbing the roots of the remaining plants. Water deeply after thinning to help the remaining seedlings establish.
Start hardening off 1-2 weeks before your last frost date. Begin by placing the seedlings outside in a sheltered, shaded spot for 1-2 hours the first day, gradually increasing their time outdoors by 1 hour daily. By the end of the week, they should tolerate full sun exposure for a full day without wilting. This step is critical—skipping it shocks plants and stunts growth.
🪴 Step 5: Transplant and Care for Mature Growth
Transplant seedlings into the garden or larger containers when they’re 4-6 inches tall and the soil is warm (at least 60°F). Dig holes twice as wide as the root ball to encourage spreading, then place the seedling in, firming soil around the base. Water deeply to settle the roots and reduce transplant shock.
Space zinnias 6-12 inches apart, depending on the variety—dwarf types need less room, while tall varieties benefit from wider spacing. Mulch with 1-2 inches of organic mulch (like straw or shredded leaves) to retain moisture and suppress weeds. You’ll know they’re thriving when new leaves emerge within 7-10 days of transplanting, signaling strong root establishment.
Tips & tricks for perfect zinnia seed sprouts
These simple strategies will help you avoid common pitfalls and ensure your zinnia sprouts thrive from start to finish.
Soil Preparation Secret: In Step 1, when pressing down the sterile seed-starting mix, focus on creating a fine, even surface—no clumps. I sift the mix through a fine-mesh strainer to eliminate any large particles that could block moisture or air flow to those tiny seeds. This step is especially important because zinnia seeds need consistent contact with damp soil to germinate properly.
Germination Timing: The 5-7 day window for sprouts to appear in Step 2 can feel like forever, but consistency is key. Maintain that warm environment (70-75°F) and keep the soil uniformly damp—not soggy—using the spray bottle method. If you notice condensation forming on the plastic cover, that’s your cue to increase airflow slightly by propping up one edge. Too much humidity creates the perfect conditions for mold, which can kill your seedlings before they even emerge.
Light Management: For Step 3, when moving seedlings under grow lights, position the tray so the light source is just above the top of the seedlings—not too close. I adjust the height every few days as they grow, keeping it within that 2-3 inch range. If you see seedlings stretching toward the light with long, thin stems, they’re begging for more intensity or closer proximity. Rotate the tray daily to prevent uneven growth, which is especially critical for zinnias that need that compact, sturdy structure for transplanting.
Hardening Off Strategy: The 1-2 week hardening off period in Step 4 is where many gardeners cut corners, but this is your chance to build resilient plants. Start with just 1-2 hours in a sheltered spot, then gradually increase exposure. I like to place seedlings on a shaded patio or under a tree where they can acclimate without sudden shock. Watch for wilting—the first sign they’re not ready for full sun exposure. If you rush this step, your zinnias will struggle when transplanted into the garden.
Pro Tips for Zinnia Seed Sprouts
- These simple strategies will help you avoid common pitfalls and ensure your zinnia sprouts thrive from start to finish.
- Soil Preparation Secret: In Step 1, when pressing down the sterile seed-starting mix, focus on creating a fine, even surface—no clumps.
- Germination Timing: The 5-7 day window for sprouts to appear in Step 2 can feel like forever, but consistency is key.
Frequently asked questions
Got questions about growing zinnia seed sprouts? You’re not alone! Here are some of the most common concerns—plus quick, actionable answers to keep your sprouts thriving.
How long do zinnia seed sprouts take to germinate?
Zinnia seeds typically sprout in 7–14 days when kept in warm (70–75°F), moist conditions. For faster results, soak seeds overnight before planting or use a heat mat. Patience is key—some varieties may take up to 2 weeks, especially in cooler temperatures.
Can zinnia sprouts handle cold weather?
Nope! Zinnia sprouts are tender and won’t tolerate frost or temps below 50°F. Start seeds indoors 6–8 weeks before your last frost date, or wait until soil is warm (60°F+) to direct-sow. Use row covers if nighttime temps dip to protect young plants.
Why aren’t my zinnia sprouts growing?
Check these 3 culprits first:
- Too wet/dry: Keep soil consistently moist but not soggy—overwatering suffocates roots!
- Poor light: Sprouts need 12+ hours of bright light daily (grow lights work for indoors).
- Stale seeds: Zinnia seeds lose viability after 2–3 years. Test with a fresh packet.
Can I harvest zinnia sprouts like microgreens?
Yes! Once sprouts reach 2–3 inches tall (about 10–14 days), snip them just above the soil with clean scissors. For regrowth, leave a 1-inch stem—zinnia sprouts can produce 2–3 harvests per seed! Rinse gently before eating (they’re edible but best used sparingly).
What’s a good alternative if zinnias fail to sprout?
Try these easy, fast-sprouting seeds for similar vibrant greens:
- Sunflower sprouts (germinate in 3–5 days!)
- Radish microgreens (ready in 7–10 days)
- Chia or flax sprouts (no soil needed—just water!)
Wrapping up and next steps
Growing zinnia seed sprouts is a rewarding journey that brings vibrant color to your lawn or garden with minimal stress! With the right materials, a little patience, and these simple techniques, you can enjoy year-round blooms—even in less-than-ideal conditions.
Whether you’re a beginner or a seasoned gardener, zinnia sprouts prove that beauty and resilience go hand in hand.
Ready to take the next step? Experiment with varieties, tweak your growing conditions, and share your progress with fellow plant lovers. Your green thumb is closer than you think—happy planting! 🌱💛