
Propagation
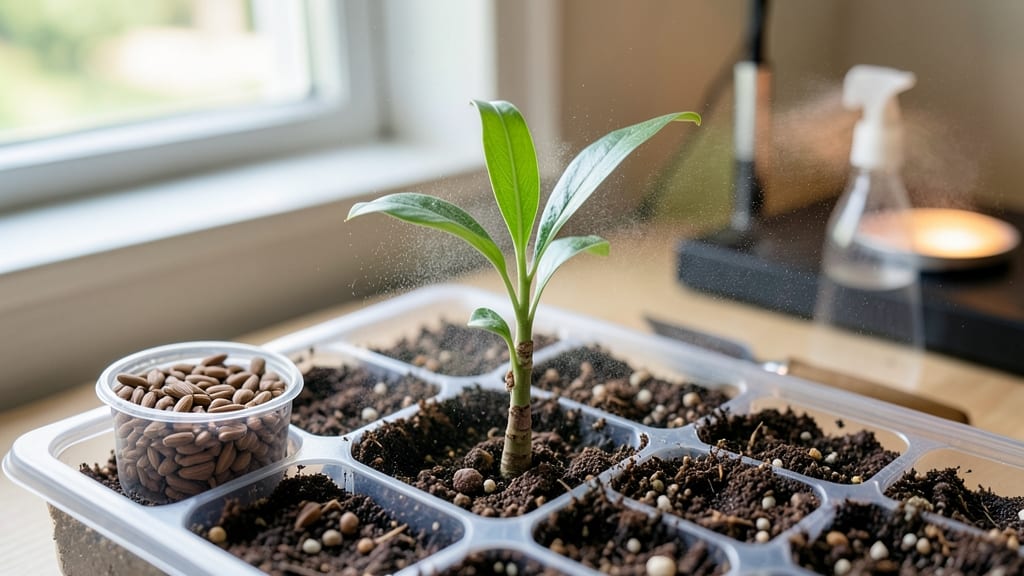
The propagation of eucalyptus seeds is all about getting the moisture just right—like unlocking a tiny, fragrant surprise. 🌱 I've learned that patience is key, as these seeds can take 3-6 weeks to germinate, but the payoff is worth it when fragrant seedlings emerge.
The secret lies in mimicking their native habitat where seasonal rains trigger germination. You'll need a shallow tray, well-draining soil mix, and a spray bottle to keep everything consistently moist without drowning the seeds.
Collecting fresh pods from mature trees ensures the best viability, but store-bought seeds work too if you're starting from scratch. The soil should stay damp like a wrung-out sponge—never soggy. Once sprouted, keep the seedlings in bright, indirect light until they develop their first true leaves.
Transplant carefully when they're about 3-4 inches tall, giving them space to grow into those iconic, towering trees. The first leaves smell like a eucalyptus forest, and that's when you know you've done it right.
This method works for both gardeners with sunny backyards and those growing in containers on patios. Just remember: eucalyptus loves heat and light, so position them where they'll get plenty of both.
📚 In This Guide
- What you need
- Instructions
- Tips and common mistakes
- Wrapping up and next steps
What you need
- ● Eucalyptus seeds: Fresh or stored seeds (preferably from Eucalyptus globulus or Eucalyptus cinerea for best results). Aim for 50–100 seeds to account for germination variability.
- ● Seed trays or pots: Small, shallow containers (3–4 inches deep) with drainage holes. Use 4–6 trays if propagating multiple varieties.
- ● Potting mix: A well-draining blend of 50% peat moss or coconut coir and 50% perlite or coarse sand (sterilized to prevent mold). Avoid garden soil—it retains too much moisture!
- ● Spray bottle: A 16–32 oz misting bottle for gentle hydration (avoid over-saturating seeds).
- ● Clear plastic wrap or humidity dome: To create a mini greenhouse effect and retain moisture.
- ● Grow lights or sunny windowsill: Eucalyptus seeds need bright, indirect light (6–8 hours daily). A LED grow light works if natural light is limited.
- ○ Heat mat (optional but helpful): A seedling heat mat (set to 70–75°F) can speed up germination, especially in cooler climates.
- ● Tweezers or toothpick: For carefully placing seeds into the soil.
- ● Fine-mist spray nozzle: Attachable to your spray bottle for precision.
- ○ pH testing kit (optional): Ensure your potting mix is slightly acidic (pH 5.5–6.5).
- ● Fertilizer (after germination): A balanced liquid fertilizer (5-5-5 or 10-10-10), diluted to half-strength, once seedlings have 2–3 true leaves.
- ● Labels & markers: To track seed varieties and planting dates.
Step-by-step instructions for eucalyptus seed propagation
Here’s how to coax eucalyptus seeds out of their moisture-sensitive pods and into thriving seedlings.
🌱 Step 1: Harvest and Prepare the Seed Pods
Collect mature eucalyptus seed pods when they turn brown and begin to split open naturally—this usually happens in late summer or early fall. The pods must be fully dry; any residual moisture will prevent them from releasing seeds properly. Place the pods in a paper bag and store them in a dry, well-ventilated area for 2-4 weeks to ensure complete drying.
Once the pods are bone-dry, gently crush them with your hands or a mortar and pestle to release the tiny, papery seeds. Avoid pulverizing the seeds—just enough pressure to break open the pods. Sift the mixture through a fine mesh screen to separate the seeds from the chaff. You’ll need roughly 1 teaspoon of seeds to yield 4 healthy seedlings—eucalyptus seeds are tiny but prolific.
💧 Step 2: Stratify Seeds for Germination
Eucalyptus seeds require stratification to break dormancy. Mix the seeds with a moistened (not soggy) sand and peat moss blend (equal parts) in a sealed container. The moisture level should feel like a damp sponge—squeeze a handful, and just a few droplets should escape. Store the container in the refrigerator for 4-6 weeks to simulate winter conditions.
Check the mixture weekly to ensure it hasn’t dried out. If the top layer feels dry, lightly mist it with water. After 4 weeks, remove the container and let it sit at room temperature for 2 more weeks. This stratification mimics natural seasonal changes, priming the seeds to germinate when conditions are right.
☀️ Step 3: Sow Seeds in a Controlled Environment
Fill 4-inch diameter pots with a light, fast-draining mix (50% peat moss, 30% perlite, 20% coarse sand). Press the mix down lightly to create a firm but not compacted surface. Scatter the stratified seeds evenly across the soil—there’s no need to bury them. Eucalyptus seeds need light to germinate, so only a light dusting of mix over the top is sufficient.
Cover the pots with clear plastic wrap to retain humidity and place them in a warm, bright location (around 70-75°F). A seedling heat mat can help maintain consistent warmth. Germination can take 2-4 weeks, but be patient—some seeds may take longer. Keep the soil consistently moist but never waterlogged; eucalyptus seedlings are sensitive to root rot.
🌿 Step 4: Transplant Seedlings to Individual Pots
Once seedlings develop 2-3 sets of true leaves (not the initial cotyledons), they’re ready for transplanting. Gently remove them from the germination tray, being careful not to disturb the delicate roots. Use a small spoon or your fingers to lift each seedling and place it into its own 4-inch pot filled with the same light mix.
Water the seedlings thoroughly after transplanting to settle the soil around the roots. Place them in bright, indirect light for the first week to help them adjust. After that, gradually introduce them to direct sunlight over 7-10 days. Eucalyptus seedlings thrive in full sun once established, but young plants benefit from a slow transition to avoid leaf scorch.
⏰ Step 5: Maintain Moisture and Light for Growth
Keep the soil evenly moist but never soggy—eucalyptus seedlings prefer consistent humidity but poor drainage. Water when the top ½ inch of soil feels dry to the touch. Avoid overhead watering, which can cause fungal issues; instead, water at the base of the plant. Fertilize lightly with a balanced, water-soluble fertilizer (10-10-10) diluted to half strength every 4-6 weeks once the seedlings are 3 inches tall.
By the time your seedlings reach 6-8 inches, they’ll be ready for their final 6-inch pots or outdoor planting (if your climate allows year-round growth). Prune leggy growth to encourage bushier development, and watch for pests like aphids—a gentle spray of soapy water usually does the trick. With patience and the right moisture balance, you’ll have 4 sturdy eucalyptus seedlings in just a few months.
Tips & tricks for perfect eucalyptus seed propagation
Here's what nobody tells you about getting those stubborn eucalyptus pods to cooperate—and how to turn them into thriving plants.
Pod Drying Precision: The 2-4 week drying period is non-negotiable for eucalyptus pods. I learned this the hard way after trying to rush the process with only 10 days of drying—my seeds refused to release properly. Place pods in a paper bag in a well-ventilated area, but avoid direct sunlight which can cause them to crack prematurely. Test readiness by gently squeezing a pod—if it crumbles easily between your fingers, it's ready. This step prevents mold while ensuring maximum seed yield.
Stratification Science: The 4-6 week cold stratification mimics natural winter conditions that eucalyptus seeds experience in their native habitat. Don't skip this step—it's what breaks dormancy. Use a sealed container with a damp (not wet) sand and peat moss blend—too much moisture causes rot, while too little prevents germination. After the initial 4 weeks in the fridge, the 2-week room temperature adjustment is crucial for triggering those germination signals. Think of it as a gentle wake-up call for the seeds.
Germination Environment: Those 70-75°F temperatures in Step 3 are ideal, but consistency is more important than exact numbers. I've seen germination rates drop dramatically when temperatures fluctuate more than 5°F. Use a seedling heat mat if your home tends to be cooler, especially at night. The clear plastic wrap creates a humid microclimate—just remove it daily for 10 minutes to prevent fungal growth. This balance between humidity and airflow is what separates successful batches from failed ones.
Transplanting Technique: When your seedlings develop their 2-3 sets of true leaves (not the initial cotyledons), they're ready for their first solo pots. This is where most beginners make mistakes by transplanting too early. Use a small spoon to gently loosen the soil around roots before lifting—this minimizes root damage. The gradual transition from indirect to direct sunlight over 7-10 days prevents leaf scorch while hardening off the seedlings. I've seen seedlings that looked perfect in the germination tray completely collapse after being moved to full sun too quickly.
Pro Tips for Eucalyptus Seed Propagation
- Here's what nobody tells you about getting those stubborn eucalyptus pods to cooperate—and how to turn them into thriving plants.
- Pod Drying Precision: The 2-4 week drying period is non-negotiable for eucalyptus pods.
- Stratification Science: The 4-6 week cold stratification mimics natural winter conditions that eucalyptus seeds experience in their native habitat.
Frequently asked questions
Got questions about growing eucalyptus from seeds? Here are some of the most common ones—and their answers—to help you succeed!
How long does it take for eucalyptus seeds to germinate?
Germination can take anywhere from 2 weeks to 3 months, depending on the species and conditions. Keep the soil consistently moist (but not soggy) and maintain temperatures around 70–75°F (21–24°C). Patience is key—some seeds may take longer, especially if they’re freshly harvested!
Can I use store-bought eucalyptus seeds, or do I need to collect them myself?
Store-bought seeds are a great option if you’re unsure about collecting them yourself! Look for fresh, viable seeds from reputable suppliers. If collecting, ensure the pods are fully mature and have popped open naturally—this indicates they’re ready for propagation.
What’s the best way to speed up germination?
Try stratification (mimicking winter conditions) by placing seeds in a damp paper towel in the fridge for 2–4 weeks before planting. Alternatively, soak seeds in warm water for 12–24 hours to soften the hard outer shell. Warmth and moisture work wonders!
Why aren’t my eucalyptus seeds sprouting?
Several factors could be at play: old seeds (eucalyptus seeds lose viability over time), poor soil drainage, or incorrect moisture levels. Double-check your soil mix (use a well-draining medium) and ensure seeds aren’t buried too deep—just press them lightly into the soil.
How do I know if my eucalyptus seedlings are healthy?
Healthy seedlings have bright green leaves, sturdy stems, and no yellowing or wilting. Keep an eye out for pests like aphids or fungal spots. If leaves turn brown, it may signal overwatering—eucalyptus prefers consistent moisture, not soggy soil.
Wrapping up and next steps
Eucalyptus seed propagation is a rewarding journey that blends patience with nature’s magic! By mastering moisture control and understanding the unique pop-open behavior of eucalyptus pods, you’re well on your way to nurturing thriving seedlings.
The key takeaway? Consistency and observation are your best tools—whether you’re germinating seeds or transplanting young sprouts.
Ready to dive deeper? Start small—try propagating a few pods in a controlled environment, then expand as you gain confidence. Soon, you’ll be sharing your lush eucalyptus saplings with fellow green thumbs! 🌱✨