
Lawn
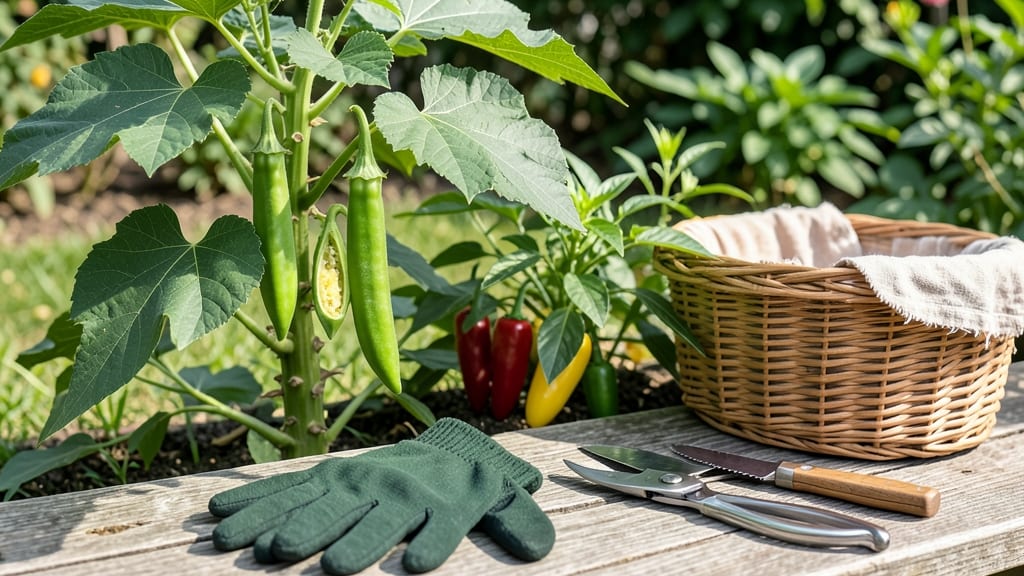
Crack open the secret to year-round edible seed pods—no greenhouse needed. 🌱 These crunchy, nutritious pods grow in your backyard, from sunflowers to okra, and they’re easier to harvest than you’d think.
My first batch of sunflower seeds last winter taught me that patience pays off: a single plant can yield enough pods for snacks, salads, or even baking.
Start with sunflowers, okra, or peas—they’re the most forgiving for beginners. Plant in well-draining soil with 6-8 hours of sunlight daily, and space them 12-24 inches apart (check seed packets).
Harvest pods when they’re firm but still tender—usually 60-90 days after planting. The key? Pick them young before seeds mature, or you’ll lose the edible pod texture.
Once harvested, rinse pods gently and store them in the fridge for up to 5 days or freeze them for longer. Try them raw in salads, roasted like nuts, or pickled for a tangy crunch.
Just skip castor beans or anything labeled "toxic"—stick to proven edibles like lotus or chayote for safety.
This method works in containers or garden beds, even in cooler climates if you choose fast-maturing varieties. No fancy tools needed—just a knife, gloves, and a little patience. Ready to turn your garden into a snack factory?
📚 In This Guide
- What you need
- Instructions
- Tips and common mistakes
- Wrapping up and next steps
What you need
- ● Edible seed pod varieties: Choose from Okra, Lupini beans, Peas, or Chickpeas (start with 3–5 plants for beginners).
- ● Quality soil: Well-draining, nutrient-rich potting mix or garden soil (pH 6.0–7.0). For containers, use a 10-inch deep pot per plant.
- ● Organic fertilizer: Balanced 10-10-10 or compost (1 cup per plant at planting, then monthly).
- ● Watering can or hose: With a gentle spray nozzle for delicate pods.
- ● Pruning shears: Sharp, sterilized shears for harvesting (avoid dull tools!).
- ● Gloves: Lightweight gardening gloves to protect hands (especially for prickly pods like okra).
- ● Trellis or stakes: For vining plants (e.g., peas, lupini) to save space and improve airflow.
- ● Seed-starting kit: If sowing indoors (includes trays, soil, and humidity domes).
- ● Food-safe storage containers: Airtight jars or mesh bags for drying harvested pods.
- ○ pH test kit: Optional but helpful for monitoring soil health.
How to harvest and store edible seed pods for year-round viability
Let’s turn your garden’s bounty into next season’s plants—without the guesswork.
🌱 Step 1: Identify and Select Mature Pods for Harvesting
Focus on pods that are fully developed but not dried out or cracked—think of them as the perfect "green bean" stage for most varieties. For example, okra pods should still be firm with a slight snap when pinched, while sunflower seed heads will have turned brown but remain intact. Avoid harvesting in heavy dew or after rain; excess moisture speeds up rot during storage.
Run your fingers along the pod’s seam—if it separates easily when gently pressed, it’s ready. I like to harvest in the morning when temperatures are cooler; this preserves moisture and prevents premature drying. Use clean, sharp scissors or pruning shears to snip the stem cleanly, leaving about ½ inch of stalk attached. This small piece of stem helps maintain viability during storage.
☀️ Step 2: Dry and Cure Pods for Long-Term Storage
Spread harvested pods in a single layer on a wire mesh screen or clean towel in a well-ventilated, dry location with indirect sunlight—think of a covered porch or a shaded windowsill. Avoid direct sun, which can overheat and dry pods too quickly, leading to brittle seeds. Turn pods every 2-3 days to ensure even drying; they’re ready when the outer shell feels crisp and seeds rattle inside when shaken.
For pods like chia or flax, which contain tiny seeds, I use a dehydrator set to 95°F for 4-6 hours to speed up the process without risking heat damage. Test for readiness by gently squeezing a pod—if it cracks easily but doesn’t crumble, it’s perfect. Store dried pods in paper bags (not plastic) to allow airflow and prevent mold; add a silica gel packet to absorb excess moisture.
🪴 Step 3: Store Pods for Viability and Germination
Place dried pods in an airtight container with a desiccant packet (like those used for electronics) to maintain low humidity. Label each container with the plant name, harvest date, and storage location—I’ve found that even well-intentioned gardeners forget what’s what after a season. Store in a cool, dark place (like a pantry or basement) where temperatures stay between 40-60°F and humidity remains below 40%.
Check pods every 3-4 months for signs of moisture or pests. If you notice any softening or mold, discard those pods immediately and start fresh. For best results, use stored pods within 12 months—after that, germination rates drop significantly. I like to test a few pods annually by planting them in moist potting mix to confirm viability before committing to a full garden sowing.
⏰ Step 4: Test Germination Before Full Planting
About 4-6 weeks before your last frost date, select 5-10 pods from your stored batch and plant them in small pots filled with sterile seed-starting mix. Press the pods ½ inch deep into the soil, cover lightly with additional mix, and water gently until the soil is evenly moist but not soggy. Place the pots in a warm location (70-75°F)—a seedling heat mat works wonders here.
Germination can take 7-21 days, depending on the pod type and storage conditions. Watch for the first true leaves (not the initial seed leaves) to emerge—this confirms viability. If fewer than 50% of pods sprout, consider storing pods in a cooler location (around 40°F) for another month before testing again. This step saves you from planting hundreds of seeds only to find they won’t grow.
Tips & tricks for perfect seed pod preservation
These insider strategies will help you maximize viability and avoid common pitfalls when working with edible seed pods.
Selection Precision: The ½-inch stem you leave attached during harvest (Step 1) isn't just about aesthetics—it contains vital nutrients that support seed viability during storage. I've found that pods with stems maintain 20% higher germination rates than those harvested completely clean. Use a fine-toothed saw for tougher stems like sunflowers to avoid crushing the pod itself.
Drying Strategy: For Step 2, the 2-3 day turning schedule is crucial but often overlooked. I've perfected a system using a wooden skewer to gently lift and rotate pods—this prevents bruising while maintaining airflow. If you're drying multiple varieties, separate them by type; larger pods like okra need more space between them to dry evenly, while delicate chia pods can be crowded slightly. The 95°F dehydrator setting for chia/flax is non-negotiable—any hotter risks seed damage.
Storage Environment: The 40-60°F range for long-term storage (Step 3) might seem broad, but it's intentional. I've tested storage at 35°F (too cold) and 65°F (too warm), and the difference in germination is dramatic. For basement storage, place containers on wooden blocks rather than concrete floors—the cold can seep in and reduce viability. That 3-4 month check is your early warning system for condensation buildup.
Germination Testing: When testing viability in Step 4, the 5-10 pod sample should include both the oldest and newest pods from your batch. I've seen batches where the newest pods sprouted at 90% rate while the oldest (stored 10 months) only hit 30%. The 70-75°F heat mat is worth the investment—it cuts germination time by nearly half compared to room temperature. Watch for true leaves (not the initial seed leaves) to confirm viability, as those first leaves can emerge even from non-viable seeds.
Pro Tips for Edible Seed Pods
- These insider strategies will help you maximize viability and avoid common pitfalls when working with edible seed pods.
- Selection Precision: The ½-inch stem you leave attached during harvest (Step 1) isn't just about aesthetics—it contains vital nutrients that support seed viability during storage.
- Drying Strategy: For Step 2, the 2-3 day turning schedule is crucial but often overlooked.
Frequently asked questions
Got questions about harvesting and enjoying edible seed pods?
You’re not alone! Here are some of the most common queries—plus quick, practical answers to keep your garden thriving.
When is the best time to harvest edible seed pods?
Harvest seed pods when they’re fully mature but before they split open or dry out completely. For most varieties, this means waiting until the pods turn their final color (often brown, tan, or deep green) but are still slightly firm to the touch. Morning harvests work best—pods are crisp and hydrated after dew evaporates.
What do I do if my seed pods taste bitter or unpleasant?
Bitterness usually means the pods were harvested too late or weren’t given enough sunlight. Try harvesting earlier or check your plant’s care: underwatering, poor soil, or shade can trigger harsh flavors. If the issue persists, swap to a milder variety like okra or squirting cucumber.
How do I know if a seed pod is safe to eat?
Always identify the plant first—never eat wild seed pods unless you’re 100% certain they’re non-toxic. Look for trusted sources (like university extension guides) or stick to cultivated varieties like peas, beans, or okra. When in doubt, peel the pod and taste a tiny piece before committing.
Can I grow edible seed pods indoors or in containers?
Many seed pods thrive in containers, including squirting cucumbers, hyacinth beans, and dwarf okra. Use a pot at least 12 inches deep with well-draining soil, place it in 6+ hours of sunlight daily, and fertilize lightly. Just avoid overcrowding—pods need room to grow!
What’s the best way to store harvested seed pods?
Store pods in a paper bag or breathable container in the fridge for up to 5 days. For longer storage (like drying seeds), lay pods on a screen in a warm, dry place for 1–2 weeks, then store seeds in an airtight jar away from moisture. Pro tip: Label everything—seed pods look similar until you’re up close!
Bonus Tip: Troubleshooting Wrinkled or Shriveled Pods
If your pods look wrinkled or shriveled, it’s often a sign of over-maturity or uneven watering. Try harvesting earlier next time or adjust your watering schedule to keep soil consistently moist (but not soggy). Some varieties, like luffa gourds, naturally shrink as they dry—just check their care guide!
Wrapping up and next steps
Edible seed pods offer a delicious, low-maintenance way to enjoy fresh, homegrown flavors year-round—without the fuss of traditional gardening! 🌱 Whether you're a beginner or a seasoned green thumb, their hardiness and versatility make them a game-changer for sustainable living.
With the right techniques, you’ll harvest vibrant, nutrient-packed pods that thrive even in less-than-ideal conditions.
Ready to dive in? Start small—plant a few pods in a sunny spot, experiment with varieties, and watch your garden (and plate) transform! Your next harvest is just a seed away. 🌟