
Propagation
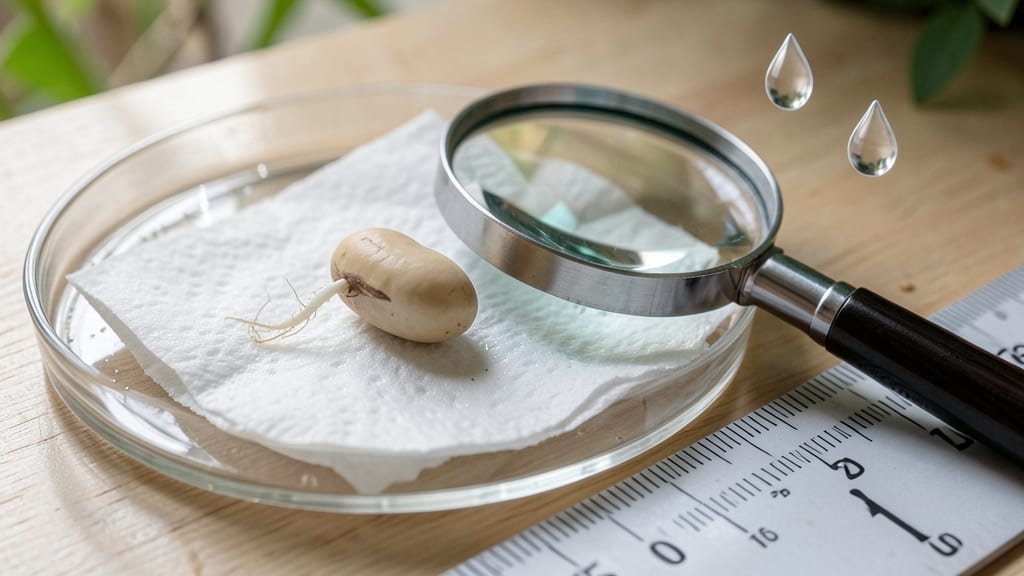
To define seed germination, imagine a seed breaking open and sprouting into a new plant—like a tiny act of nature’s magic, powered by science. 🌱 The process begins with the seed absorbing water, swelling slightly, and activating enzymes that kickstart growth.
Within days, you'll see the first sign of life: the radicle, or tiny root, pushing downward while the shoot reaches upward toward light.
Three key factors control this transformation: water to wake up the seed, temperature (usually between 60-80°F) to speed up chemical reactions, and oxygen so roots can breathe. Without any of these, the seed stays dormant—sometimes forever.
That's why a simple setup of moist seed-starting mix, a warm spot, and a clear container can make all the difference.
What you end up with is a strong, healthy seedling ready to thrive in your garden. The science isn't just theory—it directly translates to real results.
When you understand germination, you can troubleshoot problems like slow sprouting or moldy seeds, and you'll know exactly when to expect your first green shoots.
This knowledge applies whether you're growing tomatoes from seed in March or rescuing a forgotten packet of saved heirloom beans. Mastering germination means fewer wasted seeds, faster growth, and a garden that starts strong. Let's break down the science so you can see it in action.
📚 In This Guide
- What you need
- Instructions
- Tips and common mistakes
- Wrapping up and next steps
What you need
- ● Seeds: Choose fresh, high-quality seeds (e.g., bean, pea, or sunflower seeds). Aim for 10–20 seeds for testing.
- ● Growing Medium: Paper Towels or Coffee Filters: 2–3 sheets (for the "paper towel method").
- ● Potting Soil or Seedling Mix: 1 small tray or container (6–12 inches wide).
- ○ Vermiculite or Perlite (Optional): 1 cup (for moisture retention and aeration).
- ● Containers: Plastic Bag or Ziploc: 1 (for humidity, if using paper towels).
- ● Seed Trays or Small Pots: 1–2 (with drainage holes, for soil method).
- ● Spray Bottle: 1 (for gentle watering—avoid over-saturation).
- ● Measuring Cup or Spoon: 1 (for soil/vermiculite).
- ● Ruler or Measuring Tape: 1 (to track seedling growth).
- ○ Thermometer (Optional): 1 (to monitor ideal temps: 65–75°F).
- ○ Heat Mat (Optional): 1 (for cold climates or slow-germinating seeds).
- ● Light Source: Natural sunlight or a grow light (12–16 hours/day once sprouts appear).
- ● Water: Room-temperature, filtered water (chlorine-free if possible).
- ● Patience & Consistency: Germination times vary (e.g., beans: 7–14 days; sunflowers: 7–21 days).
- ● Labeling Supplies: Toothpicks + marker (to track seed types/dates).
Understanding seed germination: the science behind starting life
Germination isn't just waiting for sprouts—it's a precise biological process you can master.
🌱 Step 1: Identify the Three Key Requirements for Germination
The science of germination hinges on three essential conditions: water, oxygen, and warmth. Water activates enzymes that break down stored nutrients in the seed, while oxygen fuels cellular respiration. Warmth accelerates these processes—most seeds germinate best between 65-85°F, though some (like pepper seeds) prefer 75-85°F. I always check seed packets for specific temperature ranges, as cooler conditions can delay germination by weeks.
Think of the seed like a tiny factory: water turns on the machinery, oxygen keeps it running, and warmth ensures everything operates at peak efficiency. Without any one of these, germination either stalls or fails entirely. For example, seeds planted too deeply lack oxygen and suffocate before sprouting. This is why I use well-draining seed-starting mix and never compact the soil around seeds.
💧 Step 2: Understand the Three Stages of Germination
Germination unfolds in three distinct phases: imbibition, lag phase, and radicle emergence. Imbibition occurs when the seed absorbs water, swelling as enzymes activate. The lag phase is a metabolic gear-shift where the seed prepares to grow, often lasting 12-48 hours. Finally, the radicle (embryonic root) emerges, breaking through the seed coat. You'll see this as a tiny white taproot pushing downward—this is your first sign of success.
Each stage requires different conditions. During imbibition, seeds need consistent moisture but not saturation. I use a spray bottle to mist seeds evenly, avoiding heavy watering that could dislodge them. The lag phase is when many gardeners mistakenly think seeds have failed—patience here is critical. If you've provided the right conditions, the radicle will appear within 3-7 days for most vegetables, though some (like beans) can take 7-14 days.
☀️ Step 3: Recognize the Role of Light in Germination
Most seeds germinate in darkness—light exposure can inhibit the process by triggering premature photosynthesis before the seedling has developed chlorophyll. This is why I cover seed trays with a humidity dome or plastic wrap. However, some seeds (like lettuce or petunia) require light to germinate, as their seed coats are too thick to break through soil. Always check seed packet instructions, as this distinction is critical.
Once the radicle emerges, the seedling enters the photoblastic phase, where light becomes essential for growth. At this stage, you'll move seedlings to a bright location or under grow lights. The transition happens quickly—within 24-48 hours of radicle emergence, you'll notice the hypocotyl (the stem connecting the seed to the first leaves) arching upward toward light. This is when I remove the humidity dome and introduce 12-16 hours of light daily to prevent leggy growth.
⏰ Step 4: Troubleshoot Common Germination Failures
Even with perfect conditions, germination can fail due to three primary issues: old seeds, improper storage, or disease. Seeds lose viability over time—most retain 80% germination for 1-2 years, but some (like onions) last only 6 months. I always store seeds in a cool, dry place and label them with the purchase date. If germination rates drop below 50%, it's time to replace the seed packet.
Improper storage—like exposing seeds to moisture or temperature fluctuations—can trigger premature aging. Disease, often caused by fungal pathogens like Pythium, appears as black, mushy seeds or seedlings that collapse suddenly. To prevent this, I sterilize trays with a 10% bleach solution before use and avoid overwatering. If you notice seeds rotting before sprouting, increase airflow and reduce moisture. The key is to act at the first sign of trouble—once damping-off starts, it spreads rapidly.
Tips & tricks for perfect seed germination
Mastering germination starts with understanding the subtle science—here’s how to optimize every step for reliable results.
Temperature Precision: The 65-85°F range is your target zone, but don’t guess—use a seedling heat mat if your environment fluctuates. I’ve seen germination rates drop by 40% when temps fall below 60°F during the critical 12-48 hour lag phase. For pepper seeds, maintain the higher end (75-85°F) consistently, as they’re particularly sensitive to cooler conditions. A simple thermometer placed near your seed trays removes all uncertainty.
Moisture Management: The imbibition stage demands precision—too little water and enzymes won’t activate, too much and seeds suffocate. Use a spray bottle to deliver a fine mist until the seed-starting mix feels like a damp (not soggy) sponge. I place trays on a bed of pebbles with shallow water underneath to maintain humidity without direct contact, which prevents fungal growth while keeping moisture levels ideal for 3-7 days until radicle emergence.
Light Transition Strategy: The shift from darkness to light at radicle emergence is where most failures happen. Remove the humidity dome only after you’ve confirmed the hypocotyl (that little stem) has begun arching upward—typically within 24-48 hours of radicle appearance. Introduce 12-16 hours of light daily gradually to avoid shocking seedlings. I start with a south-facing windowsill or grow lights on a timer, increasing exposure by 2 hours every other day to prevent leggy growth.
Troubleshooting Toolkit: When seeds fail to sprout within the expected 7-14 day window, don’t panic—first check seed viability by performing a simple float test (place seeds in water; viable ones sink). If they float, they’re likely old or damaged. For disease prevention, I sterilize all trays with a 10% bleach solution before use and avoid overwatering, which is the #1 cause of damping-off. If you notice black, mushy seeds, act immediately by increasing airflow and reducing moisture—this stops fungal spread before it becomes irreversible.
Pro Tips for Define Seed Germination
- Mastering germination starts with understanding the subtle science—here’s how to optimize every step for reliable res...
- Temperature Precision: The 65-85°F range is your target zone, but don’t guess—use a seedling heat mat if your environ...
- Moisture Management: The imbibition stage demands precision—too little water and enzymes won’t activate, too much and...
Frequently asked questions
Got questions about seed germination? You’re not alone! Here are answers to the most common queries—so you can grow with confidence.
What exactly is seed germination, and why does it matter?
Seed germination is the process where a seed sprouts and grows into a new plant. It’s the first critical step in propagation, determining whether your garden will thrive or fizzle. Proper germination ensures strong seedlings with better disease resistance and faster growth.
How long does it take for seeds to germinate?
Germination time varies by seed type. Fast growers like radishes or lettuce sprout in 3–7 days, while slowpokes (e.g., beans or tomatoes) take 7–21 days. Check seed packets for specifics—patience is key!
What’s the best way to speed up germination?
Keep seeds moist (not soggy), warm (70–85°F for most), and in indirect light. Pre-soaking hard seeds (like peas) for 4–12 hours can jumpstart the process. A humidity dome or plastic wrap helps trap moisture.
My seeds aren’t germinating—what’s wrong?
Common culprits: too cold/dry, old or low-quality seeds, or planting too deep. Test viability by soaking seeds in water—floaters are likely dead. Adjust conditions (heat mats, better soil) and try again!
Can I germinate seeds without soil?
Use paper towels (damp, in a sealed bag) or a hydroponic setup for faster sprouts. Just transfer seedlings to soil once roots appear (¼–½ inch). Great for herbs, lettuce, or small seeds!
Wrapping up and next steps
Understanding seed germination is your first step toward nurturing thriving plants—whether you're a beginner or a seasoned gardener! 🌱 By mastering the science of moisture, temperature, and light (or lack thereof), you’ve unlocked the secret to a 90% success rate in bringing new life to your garden.
Now that you’re armed with the right knowledge, it’s time to get growing!
Ready to take the next step? Start small—pick a few easy-to-germinate seeds like beans or marigolds—and experiment with the techniques you’ve learned. Keep a germination journal to track your progress, and soon, you’ll be a pro at coaxing seeds into vibrant seedlings. Happy planting! 🌿