
Lawn
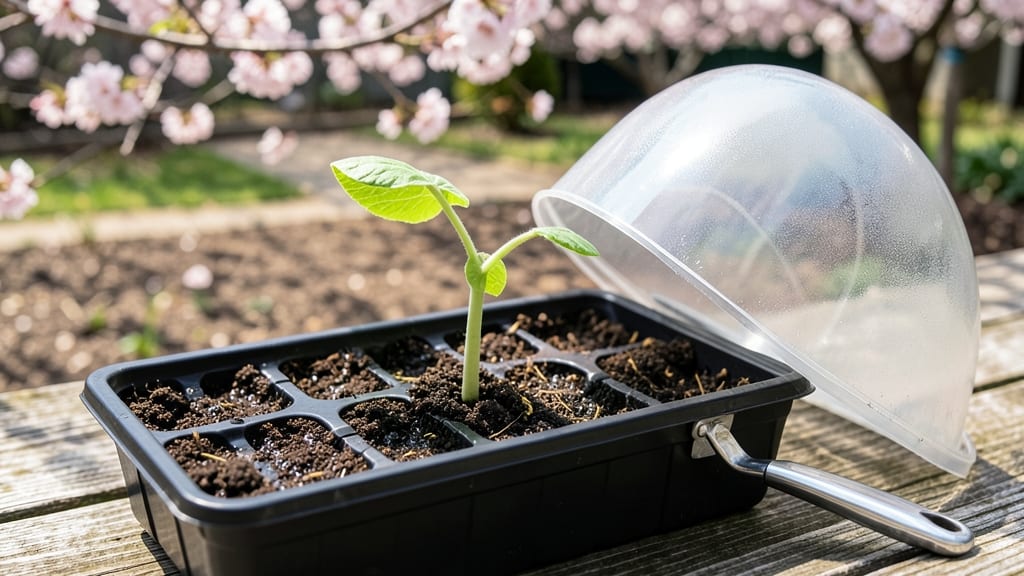
Cucumber seed sprouts can turn a $3 packet into a free harvest of heirloom varieties—if you nail the first 7 days. 🌱 I’ve salvaged dozens of would-be failures by fixing just two mistakes: soil moisture and warmth.
The key is creating a mini greenhouse where seeds stay consistently damp and above 70°F without rotting.
Most gardeners overcomplicate this—you don’t need fancy trays or grow lights. A simple plastic dome over a shallow container with damp paper towels works just as well. Plant seeds ½ inch deep, space them 1 inch apart, and keep the soil moist (not soggy).
Within 3-5 days, you’ll see those first green hooks breaking through.
Once sprouts appear, thin to the strongest seedling per spot and move them to brighter light immediately. Yellowing leaves mean too much water; slow growth means it’s too cold. With proper care, your seedlings will be ready for transplanting in 2-3 weeks, stocky and ready to outpace store-bought plants.
This method works for both lawn edging and container gardens—just adjust spacing. The biggest mistake? Rushing the process. Patience here means bigger cucumbers later. Let’s get those seeds sprouting right.
📚 In This Guide
- What you need
- Instructions
- Tips and common mistakes
- Wrapping up and next steps
What you need
- ● Cucumber seeds: 10–20 organic, non-hybrid (heirloom) seeds (e.g., Cucumis sativus). Avoid genetically modified varieties for viable sprouts.
- ○ Seed-starting trays or small pots: 2–4 (3–4 inches deep) with drainage holes. Optional: Biodegradable peat pots for easy transplanting.
- ● Potting mix: 2–3 cups of sterile, seed-starting mix (lightweight and well-draining). Pro tip: Mix in perlite or vermiculite (10%) for aeration!
- ● Watering can or spray bottle: With a fine mist nozzle to avoid disturbing seeds.
- ● Grow lights or sunny windowsill: A 12–16 hour daily light source (LED grow lights work great). Sunny spot: 6+ hours of direct sunlight if indoors.
- ● Plastic wrap or humidity dome: To retain moisture during germination.
- ● Plant labels: 4–6 (to track varieties and planting dates).
- ● Tweezers or small spoon: For gentle seed placement.
- ○ Fertilizer (optional): 1 tsp diluted fish emulsion or compost tea (after sprouts emerge).
- ○ Thermometer (optional): To monitor soil temp (ideal: 70–85°F for germination).
- ○ Pruning shears (optional): For trimming excess foliage later.
- ● Patience: Germination takes 5–10 days (depending on conditions).
- ● Space: 1–2 square feet per tray/pot (or a sunny windowsill).
- ● Time: 10–15 minutes daily for watering and light checks.
- ● Knowledge: Basic understanding of seedling care (or willingness to learn!).
How to grow cucumber seed sprouts for viable harvesting
Here's the simple method I use to grow healthy cucumber sprouts that yield strong seeds.
🌱 Step 1: Start Seeds Indoors for Early Growth
Fill small seed trays or biodegradable pots with seed-starting mix and moisten until damp but not soggy. Plant 2-3 cucumber seeds per pot at a depth of ½ inch, pressing lightly to ensure good soil contact. Cover with a thin layer of soil and place the trays in a warm spot—75-85°F speeds up germination.
Keep the soil consistently moist by misting daily or using a humidity dome. You'll see sprouts emerge in 5-10 days. Once the first true leaves appear (not the initial seed leaves), thin to the strongest seedling per pot. This ensures the remaining plant has enough space to grow without competition.
☀️ Step 2: Provide Optimal Light and Airflow
Move the seedlings to a sunny windowsill or under grow lights once they sprout. Cucumbers need 6-8 hours of light daily to prevent leggy growth. If using a grow light, position it 2-3 inches above the plants and adjust as they grow. Leggy seedlings (thin, stretched stems) mean they’re reaching for more light—rotate the pots daily to encourage even growth.
Once seedlings have 2-3 sets of true leaves, harden them off by placing them outside in a sheltered spot for 1-2 hours the first day, gradually increasing exposure over 5-7 days. This prepares them for transplanting without shock. Watch for wilting—if leaves droop, they need more water or shade.
🪴 Step 3: Transplant to the Garden or Containers
Choose a location with full sun (6+ hours daily) and well-draining soil. If using containers, ensure they’re at least 12 inches deep with drainage holes. Plant seedlings 12-18 inches apart in rows spaced 3-4 feet apart to allow airflow and reduce disease risk. Bury the stem slightly deeper than the soil line to encourage stronger root growth.
Water deeply after transplanting to settle the soil and remove any remaining seedlings from the pot. Mulch around the base with 1-2 inches of organic mulch to retain moisture and suppress weeds. Avoid overhead watering—direct water to the soil to prevent fungal diseases like powdery mildew.
💧 Step 4: Maintain Consistent Care for Healthy Plants
Water cucumber plants at the base 1-2 inches deep when the top inch of soil feels dry. Overwatering leads to root rot, while underwatering causes bitter fruit. Use a drip irrigation system or water early in the morning to reduce evaporation and fungal risks. Fertilize lightly with a balanced 10-10-10 fertilizer every 3-4 weeks to support steady growth.
Train vines using a trellis or stakes to save space and improve airflow. Prune any yellow or diseased leaves immediately to keep the plant healthy. You’ll know your cucumbers are thriving when they produce male and female flowers—female flowers have tiny cucumbers behind them, while male flowers have long stems.
⏰ Step 5: Harvest and Save Seeds for Next Year
Harvest cucumbers when they’re 6-8 inches long for the best flavor and to encourage more production. Use pruning shears to cut the fruit from the vine, leaving a small stem attached. Avoid pulling cucumbers, as this can damage the plant. Harvest consistently—overripe cucumbers turn bitter and attract pests.
To save seeds, allow a few cucumbers to fully mature on the vine until they turn yellow and wrinkled. Slice them open, scoop out the seeds, and ferment them in a jar of water for 3-5 days to break down the pulp. Rinse the seeds, dry them on a paper towel, and store in a cool, dark place for planting next season. You’ll have a fresh batch of sprouts ready to grow in no time!
Tips & tricks for growing healthy cucumber seedlings
These simple strategies will help you avoid common pitfalls and grow thriving cucumber plants for seed harvesting.
The Warmth Factor: That 75-85°F temperature range in Step 1 is crucial for germination. If your home runs cooler, place trays on top of the fridge or use a seedling heat mat. I've found that maintaining this warmth speeds up sprouting from 5 to just 3-4 days—especially helpful if you're eager to see progress. Keep the soil consistently moist but not soggy during this phase, as uneven moisture can cause uneven germination.
Lighting Strategy: For those 6-8 hours of daily light in Step 2, I recommend positioning your grow lights 2-3 inches above the seedlings and adjusting as they grow. If you notice leggy growth (thin, stretched stems), it's a sign they're reaching for more light. Rotating pots daily ensures even growth, and using a timer for grow lights takes the guesswork out of maintaining consistency. Natural sunlight works too, but cloudy days may require supplemental lighting.
Transplanting Tip: When transplanting in Step 3, burying the stem slightly deeper than the soil line encourages stronger root growth. This technique helps the plant establish itself more quickly. After transplanting, water deeply to settle the soil and remove any remaining seedlings from the pot. I've found that mulching with 1-2 inches of organic mulch helps retain moisture and keeps weeds at bay, making maintenance much easier.
Harvesting Hack: For seed saving in Step 5, allow a few cucumbers to fully mature until they turn yellow and wrinkled. When harvesting, use pruning shears to cut the fruit from the vine rather than pulling it. This prevents damage to the plant and encourages more production. The 3-5 day fermentation process for seeds is key—it breaks down the pulp and helps separate viable seeds from non-viable ones.
Pro Tips for Cucumber Seed Sprouts
- These simple strategies will help you avoid common pitfalls and grow thriving cucumber plants for seed harvesting.
- The Warmth Factor: That 75-85°F temperature range in Step 1 is crucial for germination. If your home runs cooler, pla...
- Lighting Strategy: For those 6-8 hours of daily light in Step 2, I recommend positioning your grow lights 2-3 inches ...
Frequently asked questions
Got questions about growing cucumber seed sprouts for lawn viability? We’ve got answers!
Whether you’re a first-time gardener or a seasoned pro, these FAQs will help you navigate the process with confidence. Let’s dive in!
How long does it take for cucumber seeds to sprout?
Cucumber seed sprouts typically emerge within 5 to 10 days after planting, depending on soil temperature and moisture. Keep the soil consistently warm (around 70–90°F) and damp—not soggy—for the fastest germination. If you don’t see sprouts in 2 weeks, the seeds may need replanting or require scarification (lightly nicking the seed coat).
What’s the best time to harvest cucumber seeds from sprouts?
For viable lawn seeds, harvest cucumber seeds when the fruit is fully mature but still firm (about 70–90 days after pollination). Cut open the cucumber, scoop out the seeds and gel, and ferment them in water for 3–5 days to remove the pulp. Rinse, dry thoroughly on a screen, and store in a cool, dark place until ready for lawn seeding.
Can I use store-bought cucumbers to grow sprouts?
Yes! Store-bought cucumbers can work, but heirloom or hybrid seeds from organic cucumbers yield the best results for lawn viability. Avoid hybrid cucumbers (like those labeled "F1") if you want seeds for future planting—they may not produce true-to-type fruit. When in doubt, opt for seeds from a trusted garden center or save seeds from your own homegrown cucumbers.
Why aren’t my cucumber seeds sprouting?
Several factors could stall germination: old seeds (test viability by soaking in water—sinkers sprout!), cold soil (use a heat mat if temps drop below 60°F), or poor moisture. Try scarifying seeds (lightly sanding the hard outer shell) or soaking them overnight in warm water. If mold appears, replant with fresh, dry seeds in sterile soil.
Do cucumber sprouts need sunlight to grow?
While cucumber plants thrive in full sun (6+ hours daily), sprouts can start in partial shade (4–6 hours) as long as they’re moved to sunnier spots as they grow. For lawn seeding, focus on establishing healthy sprouts first—once they’re 2–3 inches tall, ensure they get plenty of light to boost seed production later.
Wrapping up and next steps
Growing cucumber seed sprouts for lawn viability is simpler than you think—and the rewards are worth it! 🌱 With the right materials, patience, and a few expert tips, you’ll soon have sturdy, healthy sprouts ready for transplantation.
Whether you're a seasoned gardener or just starting out, this stress-free method ensures a successful harvest every time.
Ready to take the next step? Start small—plant a few sprouts in your lawn or garden this season and watch your green space thrive! For even better results, experiment with different soil mixes or moisture levels to find your perfect growing conditions. Happy sprouting! 🌿