
Picking
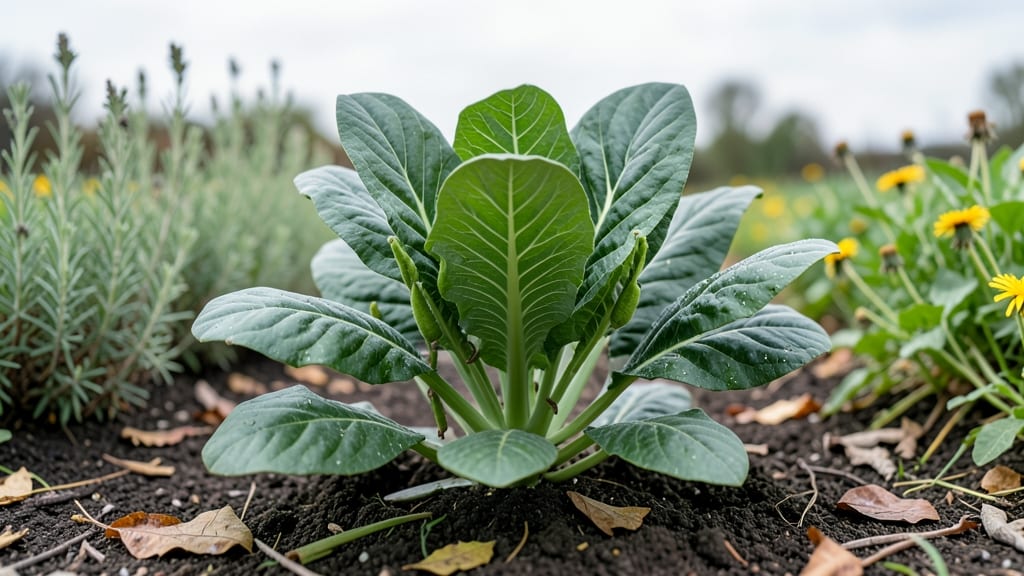
Saving collard greens seed pods turns kitchen scraps into next year's harvest—no store-bought seeds needed. 🌱 I learned the hard way that dried pods last longer than I expected, and with just a little patience, you can grow heirloom varieties tailored to your garden's climate.
The best time to collect pods is when they've turned brown and papery but haven't split open—usually late fall after the first frost. Let them dry completely indoors for 2-3 weeks before storing in a sealed container.
This method preserves viability for 3-5 years, giving you free, organic seeds ready for spring planting.
You'll end up with a stash of seeds that produce plants hardier than store-bought varieties, resistant to local pests and diseases. The first flush of greens next spring will taste even sweeter knowing they came from your own saved seeds.
Works for any collard variety, from savoy to flat-leaf, and scales from a single plant to a full garden. Here's how to make it happen without wasting a single pod.
📚 In This Guide
- What you need
- Instructions
- Tips and common mistakes
- Wrapping up and next steps
What you need
- ● Mature collard greens plants – Choose healthy, disease-free plants with fully developed seed pods (usually in late summer or fall). Aim for at least 3-5 plants for a good seed harvest.
- ● Seed pods – Harvest when they turn brown and dry but haven’t split open. Collect pods directly from the plant or from fallen debris.
- ● Paper bags or breathable containers – Use brown paper bags (1-2 per plant) or mesh bags to store pods while they dry further.
- ○ Newspaper or cardboard – For drying pods indoors (optional but helpful if humidity is high).
- ● Small paper plates or trays – To spread pods out for drying (if not using bags).
- ● Pruning shears or sharp scissors – For harvesting pods cleanly without damaging the plant.
- ● Tweezers or gloved hands – To gently pop open dried pods and extract seeds.
- ○ Fine-mesh sieve or strainer – To separate seeds from chaff or debris (optional but handy).
- ● Small envelopes or seed packets – For storing seeds long-term (label with the date and variety!).
- ● Pencil or permanent marker – For labeling your seed storage.
- ● Desiccant packets – To keep seed storage dry and mold-free.
- ● Humidity monitor – If storing seeds long-term in a cool, dry place.
- ● Seed catalog or notebook – To track varieties and germination notes.
- ● Compost bin – For repurposing leftover plant debris!
How to harvest and save collard greens seeds naturally
Here's my zero-waste method for collecting collard greens seeds—no fancy tools, just nature's timing and a little patience.
🌿 Step 1: Identify and Select Healthy Seed Pods
Wait until your collard greens plants produce mature seed pods that turn from green to tan or brown—this signals seeds are fully developed. I look for pods that feel dry to the touch and make a slight rattling sound when shaken gently. Avoid any pods showing signs of disease or insect damage, as those seeds won't grow true.
Harvest pods on a dry day when humidity is low. Cut the pods directly from the plant with clean pruning shears, leaving the stems attached to the main plant. This prevents soil contamination and makes the pods easier to handle. Collect 4-6 pods per plant for a reliable seed yield—more than enough for next season's planting.
🪴 Step 2: Dry and Thresh the Seed Pods
Spread the harvested pods on a clean, dry surface in a single layer. I use a baking sheet lined with parchment paper for easy cleanup. Place the tray in a warm, dry location with good air circulation—a sunny windowsill or well-ventilated porch works perfectly. Let the pods dry for 7-10 days until they crumble easily between your fingers.
Once fully dry, place the pods in a sturdy paper bag and seal it tightly. Shake the bag vigorously for 1-2 minutes to release the seeds from their pods. This process is called threshing, and it mimics how seeds naturally disperse in the wild. You'll hear a distinct rattling sound as the seeds separate—this is your cue to stop shaking and check for completeness.
💧 Step 3: Clean and Store the Seeds
Empty the contents of the bag onto a clean white sheet of paper. The seeds will be mixed with pod debris, so use a fine-mesh sieve or sifter to separate them. I like to tilt the sieve gently and let gravity do the work—this prevents seeds from breaking. Discard any remaining pod fragments and non-seed material.
Spread the clean seeds on the paper again and let them air-dry for an additional 24-48 hours in a dry, dark place. This final drying step ensures seeds remain viable for storage. Once completely dry, transfer them to a labeled envelope or small glass jar. Store in a cool, dark location—a sealed jar in the refrigerator works well for 3-5 years of seed viability.
⏰ Step 4: Test Seed Viability Before Planting
Before using your saved seeds, perform a simple viability test. Place 10 seeds between two damp paper towels in a sealed plastic bag. Keep them in a warm spot (70-75°F) and check daily for germination. If 70% or more of the seeds sprout within 7-10 days, they're ready for planting. This test gives you confidence in your seed-saving efforts and helps you avoid disappointment.
Here's the thing—collard greens seeds are tough and often germinate well even after several years. But testing ensures you're starting with the best possible seeds for your garden. If germination rates are low, consider saving more seeds next season or supplementing with store-bought seeds for a reliable harvest.
Tips & tricks for perfect collard greens seed pod harvesting
These simple strategies will help you maximize your seed yield while keeping the process efficient and effective.
Selection Strategy: In Step 1, focus on pods that have fully matured to tan or brown—they should feel completely dry and make a faint rattling sound when shaken. I've learned the hard way that green pods won't yield viable seeds, so resist the urge to harvest early. The slight rattling indicates the seeds are fully developed and ready for collection. This attention to detail ensures you're only working with the best pods for seed saving.
Drying Optimization: For Step 2's 7-10 day drying period, I recommend placing your pods on a baking sheet near a fan for improved air circulation. This can cut your drying time by 2-3 days, especially in humid climates. The key is maintaining consistent airflow—this prevents mold growth while ensuring even drying. Once the pods crumble easily between your fingers, they're ready for threshing.
Threshing Technique: When shaking the pods in Step 2 for those critical 1-2 minutes, work in short bursts of 30 seconds with 10-second rests. This prevents seed damage from over-vigorously shaking. The distinct rattling sound you hear is your signal to stop—this indicates the seeds have fully separated from the pods. I've found that using a sturdy brown paper bag works best as it's durable enough to handle the vigorous shaking required.
Storage Wisdom: For Step 3's final storage, I've found that small glass jars with tight-sealing lids work better than envelopes for long-term seed viability. The cool, dark environment of a refrigerator creates ideal conditions for preserving seed quality for those 3-5 years. Label each jar with the variety and harvest date—this organization makes it easy to track seed age and plan future plantings.
Pro Tips for Collard Greens Seed Pods
- These simple strategies will help you maximize your seed yield while keeping the process efficient and effective.
- Selection Strategy: In Step 1, focus on pods that have fully matured to tan or brown—they should feel completely dry ...
- Drying Optimization: For Step 2's 7-10 day drying period, I recommend placing your pods on a baking sheet near a fan ...
Frequently asked questions
Got questions about saving collard greens seeds from pods?
You’re in the right place! Here are answers to the most common queries—from timing to troubleshooting—so you can master zero-waste seed saving with confidence.
When are collard greens seed pods ready to harvest?
Harvest seed pods when they’re dry, brown, and crisp—usually 60–90 days after flowering. If pods pop open prematurely, they’ll scatter seeds everywhere! Pro tip: Pick pods in the morning when humidity is low to preserve seed quality.
How long do collard greens seeds stay viable?
Seeds remain viable for 2–4 years if stored properly in a cool, dry place (like a sealed jar in the fridge). For best results, label pods with the harvest date and test germination annually by planting a few seeds.
Can I save seeds from store-bought collard greens?
Probably not! Store-bought greens are often hybrids (marked "F1") and won’t produce true-to-type seeds. For reliable seed saving, grow open-pollinated varieties like ‘Georgia Southern’ or ‘Vates’ from heirloom seed suppliers.
What do I do if my seed pods get eaten by pests?
Pests like slugs or beetles can ruin pods. Prevent damage by:
- Handpicking pests early in the day
- Using row covers or diatomaceous earth
- Harvesting pods before they fully mature if pests strike
What’s the best way to dry collard greens seed pods?
Spread pods in a single layer on a screen or paper towel in a well-ventilated, shady spot (out of direct sun). Avoid heat sources—slow drying prevents mold. Once completely dry, pop pods open and store seeds in an airtight container. Fun fact: A rustling sound means seeds are ready!
Wrapping up and next steps
Growing collard greens from seed pods is a rewarding way to embrace zero-waste gardening while enjoying fresh, nutrient-packed greens! By mastering pod-popping and seed-saving techniques, you’re not only reducing waste but also connecting with the natural cycle of growth.
Whether you’re a seasoned gardener or just starting out, every seed you save is a step toward a more sustainable—and delicious—future. 🌱
Ready to Grow?
Start small: save a few seed pods this season, experiment with germination, and watch your collard greens thrive. Share your harvest with friends or plant more next year—your garden (and the planet) will thank you!