
Lawn
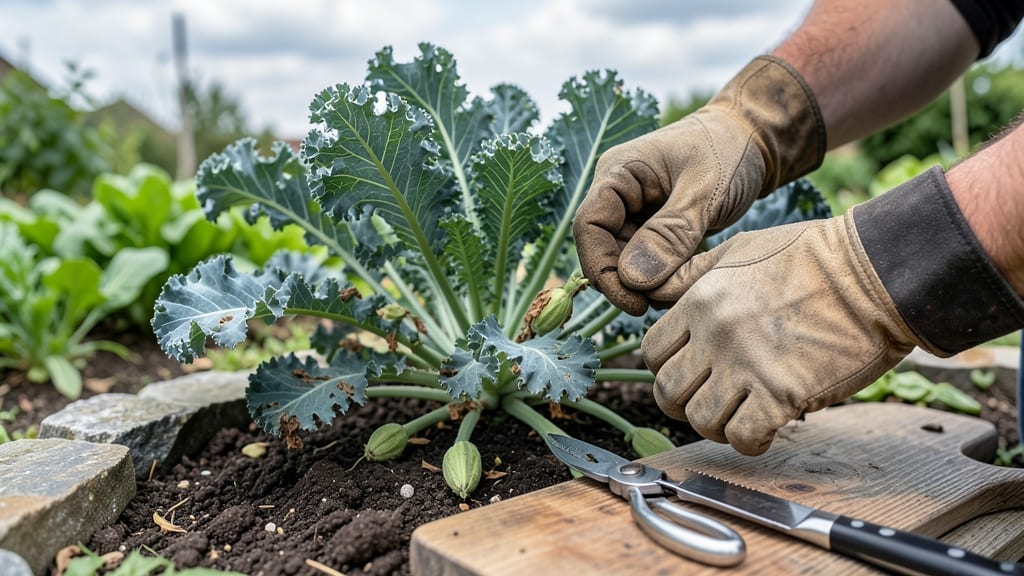
Harvesting kale seed pods means never buying seeds again—just let the plants do the work for you. 🌱 The pods form in late summer when your kale bolts, and each one contains hundreds of seeds ready for next year's garden.
I've saved seeds from my own plants for three seasons now, and the process gets easier every time you do it.
You'll need just a few simple tools: sharp scissors, a paper bag for drying, and a dark, cool place to store them. The key is patience—wait until the pods turn from green to brown before harvesting, usually about 10-14 days after bolting.
Twisting pods off the stem is the easiest way, but be gentle to avoid damaging the seeds inside.
Once you've collected the pods, let them dry completely on paper towels for a week. Then, gently rub them between your hands to release the seeds, which you'll sift into a jar.
Properly stored in a cool, dry place, these seeds will stay viable for 3-5 years, giving you a free, organic supply for future gardens.
This method works for any kale variety, from curly to lacinato, and it's a great way to preserve heirloom traits. Even if you're new to seed saving, the process is simple once you know the right timing and technique—no fancy equipment required.
📚 In This Guide
- What you need
- Instructions
- Tips and common mistakes
- Wrapping up and next steps
What you need
- ● Mature kale plants: Choose healthy, disease-free varieties (e.g., curly, lacinato, or red Russian kale). Aim for plants that have bolted (flowered) naturally or been encouraged to bolt with reduced watering.
- ● Kale seed pods: Harvest when pods are dry, brown, and slightly papery (typically late summer to fall, depending on your climate). You’ll need at least 10–15 pods for a reliable seed yield.
- ● Pruning shears or sharp scissors: Clean, sterilized tools to snip pods without damaging the plant.
- ● Paper bags or brown lunch bags: 2–3 medium-sized bags for drying pods (avoid plastic—it traps moisture!).
- ● Labeling tags or masking tape + marker: To label bags with the kale variety and harvest date.
- ● Small sieve or fine mesh screen: For separating seeds from chaff later.
- ● Envelope or airtight container: For storing clean, dry seeds (e.g., a glass jar with a lid or paper seed envelope).
- ● Desiccant packets (silica gel): Place 1–2 in seed bags to speed up drying if humidity is high.
- ● Magnifying glass: For inspecting pods/seeds for pests or damage.
- ● Seed catalog or notebook: To track varieties, germination rates, and notes on each batch.
- ● Humidity monitor: Ideal for climates with high moisture—aim for 30–40% humidity during drying.
- ● Patience: Seed pods take 2–4 weeks to fully dry indoors, depending on conditions.
- ● Dedicated drying space: A cool, dark, well-ventilated area (e.g., pantry, closet, or basement).
- ● Knowledge of your kale variety: Some kales (like Tuscan) produce more reliable seeds than others—research if you’re new to seed saving!
Step-by-Step instructions for harvesting kale seed pods
Here’s how to collect kale seeds without the frustrating twist-and-pull method.
🌱 Step 1: Identify and Prepare Mature Seed Pods
Look for seed pods that have turned from green to tan or brown—this signals they’re fully mature and ready for harvest. I like to check my kale plants in late summer or early fall when the pods are dry but haven’t yet scattered their seeds. Gently twist the stems near the base of the pods to loosen them, but don’t pull too hard—you want the pods to release easily without damaging the plant.
Place the harvested pods in a paper bag (not plastic) to allow airflow. This prevents moisture buildup, which can cause mold. If you’re harvesting on a humid day, spread the pods on a clean, dry towel in a shaded area for a few hours to dry them completely before bagging.
🪴 Step 2: Dry and Store Seed Pods Properly
Find a warm, dry spot (like a sunny windowsill or a well-ventilated shelf) and let the pods dry for 5-7 days. You’ll know they’re ready when the pods feel lightweight and papery—they should rattle slightly when shaken. Avoid direct sunlight, which can overheat the pods and reduce seed viability.
Once fully dry, store the pods in a sealed glass jar or airtight container in a cool, dark place (like a pantry or basement). Label the jar with the variety name and harvest date—this helps track freshness, as kale seeds stay viable for 2-4 years when stored properly.
✂️ Step 3: Extract Seeds Without Waste
When you’re ready to use the seeds, place a few dried pods in a clean cloth bag and gently crush them with a rolling pin or your hands. The pods will break open, releasing the seeds while leaving behind the empty husks. I like to do this over a white plate or sheet of paper—it makes it easy to see the seeds and separate them from debris.
Sift the crushed pods through a fine-mesh strainer to remove any remaining husk fragments. The seeds will fall through while the chaff stays behind. For extra cleanliness, float the seeds in a bowl of lukewarm water—the empty or damaged seeds will sink, while the viable ones will float. Scoop out the floating seeds and spread them on a paper towel to dry completely before planting.
🌿 Step 4: Test and Plant Your Kale Seeds
To ensure your seeds are viable, plant a small batch in moist potting mix at a depth of ¼ inch. Keep the soil consistently damp (not soggy) and place the container in a warm, sunny spot (around 65-75°F). You should see sprouts in 7-14 days—if germination is slow, try soaking the seeds in warm water for 12 hours before replanting.
Once you’ve confirmed the seeds are good, store the rest in a small envelope inside the glass jar for future planting. This method keeps seeds organized and prevents moisture buildup, which can shorten their shelf life. Now you’re ready to grow your own kale—zero waste, zero fuss!
Tips & tricks for perfect kale seed pod harvesting
Here's what nobody tells you about making this process even easier—and why those little details matter.
Timing is Everything: Harvest your kale seed pods in the morning when humidity is lowest. The pods will be drier and less likely to stick together, making the twisting process in Step 1 much smoother. I've found that harvesting just after a light dew has evaporated (around 9-10 AM) gives me the cleanest pods with minimal debris. This small timing adjustment can save you hours of post-harvest cleaning later.
Storage Wisdom: For the 5-7 day drying period in Step 2, place a small piece of uncooked rice in your paper bag or container. The rice absorbs any residual moisture and helps prevent mold growth, especially if your kitchen has higher humidity. I keep my drying pods on a wire cooling rack over a baking sheet—this allows air to circulate from all sides, speeding up the drying process by about 24 hours. Just avoid direct sunlight as mentioned in the instructions.
Seed Viability Test: Before planting all your seeds in Step 4, do a quick viability test: place 10 seeds in a small cup of lukewarm water. After 30 minutes, count how many have swollen. If more than 80% swell, your seeds are excellent. If fewer than 50% swell, consider soaking them for the full 12 hours mentioned in the instructions before planting. This simple test can save you from planting hundreds of non-viable seeds.
Pro Tips for Kale Seed Pods
- Here's what nobody tells you about making this process even easier—and why those little details matter.
- Timing is Everything: Harvest your kale seed pods in the morning when humidity is lowest. The pods will be drier and ...
- Storage Wisdom: For the 5-7 day drying period in Step 2, place a small piece of uncooked rice in your paper bag or co...
Frequently asked questions
Got questions about harvesting kale seed pods?
You’re not alone! Here are answers to the most common queries to help you master zero-waste seed saving like a pro.
How do I know when kale seed pods are ready to harvest?
Kale seed pods mature when they turn brown and crispy—usually 60–90 days after flowering. Gently tug on them; if they release easily, they’re ready! Harvest on a dry day to avoid mold. Pro tip: Use a pair of scissors to snip pods cleanly without damaging the plant.
Can I save seeds from store-bought kale?
Yes, but with a catch! Store-bought kale is often hybridized for uniform growth, so seeds may not produce true-to-type plants. For reliable heirloom seeds, grow your own kale from saved seeds or buy certified organic, non-hybrid varieties. Pro tip: Label seeds with the variety and harvest year to track traits!
What’s the best way to dry and store kale seed pods?
Spread pods in a single layer on a paper towel or mesh screen in a cool, dry place (60–70°F) for 1–2 weeks. Stir them occasionally to speed drying. Once fully dry, store seeds in paper envelopes or airtight containers in a dark, cool spot (like a fridge) for up to 3 years. Pro tip: Add a silica gel packet to prevent moisture!
What if my kale seed pods won’t open naturally?
If pods stay closed, try these tricks: Freeze them for 24 hours to simulate winter dormancy, then thaw and check. Alternatively, soak pods in warm water for 12 hours to soften them. If all else fails, gently crush pods with a mortar and pestle to release seeds—but save this for last! Pro tip: Patience is key; some varieties need extra time.
Are there alternatives to saving kale seeds?
If seed saving feels overwhelming, try propagating kale from cuttings (root bare stems in water) or buying seeds annually from reputable suppliers. For zero-waste gardeners, composting leftover pods is a great backup—just avoid hybrid varieties in compost if you plan to regrow! Pro tip: Swap seeds with local gardeners to diversify your stash!
Wrapping up and next steps
Harvesting kale seed pods is a rewarding way to embrace zero-waste gardening while ensuring a fresh supply of organic seeds for next season! By mastering twist-free techniques and understanding the lifecycle of these resilient pods, you’re not only saving money but also contributing to sustainable gardening practices.
Whether you’re a seasoned gardener or just starting out, every seed pod you save is a step toward a greener, more self-sufficient future. 🌱
Ready to take the next step? Start small—try saving seeds from just one or two kale plants this season—and watch your confidence (and seed stash!) grow. Share your harvest with fellow gardeners or experiment with growing your own seedlings from scratch. Happy saving, and may your garden flourish! 🌟