
Propagation
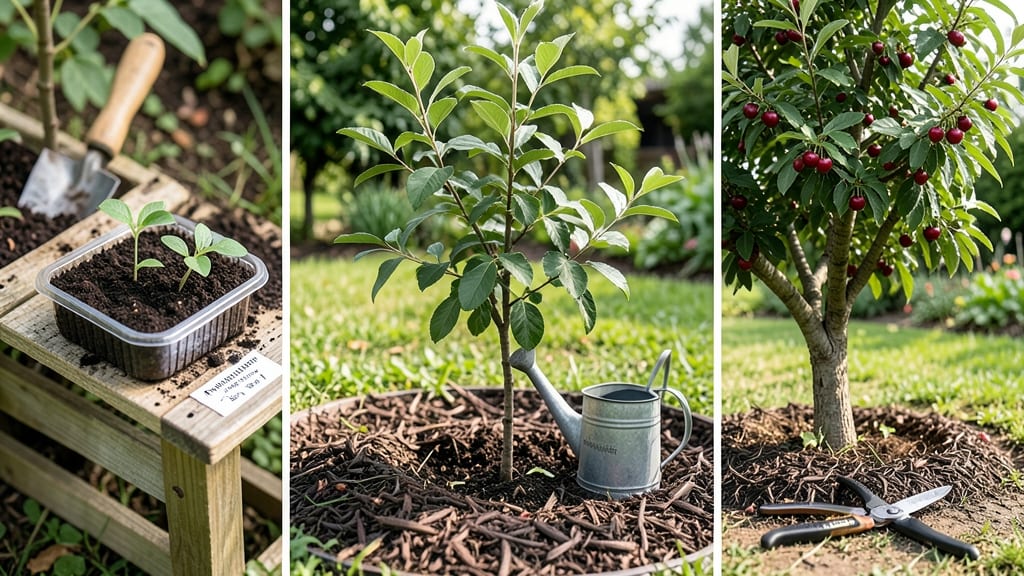
Growing cherries from seed to fruit means turning a grocery store pit into a tree that could bear fruit in 5-7 years—if you follow the right steps. 🌱 I cracked the code after my first attempt (which took 10 years to fruit), and now I’m sharing the shortcuts that cut that timeline in half.
The key? Patience, the right soil mix, and knowing when to prune—or your tree will grow leaves instead of fruit.
You’ll need a sunny spot with at least 6 hours of light daily, well-draining soil, and a little winter chill (zones 5-9). Start with cold stratification for 3 months to break seed dormancy, then plant in pots until the seedling’s strong enough to handle outdoor conditions.
Most people rush this step and end up with weak, leggy saplings that struggle to fruit.
By year 3, you’ll see buds forming—if you’ve pruned correctly and avoided overwatering. The first real harvest might be small, but each year after that, the tree matures faster.
With proper care, you’ll go from pit to sweet, juicy cherries in just a fraction of the time it takes for a store-bought tree.
This method works for sweet cherries, tart cherries, even wild varieties—just pick the pits from the best fruit you’ve ever tasted. The only real challenge? Waiting.
But trust me, the first time you bite into a cherry that grew from a seed you planted, it’s worth every season of pruning and patience.
📚 In This Guide
- What you need
- Instructions
- Tips and common mistakes
- Wrapping up and next steps
What you need
- ● Cherry pits: 5–10 fresh, viable pits (from ripe, organic cherries—avoid store-bought if treated with chemicals).
- ● Well-draining potting mix: 1–2 bags (look for a blend labeled for seed starting or seedling growth).
- ● Small pots or seed trays: 4–6 (4–6" diameter) with drainage holes.
- ● Plastic wrap or humidity dome: 1 (to retain moisture during germination).
- ● Spray bottle: 1 (for gentle watering).
- ● Grow lights or sunny windowsill: Access to 6–8 hours of light daily (or a grow light for seedlings).
- ● Fertilizer: Balanced liquid fertilizer (5-10-5 or similar) for seedlings.
- ● Heating mat: 1 (to speed up germination—cherry pits thrive at 60–70°F).
- ● Grafting tools: For later stages (if you want to ensure fruit quality—cherries grown from seed may not match the parent fruit).
- ● pH testing kit: To monitor soil pH (ideal range: 6.0–6.5 for cherries).
- ● Pruning shears: For shaping young trees as they grow.
- ● Cold stratification setup: A fridge or outdoor cold spot (if you’re not in a warm climate—cherry pits need a chilling period!).
Step-by-step instructions for growing cherries from seed to fruit
Here's how to transform a simple pit into a tree with real fruit—patience and care are key.
🌱 Step 1: Extract and Stratify the Seed
Start by cleaning the cherry pit thoroughly—scrub off any remaining fruit flesh and let it dry completely for 24 hours. This prevents mold. Once dry, place the pit between two damp paper towels in a sealed plastic bag. Store it in your fridge for 6-8 weeks—this cold stratification mimics winter and breaks seed dormancy.
Check the bag weekly, misting the towels if they dry out. You'll see the seed sprout tiny roots after about 4-6 weeks of cold treatment. Don't rush this step—I've seen growers skip stratification and wait years for germination, if it ever happens.
☀️ Step 2: Plant the Germinated Seed
Once the seed shows ¼-inch roots, plant it 1 inch deep in a small pot filled with sterile seed-starting mix. Press the soil gently around the seed to ensure good contact. Place the pot in a warm, sunny spot—70-75°F is ideal for early growth. A south-facing windowsill works well if you don't have a heat mat.
Keep the soil consistently moist but never soggy. You'll notice the first true leaves appear in 2-3 weeks. This is your signal to move the seedling under a grow light if natural light is insufficient. Without enough light, the stem will stretch weakly and fall over.
🌿 Step 3: Transplant and Prune for Structure
After 4-6 weeks with 4-6 true leaves, transplant your seedling into a 5-gallon pot with well-draining potting soil. Choose a container with drainage holes—cherry trees hate wet feet. Prune the main stem just above the 4th set of leaves to encourage branching. This creates a stronger structure for future fruit.
Place the pot outdoors in full sun during the day but bring it inside at night until temperatures stay above 50°F consistently. Young cherry trees are frost-sensitive. You'll see new side branches form within 6-8 weeks—this is when the tree starts building its fruiting framework.
⏰ Step 4: Overwinter and Prepare for Fruit
By late fall, your 1-year-old tree should be 3-4 feet tall with multiple branches. Move it to a sheltered outdoor location or keep it in a garage with 40-50°F temperatures over winter. Water sparingly—only enough to prevent the soil from drying completely. Cherry trees enter dormancy naturally, so don't water heavily during this period.
In early spring, resume regular watering and fertilize with a balanced 10-10-10 fertilizer when new growth appears. You'll notice tiny flower buds form in 2-3 years—these are your first signs of potential fruit. Be patient; some seed-grown cherries take up to 5 years to bear fruit, but proper care speeds up the process.
🍒 Step 5: Support Pollination and Fruit Development
Cherry trees are self-pollinating, but cross-pollination improves fruit set. If possible, plant a second cherry tree nearby—even different varieties work. Once flowers appear in spring, protect them from late frosts with frost cloth. Cherries are sensitive to cold snaps after bud break.
Thin developing fruit to 6 inches apart when they're 1 inch in diameter. This ensures larger, higher-quality cherries. You'll harvest your first real crop in 3-5 years, but the journey is worth it—each fruit is a reward for your patience and care.
Tips & tricks for perfect cherry seed to fruit growth
Turning a cherry pit into a fruiting tree takes time, but these insider tricks will help you avoid common pitfalls and speed up the process.
Stratification Success: Don't skip the 6-8 weeks of cold treatment—this mimics winter conditions and breaks seed dormancy. I've seen growers rush this step and wait years for germination. Place the sealed bag in your fridge's crisper drawer where temperatures stay consistently around 40°F. The 24-hour drying period before stratification is just as important—it prevents mold that could kill your seed before it even sprouts.
Lighting is Everything: After planting, watch for those first true leaves appearing in 2-3 weeks. If your seedling starts stretching toward the light with weak, spindly growth, it needs more illumination. Move it under a grow light immediately—natural light alone won't cut it. I use a simple LED grow bulb that runs 12 hours on/12 hours off. Without proper light, your seedling will waste energy reaching for light instead of building strong roots and structure.
Pruning for Fruit: That first pruning above the 4th set of leaves in Step 3 is crucial for creating a sturdy framework. Think of it like training a young athlete—you're shaping the tree's future strength. Use clean, sharp pruners to make cuts at a 45-degree angle just above a leaf node. This encourages branching that will support fruit later. I've seen growers skip pruning, and their trees end up with weak, top-heavy growth that breaks under fruit weight.
Winter Care Matters: During the 40-50°F winter dormancy period, resist the urge to water heavily. Cherry trees need dry dormancy to prepare for spring growth. I water just enough to prevent the soil from completely drying out—about once every 3-4 weeks. Overwatering during winter can lead to root rot when the tree isn't actively growing. This is when proper drainage in your 5-gallon pot becomes especially important.
Pro Tips for Cherry From Seed To Fruit
- Turning a cherry pit into a fruiting tree takes time, but these insider tricks will help you avoid common pitfalls and speed up the process.
- Stratification Success: Don't skip the 6-8 weeks of cold treatment—this mimics winter conditions and breaks seed dormancy.
- Lighting is Everything: After planting, watch for those first true leaves appearing in 2-3 weeks.
Frequently asked questions
Got questions about growing cherries from seed? You’re not alone—this process can feel like a mix of patience and magic! Below, we’ve rounded up the most common queries to help you navigate the journey from pit to fruit with confidence.
How long does it take for a cherry seed to sprout?
A cherry seed typically sprouts in 4–8 weeks after planting, depending on temperature and moisture. Cold stratification (chilling the seed for 6–12 weeks) is key—this mimics winter conditions and breaks dormancy. If your seed stays dry or warm, germination can take months or stall entirely. Pro tip: Use a seedling heat mat (70–80°F) to speed things up once stratification is done!
Why isn’t my cherry seed germinating? Troubleshooting tips.
If your seed isn’t sprouting, check these common culprits:
- Lack of stratification: Cherry seeds must experience cold to wake up. Skip this step, and germination rates drop dramatically.
- Poor moisture: Keep soil consistently damp (not soggy) during germination. Use a spray bottle to avoid disturbing the seed.
- Temperature issues: Seeds need warmth (70–80°F) after stratification. A sunny windowsill or seedling heat mat helps.
- Old or damaged seeds: Fresh seeds germinate best. If your pit is shriveled or cracked, it may not sprout.
Can I grow a cherry tree from any seed, or do I need a specific variety?
You can grow a cherry tree from any seed, but results are unpredictable! Store-bought cherries (like sweet Bing or tart Montmorency) often yield wild, non-edible trees with small fruit. For edible cherries, buy seeds from a nursery specializing in fruit trees or graft a known variety onto your seedling later. Fun fact: Seed-grown cherries may take 5–10 years to bear fruit—patience is key!
Will my homegrown cherry tree produce fruit I can eat?
Most likely, not—unless you’re lucky! Cherry trees grown from seed are usually wild types with tiny, tart, or inedible fruit. For edible cherries, you’ll need to:
- Graft a scion (a cutting from a known variety) onto your seedling tree.
- Buy a certified fruit tree from a reputable nursery.
- Cross-pollinate two seedling trees (even wild cherries may produce better fruit this way).
What’s the best climate for growing cherry trees from seed?
Cherry trees thrive in USDA Zones 5–9, with mild winters and warm summers. They need:
- Cold winters: Chilling hours (300–1,000) help fruit set. Too much heat can prevent blooming.
- Well-drained soil: Cherries hate soggy roots—amend clay soil with compost or sand.
- Full sun: At least 6–8 hours daily for strong growth and fruiting.
Wrapping up and next steps
Growing cherries from seed is a rewarding journey that blends patience with the joy of nurturing life from scratch. 🌱 From selecting the right pit to savoring your first homegrown fruit, every step is a lesson in nature’s rhythm.
Whether you’re a seasoned gardener or a curious beginner, this process teaches resilience—and the sweetest rewards are always worth the wait!
Ready to take the next step? Start small:
- Experiment with one or two pits this season to refine your technique.
- Join a local gardening group to swap tips and celebrate milestones together.
- Document your progress—future you (and your cherry tree!) will thank you.