
Lawn
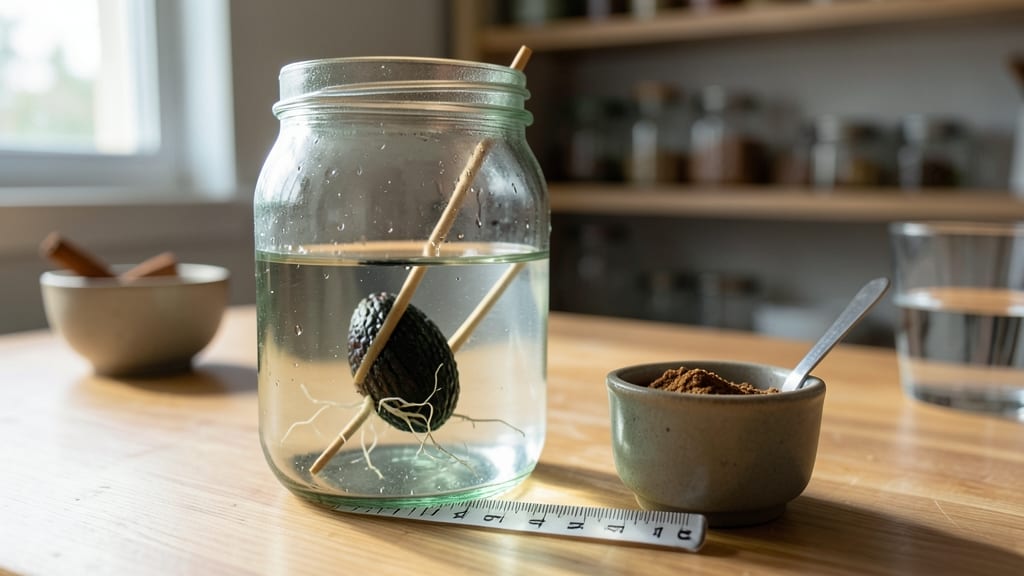
Sprouting an avocado seed in water is one of those simple projects that feels like magic—roots growing right on your kitchen counter in just 2 weeks. 🌱 I’ve tried this with grocery store seeds (yes, they work!) and watched those first pale roots emerge like tiny green fingers reaching for the light.
The best part? No soil, no mess, just patience and a clear jar.
You only need three things: a fresh avocado seed, a glass jar, and some toothpicks to keep it suspended. The secret is maintaining the water level—just enough to cover the bottom third of the seed, not drowning it.
Change the water every 2-3 days to keep it fresh, and within a week, you’ll spot those first wobbly roots. It’s oddly satisfying, like watching a tiny plant wake up.
By week three, you’ll have a 4-6 inch root system ready for its next adventure—transplanting into soil. The roots will thicken, and if you’re lucky, you might even coax a sprout from the top later.
This isn’t just a science experiment; it’s a living reminder that growth starts small but doesn’t need soil to begin.
Here’s where it gets interesting—some seeds grow roots but never sprout, while others surprise you with a tiny leaf. That’s the fun of it. Whether you keep it as a houseplant or bury it in the garden, you’ve already won by giving it a chance. Ready to try?
📚 In This Guide
- What you need
- Instructions
- Tips and common mistakes
- Wrapping up and next steps
What you need
- ● 1 fresh avocado seed – Choose a seed from a ripe, organic avocado (the bigger, the better!)
- ● 1 sharp knife or peeler – For carefully removing the seed from the pit
- ● Toothpicks (3–4) – To suspend the seed over water (or a clean, rust-free alternative like wooden skewers)
- ● 1 glass or jar (16–24 oz) – Tall enough to submerge ~1 inch of the seed’s bottom
- ● Filtered or room-temperature water – Tap water is fine, but avoid chlorine-heavy sources
- ● Paper towels or a clean cloth – To keep the seed’s top dry and prevent rot
- ● Hydrogen peroxide (3%) – A few drops in the water to prevent bacterial growth (rinse before planting later)
- ● Planting medium (potting soil or coconut coir) – For transplanting once roots reach ~2–3 inches
- ● Spray bottle – To mist the seed’s top if it dries out
- ● Ruler or measuring tape – To track root growth over time
Step-by-Step instructions for sprouting avocado seeds in water
Here's the simple method I use to grow strong roots in just two weeks—no soil required.
🌱 Step 1: Prepare Your Avocado Seed
Start with a fresh avocado pit, preferably from an organic fruit. Rinse it gently to remove any remaining fruit residue, then pat it dry with a paper towel. You'll want to work with a clean seed to avoid introducing bacteria that could slow root growth or cause rot.
Next, locate the wide, flat side of the pit. This is where the seed naturally splits open to sprout. Using a sharp, sterilized knife, carefully slice the pit lengthwise through the center. You're aiming to cut straight down the middle without piercing the seed itself—think of it like cutting a hot dog bun in half. This will create two equal halves that will open like a book.
💧 Step 2: Set Up the Water Sprouting Station
Fill a small glass or jar with enough water to cover about 1 inch of the seed's bottom. I like to use a clear container so I can easily monitor the water level and root development. Place the jar somewhere warm—around 70-75°F—like on a kitchen counter near a sunny window.
Gently insert three or four toothpicks into the seed, spacing them evenly around the edges. The toothpicks should be positioned so they rest on the rim of the jar, keeping the seed suspended just above the water. This prevents the seed from sitting directly in water, which can lead to rot. The bottom ¼ inch of the seed should be submerged—this is all the moisture it needs to start growing roots.
☀️ Step 3: Maintain Water and Light Conditions
Change the water every 2-3 days to keep it fresh and oxygenated. Stagnant water can become a breeding ground for mold or bacteria that will stunt root growth. When changing the water, gently lift the seed out of the jar, rinse any accumulated debris from the submerged portion, and place it back in fresh water.
Position your sprouting seed near a window that receives bright, indirect light for 6-8 hours daily. Direct sunlight can overheat the water and stress the developing roots. You'll see tiny white roots emerge from the cut end within 1-2 weeks. These roots will grow rapidly, so keep an eye on them—you want them to reach about 2-3 inches before moving to soil.
🌿 Step 4: Transition to Soil When Roots Are Ready
Once your avocado seed has developed roots of 2-3 inches, it's time to plant it in soil. Fill a small pot with well-draining potting mix, leaving about 1 inch of space at the top. Make a small hole in the center of the soil, just large enough to accommodate the seed's root ball.
Gently remove the seed from the water, being careful not to damage the delicate roots. Place the seed into the hole, covering the roots with soil but leaving the top half exposed. Press the soil lightly around the seed to secure it. Water the soil gently until it's evenly moist, but avoid oversaturating it—avocado plants are sensitive to root rot.
Tips & tricks for sprouting avocado seeds
Here's what nobody tells you about growing those roots—trust me, these little details make all the difference.
Seed Selection Matters: Not all avocado pits are created equal! Choose a seed from an organic avocado that's fully ripe but not mushy. The larger the pit, the better—smaller ones often struggle to develop strong roots. I've tried this with Hass avocados exclusively, as their pits tend to be more robust and responsive.
The Cutting Technique: When slicing your avocado pit in Step 1, aim for perfect symmetry. Uneven cuts can cause the seed to tip over in the water, leading to rot. Use a sharp knife and make one clean cut down the middle—no need to remove the seed from the pit. The toothpicks will hold it steady once suspended. Confession: I ruined my first three attempts by cutting too deep!
Water Quality is Critical: Tap water works fine, but if your water is heavily chlorinated, let it sit out overnight before using. The chlorine can stress delicate roots. I've also found that distilled water works beautifully—it's pure and won't introduce any contaminants. Always use room-temperature water to avoid shocking the seed.
Light Positioning: While bright indirect light is ideal, don't place your sprouting seed directly on a windowsill where it might get too hot. I position mine about 6 inches away from the glass in a south-facing window. You'll notice the roots grow faster toward the light source—this is normal! If they start curving dramatically, gently rotate the jar every few days for even growth.
Pro Tips for Sprout An Avocado Seed In Water
- Here's what nobody tells you about growing those roots—trust me, these little details make all the difference.
- Seed Selection Matters: Not all avocado pits are created equal! Choose a seed from an organic avocado that's fully ri...
- The Cutting Technique: When slicing your avocado pit in Step 1, aim for perfect symmetry. Uneven cuts can cause the s...
Frequently asked questions
Got questions about sprouting avocado seeds? You’re not alone! Here are answers to the most common curiosities—from patience to pitfalls—to help you grow roots like a pro.
How long does it take for an avocado seed to sprout roots in water?
With consistent care, your avocado seed should sprout roots in 2–6 weeks. Most growers see the first roots (about 2–3 inches) within 2–3 weeks if kept in warm water (60–75°F) and changed every 2–3 days. Patience is key—some seeds take longer, especially if the water isn’t fresh or the pit isn’t healthy.
Can I use regular tap water, or do I need special water?
Tap water is perfectly fine for sprouting avocado seeds! Just ensure it’s room temperature (not cold) to avoid shocking the seed. Some gardeners swear by filtered or distilled water to prevent chlorine buildup, but it’s optional. The key is freshness: change the water every 2–3 days to prevent mold or bacterial growth.
What do I do if my avocado seed starts to rot or smell bad?
If your seed develops a musty smell or slimy texture, it’s rotting—likely from bacteria or fungus due to stagnant water. Act fast:
- Remove the seed from the water.
- Rinse it with fresh water and gently scrub the base with a soft brush to remove mold.
- Dry it for 1–2 hours before placing it back in fresh, clean water.
- If the pit is mushy inside, it’s too far gone—start with a new seed!
Should I keep the avocado seed in sunlight or shade?
Indirect light is ideal! Place your jar near a bright window (e.g., east or west-facing) where it gets 4–6 hours of gentle sunlight daily. Direct sunlight can overheat the water and promote algae growth, while total darkness slows root development. Avoid drafts or AC vents, which can stress the seed.
What if my avocado seed doesn’t sprout roots at all?
Don’t worry—it might just need a little encouragement! Try these fixes:
- Check the seed: It should have a small sprout hole (where the stem was attached). If it’s solid, the seed may be non-viable.
- Soak it longer: Some seeds need 24–48 hours of soaking before roots appear.
- Warmth matters: Place the jar in a warm spot (like near a heater or in a seedling tray with a heating pad).
- Try a different method: If water fails, some gardeners use a damp paper towel or coconut coir for humidity.
Wrapping up and next steps
Sprouting an avocado seed in water is a simple, rewarding project that brings a touch of nature indoors! 🌱 With just a few basic supplies and patience, you’ll watch roots grow in as little as two weeks—no soil required.
Whether you’re a plant enthusiast or just curious, this experiment is a fun way to learn about plant growth and even nurture a future avocado tree.
Now that you’ve mastered the basics, why not take the next step? Once your roots are strong, consider transplanting your seedling into soil to grow it into a full-fledged plant. Happy growing! 🌿