
Lawn
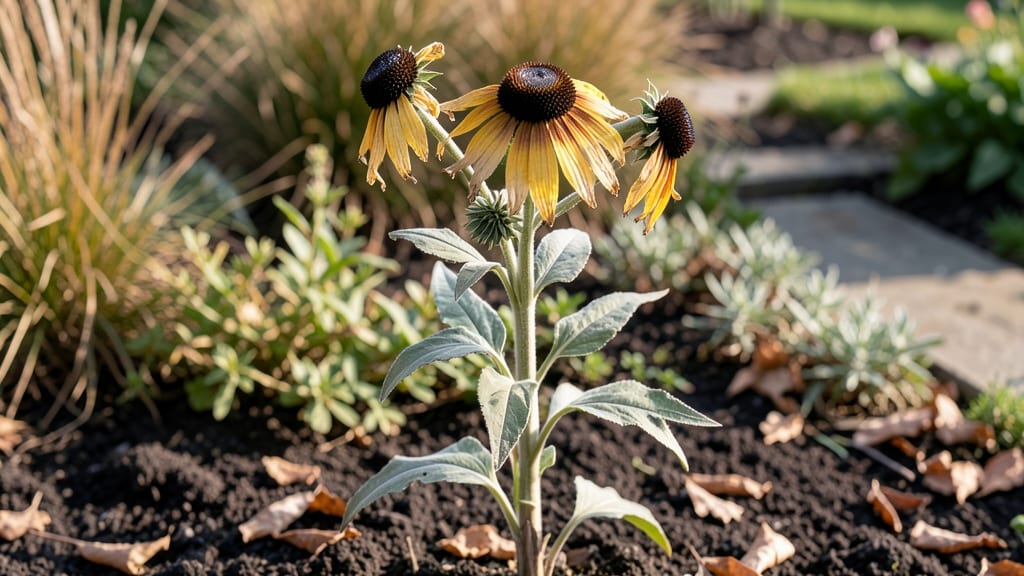
Those papery brown seed heads are black-eyed Susan's secret weapon for next year's garden. 🌻 I used to toss them after blooms faded, but now I collect them for free plants and winter arrangements that last.
The trick is harvesting them at the right stage—when they're fully brown but before they shatter—so you get viable seeds without the mess.
You'll need a pair of clean pruners, paper bags for storage, and a dry spot to keep them until spring. The process takes less than 15 minutes once you know the timing, and you'll end up with seeds that stay viable for 2-3 years if stored properly.
No special equipment needed—just patience and a little timing.
By leaving some seed heads on the plant, you encourage even more blooms the following season. The dried flowers also make stunning winter arrangements that hold their shape for months. Plus, birds love the seeds—so you're feeding wildlife while propagating your garden.
This method works for gardeners in zones 3-9, whether you're growing in full sun beds or containers. The key is knowing when to harvest, and I'll show you exactly how to do it without the usual seed-head chaos. Let's get those seeds saved!
📚 In This Guide
- What you need
- Instructions
- Tips and common mistakes
- Wrapping up and next steps
What you need
- ● Mature black-eyed Susan plants (with fully dried seed heads—wait until late summer/fall when seed pods turn brown and papery).
- ● Sharp pruning shears or garden scissors (clean, sterilized blades to avoid disease transfer).
- ● Paper bags or breathable seed-saving envelopes (1–2 per plant, labeled with the harvest date and variety).
- ● Newspaper or cardboard (for drying—enough to cover a flat surface, ~2’x3’).
- ● Small mesh bags or fine sieve (for winnowing seeds from chaff, 1–2 mesh sizes: 1/8" or 1/16").
- ● Air-tight glass jars or resealable plastic containers (quart-sized, 1–2 per batch for long-term storage).
- ● Gloves (to protect hands from prickly stems or dust).
- ● Fan or hairdryer (low heat) (to speed up drying if weather is damp).
- ● Magnifying glass (for inspecting seed viability if saving for rare varieties).
- ● Humidity pack (silica gel) (for jars to absorb moisture during storage).
- ● Permanent marker & labels (waterproof, for tracking seed batches).
Twist-free techniques for harvesting black eyed Susan seed heads
Here's how to collect and store seeds without the frustrating twists—guaranteed to preserve viability for next season.
🌱 Step 1: Identify Mature Seed Heads
Wait until the seed heads turn completely brown and begin to dry out on the plant—this usually happens in late fall after the first frost. The papery petals will have fallen away naturally, leaving behind the spiky seed clusters. Gently squeeze a seed head between your fingers; if the seeds rattle inside but don't crumble, they're ready for harvest.
I always harvest on a dry morning after the dew has evaporated. Wet seed heads are harder to process and can develop mold if stored prematurely. Cut the stems about 2 inches below the seed head using clean pruners to avoid introducing disease to your plants.
✂️ Step 2: Process Seed Heads at Home
Lay the harvested seed heads on a clean, dry towel indoors. Let them dry completely for 2-3 days in a well-ventilated area with indirect light. This prevents moisture from trapping inside the seed clusters, which can lead to rot during storage. I place them in a single layer—crowding them speeds up drying but risks mold growth.
Once fully dry, gently rub the seed heads between your palms or use a small brush to release the seeds. The seed heads should crumble apart easily, revealing the characteristic black-and-white seeds. Spread the seeds on the towel again to remove any remaining chaff or debris. This step ensures only clean, viable seeds go into storage.
🪴 Step 3: Store Seeds for Long-Term Viability
Transfer the clean seeds into a paper envelope or small glass jar with a tight-sealing lid. Label each container with the variety name and harvest date—Black Eyed Susans can stay viable for 2-3 years if stored properly. I use a permanent marker on the envelope for easy identification later.
Store the seeds in a cool, dark place like a pantry or refrigerator. The ideal storage temperature is 35-40°F, which slows down seed deterioration. Avoid plastic bags—they trap moisture and can cause seeds to spoil. Check the seeds annually; if they smell musty or develop mold, discard them immediately.
⏰ Step 4: Test Seed Viability Before Planting
Before sowing your stored seeds, conduct a quick viability test. Place 10 seeds between two damp paper towels in a sealed plastic bag. Keep them in a warm spot (70°F) for 7-10 days. Check daily for sprouts—if at least half germinate, your seeds are still good to plant. This simple test saves you from wasting time with seeds that might not grow.
If germination rates are low, try storing the remaining seeds in the freezer for 1-2 weeks to break dormancy. This mimics natural winter conditions and can trick the seeds into germinating more reliably. Once you confirm viability, plant them outdoors in early spring for a vibrant summer display.
Tips & tricks for perfect black eyed Susan seed harvesting
Between us, harvesting Black Eyed Susan seeds can be frustrating if you don't know these little tricks that'll save you from dealing with tangled messes and wasted seeds.
Timing Secret: Harvest on a day when the humidity is low—right after the morning dew has evaporated but before the afternoon heat sets in. I've learned this the hard way after trying to process damp seed heads that ended up moldy. The ideal time is between 10 AM and noon when the air is dry but not scorching.
Drying Technique: When you're letting those seed heads dry for the required 2-3 days, don't be tempted to speed things up by using heat. I once tried placing mine near a heater and ended up with brittle seeds that cracked apart too easily. Keep them in a well-ventilated area with indirect light—this maintains the delicate structure while removing moisture gradually.
Seed Release Strategy: For the most efficient seed extraction, I've found that gently tapping the dried seed heads against a hard surface (like a cutting board) works better than rubbing them between your palms. This preserves more seeds while still releasing them cleanly. After tapping, I use a small hand brush to gently coax out any stubborn seeds that might remain.
Storage Wisdom: While paper envelopes work well, I've had the best luck with small glass jars that have tight-sealing lids. The glass doesn't absorb moisture like paper can over time, and the seal keeps out humidity. Just be sure to leave a little air space at the top—seeds need some airflow to prevent condensation buildup during storage.
Pro Tips for Black Eyed Susan Seed Heads
- Between us, harvesting Black Eyed Susan seeds can be frustrating if you don't know these little tricks that'll save you from dealing with tangled messes and wasted seeds.
- Timing Secret: Harvest on a day when the humidity is low—right after the morning dew has evaporated but before the afternoon heat sets in.
- Drying Technique: When you're letting those seed heads dry for the required 2-3 days, don't be tempted to speed things up by using heat.
Frequently asked questions
Got questions about harvesting and storing black-eyed Susan seed heads? You’re not alone! Here are answers to the most common queries to help you keep your seeds viable and ready for next season’s garden.
When is the best time to harvest black-eyed Susan seed heads?
Harvest seed heads when they’ve fully dried on the plant but before they release seeds naturally. Look for brown, papery centers (late summer to early fall). Twist gently—if they come off easily, they’re ready! Avoid harvesting if rain is forecasted to prevent mold.
How long can I store black-eyed Susan seeds?
Properly stored seeds stay viable for 1–2 years in a cool, dry place (like a sealed container in the fridge). For longer storage, dry seeds thoroughly and keep them in an airtight bag with a desiccant. Check for moisture or pests annually.
What if my seed heads won’t twist off easily?
If seed heads resist twisting, they may still be too moist. Let them dry indoors for 1–2 weeks in a well-ventilated area (e.g., a paper bag with holes). Avoid heat sources—slow drying prevents seed damage. If they’re completely stubborn, use clean scissors to snip stems.
Can I use dried black-eyed Susan seed heads for anything else besides planting?
Beyond seeds, dried heads add texture to winter bouquets, craft projects (like wreaths), or natural bird feeders (pack seeds into pinecones). Just ensure they’re fully dry to avoid attracting pests. Bonus: Their rustic charm brightens holiday decor!
Why are my seeds not germinating after storage?
Seed failure often stems from moisture or age. Test viability by soaking a few seeds overnight—if they swell, they’re still good. For older seeds, try scarification (lightly sanding the seed coat) or a warm stratification period (mix with damp sand, refrigerate 4 weeks). If all else fails, source fresh seeds!
Wrapping up and next steps
Black-eyed Susan seed heads are a gardener’s hidden treasure—packed with easy harvesting tips and long-term storage potential! Whether you’re saving seeds for next year’s garden or crafting natural decor, their twist-free harvesting method ensures viable, high-quality seeds ready for planting.
Now that you’re equipped with the right tools and techniques, roll up your sleeves and enjoy the process!
🌱 Next step: Gather your dried seed heads, follow the twist-free method, and store them in a cool, dry place. Watch your garden bloom with fresh, homegrown Black-eyed Susans year after year—nature’s way of rewarding your green thumb!