
Lawn
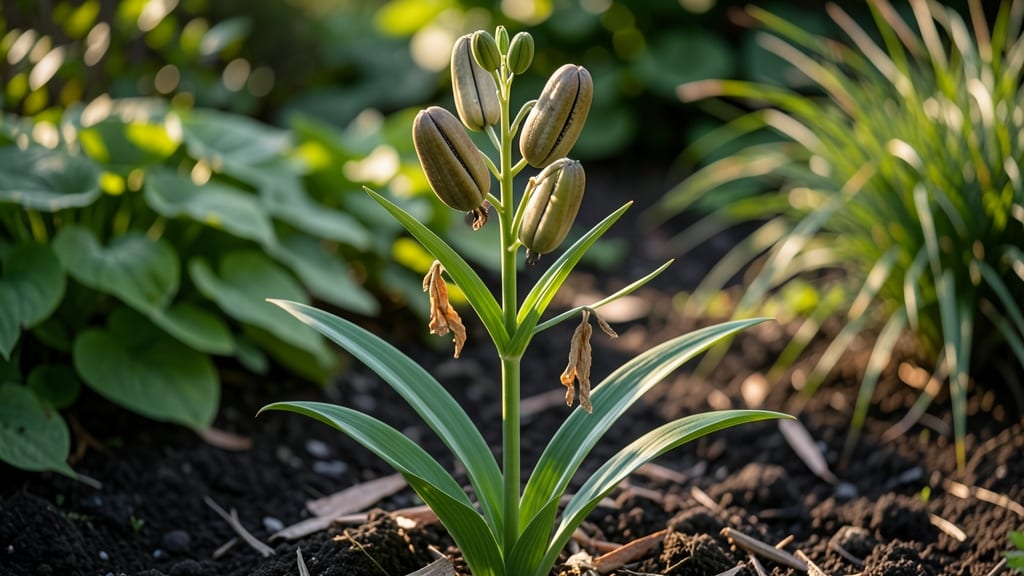
Harvesting Asiatic lily seed pods in late fall unlocks free plants for next year’s garden. 🌱 The trick is knowing exactly when to collect them—before they split open but after they’ve fully ripened—so you don’t waste time on seeds that won’t sprout.
I’ve learned the hard way that patience is key; rushing the harvest means lower germination rates.
Once you’ve gathered the pods, you’ll need a simple setup: a plastic bag, some damp paper towels, and a refrigerator. The cold stratification mimics winter’s natural process, breaking seed dormancy so they’ll germinate reliably in spring.
This method works even if you’ve never propagated lilies before—just follow the steps, and you’ll see those first green shoots in just a few weeks.
What you’ll end up with are sturdy young plants ready to bloom in their second or third year, giving you free Asiatic lilies in vibrant colors like fiery red, sunny yellow, or deep purple.
The best part? These homegrown lilies often outperform nursery plants because they’re perfectly adapted to your local climate. No more struggling with wilting blooms or weak stems.
This technique works for gardeners in zones 3-9, though timing varies slightly by region. If you’re in a warmer climate, you might skip the cold stratification and plant seeds directly in fall.
Either way, you’ll be rewarded with lush, long-stemmed blooms that make cutting gardens a breeze—no seed catalogs or pricey bulbs needed.
📚 In This Guide
- What you need
- Instructions
- Tips and common mistakes
- Wrapping up and next steps
What you need
- ● Fresh Asiatic lily seed pods: Harvest ripe pods (brown, slightly wrinkled) in late fall or early winter. Aim for 5–10 pods for a small-scale experiment.
- ● Potting mix: Use a well-draining, sterile mix (e.g., 50% peat moss + 50% perlite). A 6-inch pot or tray is ideal.
- ● Small plastic bags or containers: For moisture retention during stratification (e.g., quart-sized zip-top bags or clear plastic containers with lids).
- ● Moistened paper towels or sphagnum moss: To keep seeds hydrated without drowning them.
- ● Refrigerator or cold frame: Maintain temperatures between 35–45°F (2–7°C) for 8–12 weeks.
- ● Spray bottle: For gentle hydration of seeds/pods.
- ● Plant labels & marker: Track seed varieties and planting dates.
- ● Pruning shears or knife: For carefully opening seed pods (if needed).
- ○ Fine-mesh sieve: Optional for separating seeds from pod debris.
- ● Grow lights or sunny windowsill: Post-stratification, seedlings need 6–8 hours of light/day.
- ● Humidity dome or plastic wrap: Helps maintain moisture in the early stages.
- ● Fertilizer (balanced 10-10-10 or compost tea): Lightly feed seedlings after sprouting.
- ● Gloves: Recommended if handling prickly pods or moist soil.
Step-by-step instructions for cold-stratifying Asiatic lily seed pods
Here's the proven method I use to break dormancy and coax vibrant Asiatic lily seedlings from those tricky seed pods.
🌱 Step 1: Harvest and Prepare Fresh Seed Pods
Collect mature seed pods when they turn tan-brown and begin splitting open naturally—usually in late fall after blooms fade. Gently twist to remove seeds from pods, then separate any attached dried husks. You'll want 4-6 plump seeds per pod for best results. Store them in a paper envelope (not plastic) in a cool, dry place until stratification begins.
Don't rush this step. Seeds harvested too early won't germinate properly, and pods left too long on the plant may release seeds prematurely. The first true frost is your signal that pods are ready—nature's way of telling you they've had enough time to mature.
❄️ Step 2: Cold-Stratify for 8-12 Weeks
Fill a quart-sized container with moistened perlite or sand (never regular soil—it compacts and suffocates seeds). Place the seeds 1 inch deep in the medium, spacing them 2 inches apart to prevent crowding. Cover the container with a plastic lid or wrap tightly in plastic wrap to maintain consistent moisture during stratification.
Store the container in your refrigerator's crisper drawer where temperatures stay 35-45°F. Check monthly to ensure the medium remains evenly damp (not soggy). You'll see nothing happening for weeks—that's normal. The cold period mimics winter conditions and breaks the seed's dormancy. After 8-12 weeks, remove the container and let it sit at room temperature for 1-2 weeks before planting.
🌿 Step 3: Plant Stratified Seeds in Pots
Fill 4-inch pots with well-draining potting mix (I use a blend of 50% peat moss, 30% perlite, and 20% compost). Plant each seed 1 inch deep, pressing the soil lightly around it to ensure good contact. Water gently until the surface looks evenly moist but not wet. Place the pots in a warm, bright location (65-75°F) with indirect light—direct sun will dry them out too quickly.
Here's where patience pays off. Germination can take 4-12 weeks—sometimes longer. Keep the soil consistently moist (water when the top ½ inch feels dry), and you'll eventually see tiny green shoots pushing through. Once seedlings reach 3-4 inches tall, they're ready for their first transplant into larger containers.
☀️ Step 4: Transition to Outdoor Conditions
After the last frost date, move pots outside to a shaded, sheltered spot for 1-2 weeks to harden off. Gradually increase sun exposure by 1 hour daily, watching for first signs of stress (yellowing leaves or wilting). Asiatic lilies thrive in full sun, but their first outdoor weeks should be gentle to avoid shock.
Plant in the garden after 4-6 weeks of hardening, spacing seedlings 12-18 inches apart in well-draining soil. Mulch with 2-3 inches of organic matter to retain moisture and regulate soil temperature. You won't see blooms for 2-3 years, but the wait is worth it—each seed you nurture now will reward you with vibrant, disease-resistant Asiatic lilies for decades.
Tips & tricks for perfect Asiatic lily seed germination
These little-known tricks will help you maximize your chances of success with even the trickiest Asiatic lily seeds.
Timing Secret: Harvest seed pods only after the first true frost—this is nature's cue that they're fully mature. I've learned the hard way that pods harvested too early won't germinate, while those left too long on the plant may release seeds prematurely. The tan-brown color and natural splitting are your visual cues that seeds are ready to collect.
Medium Matters: Perlite or sand is crucial for this process—regular soil compacts and suffocates seeds during stratification. I use perlite because it maintains perfect drainage while keeping seeds evenly moist. The 1-inch depth and 2-inch spacing in Step 2 prevent crowding, which can lead to mold or uneven germination. Pro tip: Sterilize your container first by rinsing it with a 1:9 bleach-water solution to prevent fungal issues.
Temperature Control: The refrigerator's crisper drawer maintains that critical 35-45°F range perfectly, but every fridge is different. If your crisper runs cooler, you can place the container on a small tray with a thin layer of water to create a mini humid environment. The key is consistency—fluctuations can break dormancy prematurely or prevent it entirely. I check my container monthly just to confirm the medium stays evenly damp without being soggy.
Patience Payoff: Germination timelines can be frustrating—4-12 weeks is normal, sometimes longer. I recommend marking your calendar when you start stratification so you don't get discouraged. The 1-2 week room-temperature acclimation period before planting is just as important as the cold stratification. Think of it like waking a seed from hibernation—rushing this step can shock the seeds and prevent germination.
Pro Tips for Asiatic Lily Seed Pods
- These little-known tricks will help you maximize your chances of success with even the trickiest Asiatic lily seeds.
- Timing Secret: Harvest seed pods only after the first true frost—this is nature's cue that they're fully mature.
- Medium Matters: Perlite or sand is crucial for this process—regular soil compacts and suffocates seeds during stratification.
Frequently asked questions
Got questions about Asiatic lily seed pods? You’re not alone! Here are answers to the most common ones—whether you’re just starting or troubleshooting your garden project.
When should I harvest Asiatic lily seed pods?
Harvest seed pods when they turn brown and papery (usually late summer to early fall). Wait too long, and they’ll split open, scattering seeds prematurely. Store them in a cool, dry place until stratification.
How long does cold stratification take for Asiatic lily seeds?
Most Asiatic lily seeds need 4–6 weeks of cold stratification (33–41°F) to break dormancy. Place them in a sealed bag with moist peat moss, then refrigerate. Patience pays off—spring germination will reward you!
Can I use store-bought potting mix instead of peat moss for stratification?
Yes, but with a twist! Mix equal parts potting soil and perlite to improve drainage. Keep it lightly moist (not soggy) to prevent mold. Avoid heavy garden soil—it can compact and suffocate seeds.
What if my Asiatic lily seeds won’t germinate after stratification?
Try these fixes:
- Check moisture: Seeds need consistent dampness (like a wrung-out sponge).
- Test viability: Cut open a seed—if it’s hollow or moldy, it’s nonviable.
- Extend stratification: Some seeds need up to 8 weeks. Don’t give up!
Do Asiatic lily seed pods produce flowers the first year?
Nope! Seed-grown lilies typically take 2–3 years to bloom. Focus on nurturing strong foliage first. Divide mature plants (after 3–4 years) for faster, reliable blooms.
Wrapping up and next steps
Discovering how to germinate Asiatic lily seed pods through cold stratification unlocks a world of vibrant spring blooms right in your garden! 🌱 With the right materials, patience, and care, you can transform tiny seeds into stunning lilies that’ll brighten your outdoor space.
Whether you’re a seasoned gardener or just starting, this blueprint makes the process simple and rewarding.
Ready to take the next step? Grab your supplies, follow the steps, and watch your garden transform! Share your progress with fellow gardeners—every seedling is a future masterpiece waiting to bloom. Happy gardening! 🌸