
Propagation
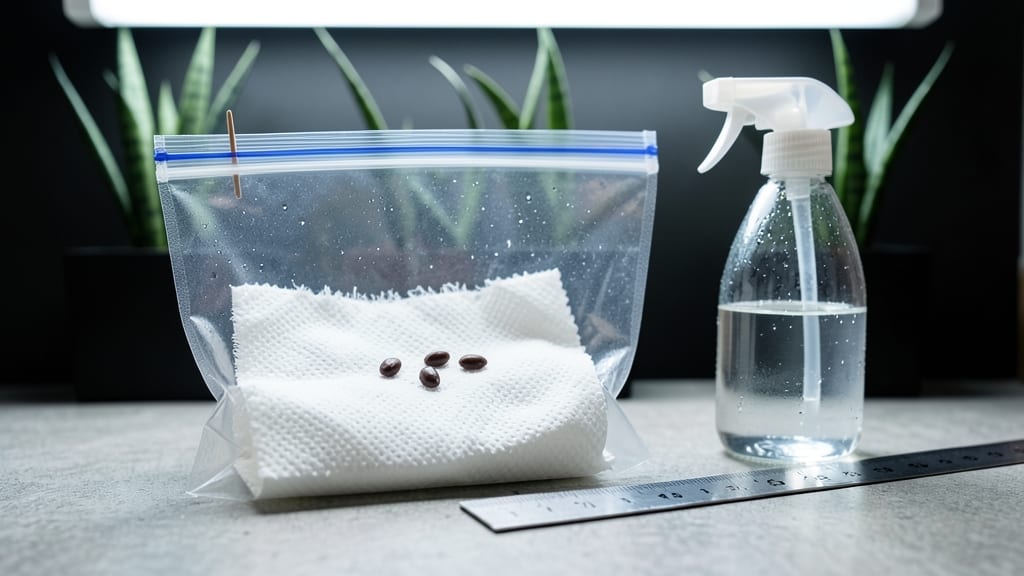
Ziploc bag seed germination saves space and speeds up sprouts—no fancy equipment needed. 🌱 I’ve used this method for years to get peppers, tomatoes, and herbs popping in just 7 days, and it’s the secret to starting a head start on the growing season without the mess of trays or soil. The magic is in the humidity: a sealed bag keeps moisture locked in while letting roots breathe through the plastic. You’ll need seeds, damp paper towels, a Ziploc, and a warm spot—basically what you’d find in a kitchen drawer. No greenhouse required. Once those first green shoots crack through, you’ll have tiny seedlings ready to transplant into soil. The transition is smooth, and you’ll avoid the dreaded damping-off that kills so many starter plants. Just watch for condensation and open the bag slightly if needed. Works for almost any seed—just avoid tiny ones that might get lost in the folds. Perfect for beginners, small spaces, or anyone tired of waiting for seeds to germinate the old-fashioned way.
📚 In This Guide
- What you need
- Instructions
- Tips and common mistakes
- Wrapping up and next steps
What you need
- ● 1–2 quart-sized ZipLoc bags (or gallon-sized for larger seeds like beans or peas)
- ● Seedling trays or small containers (to hold the bags upright—e.g., a shallow dish or egg carton)
- ● Seeds (fast-sprouting varieties like radishes, lettuce, or herbs work best)
- ● Potting soil or seed-starting mix (sterilized, well-draining—1–2 cups per bag)
- ● Spray bottle with water (to mist soil without over-saturating)
- ○ Rubbing alcohol or bleach solution (for sterilizing bags—optional but recommended)
- ● Scissors or hole punch (to create ventilation holes in the bag)
- ● Grow lights or sunny windowsill (for consistent warmth and light)
- ● Plant labels or masking tape (to track seed types)
- ● Hair dryer or heat mat (to speed up germination in cooler climates)
- ● Clear packing tape (to seal edges tightly and prevent mold)
Step-by-Step instructions for germinating seeds in ZipLoc bags
Here’s how to grow strong seedlings without soil or mess—just a plastic bag and patience.
🌱 Step 1: Prepare Seeds and Moisten Paper Towels
Lay out 4 paper towels on a clean, flat surface. Lightly spray them with warm water until damp but not soaking—you want them to hold moisture without dripping. I like to wring them out gently like a sponge to avoid excess water.
Place 4-6 seeds (depending on size) in a single row on one towel. Fold the second towel over them, then fold the entire stack in half. This keeps seeds contained while allowing airflow. The goal is to mimic a cozy, damp environment where seeds can wake up without stress.
💧 Step 2: Seal in a ZipLoc Bag for Germination
Slide the folded towel stack into a quart-sized ZipLoc bag, leaving the top open. Seal it loosely—just enough to trap moisture but not so tight that condensation builds up. I leave a 1-inch gap at the top to prevent pressure buildup, which can suffocate seeds.
Hang the bag in a warm, dark spot—70-75°F works best. A pantry, top of the fridge, or even a cardboard box with a lightbulb inside (not touching) creates the perfect warmth. Check daily for moisture; if the towels dry out, mist them lightly again. You’ll see tiny roots and sprouts in 3-7 days.
☀️ Step 3: Transfer Sprouts to Light for Growth
Once seedlings have 1-inch sprouts and visible roots, open the bag and carefully unfold the towels. You’ll see delicate root systems—handle them like you’re cradling a baby. Gently separate seedlings if they’re tangled, but don’t pull roots apart.
Transfer them to a seed-starting tray with soilless mix, pressing lightly to cover roots but not stems. Water gently until moisture seeps to the surface. Place the tray under grow lights or bright indirect light—12-14 hours daily. Watch for true leaves (not the first tiny cotyledons) to appear in 7-10 days.
✂️ Step 4: Harden Off and Transplant Seedlings
After 2 weeks of growth, start hardening off seedlings by placing them outside in partial shade for 1 hour daily. Gradually increase time and sun exposure over 5-7 days until they’re ready for their final home. This prevents shock from temperature swings.
Transplant on an overcast day or late afternoon to reduce stress. Dig a hole slightly deeper than the root ball and water deeply after planting. Mulch with ¼ inch of compost to retain moisture and deter weeds. You’ll know it’s working when seedlings stand tall and leaves stay vibrant.
Tips & tricks for perfect ZipLoc bag seed germination
Here's what nobody tells you about making this method work flawlessly every time.
Moisture Balance: The key to success in Step 1 is getting those paper towels just right—not soggy, not dry. I use a spray bottle with warm water and wring them out until they're damp like a wrung-out sponge. Too much moisture creates mold, while too little means your seeds won't wake up. Check daily and mist lightly if they feel dry to the touch.
Temperature Matters: While the instructions mention 70-75°F, I've found that consistency is more important than exact numbers. If your kitchen runs cooler, place the bag near a warm spot like the top of your fridge or next to a sunny window (indirect light only). A cheap digital thermometer ($5) in the bag helps monitor conditions—aim for steady warmth without heat fluctuations.
Light Transition: In Step 3, when moving seedlings to light, don't rush it! Start with just 2-3 hours of light the first day, then gradually increase to the full 12-14 hours. Sudden exposure can shock delicate seedlings. I place mine under fluorescent lights first—they're gentler than LED grow lights for this transition phase.
Seedling Handling: When transferring those precious 1-inch sprouts in Step 3, use a soft paintbrush or your fingertip to gently lift them from the towels. Never grab by the stems! The roots are surprisingly delicate—think of them like tiny glass fibers. I even keep a damp paper towel handy to wipe any broken roots clean before planting.
Pro Tips for Ziploc Bag Seed Germination
- Here's what nobody tells you about making this method work flawlessly every time.
- Moisture Balance: The key to success in Step 1 is getting those paper towels just right—not soggy, not dry.
- Temperature Matters: While the instructions mention 70-75°F, I've found that consistency is more important than exact numbers.
Frequently asked questions
Got questions about germinating seeds in Ziploc bags?
You’re not alone! Here are answers to the most common queries to help you grow confidently—no guesswork required.
Can I reuse a Ziploc bag for multiple seed batches?
While it’s possible, we don’t recommend it. Residual moisture or mold from the first batch can contaminate new seeds. For hygiene and success, use a fresh bag each time—it’s just as easy!
How long should I wait before seeds sprout in a Ziploc bag?
Most seeds sprout within 3–7 days in ideal conditions (warmth, moisture, and darkness). If nothing appears after a week, check for mold or adjust humidity. Some seeds (like beans) sprout faster than others (like herbs).
What if my Ziploc bag gets moldy?
Mold is a red flag—act fast! Discard the bag and seeds immediately. To prevent it, never overwater (just mist seeds lightly) and ensure proper airflow by leaving the bag slightly open or using a breathable towel.
Are there better alternatives to Ziploc bags for germination?
Yes! Try paper towels (soaked in water, sealed in a container) or germination mats for larger batches. Some gardeners also use seedling trays with domes for better airflow. Ziploc bags are just the easiest for beginners!
Do I need a heat mat for faster germination?
Not always! Most seeds germinate fine at room temperature (70–75°F). For slower seeds (like tomatoes or peppers), a heat mat (or placing the bag near a sunny window) can speed things up by 2–3 days.
Wrapping up and next steps
Germinating seeds in a ZipLoc bag is a game-changer—it’s fast, mess-free, and foolproof! 🌱 With just a few supplies and minimal effort, you’ll see sprouts in as little as 7 days, giving your plants a head start.
Whether you’re a beginner or a seasoned gardener, this method simplifies the process while boosting success rates.
Now that you’re armed with the know-how, give it a try! Start with your favorite seeds, monitor their progress, and soon you’ll be transplanting confident little seedlings into soil. Happy growing—your green thumb is about to get even greener! 🌿