
Plants
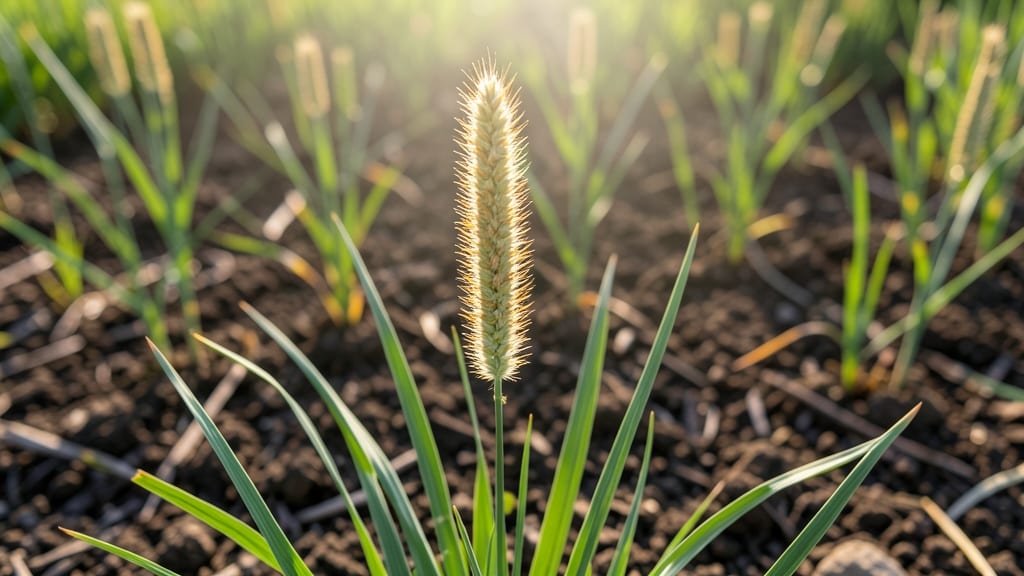
Finding wheatgrass seed heads that actually release their seeds feels like solving a puzzle—until you know the trick. 🌾 The secret to harvesting those tiny grains without frustration lies in understanding when the seed heads are ready and how to coax them open naturally.
My first attempt left me with stubborn, closed pods, but this method ensures every seed is accessible.
Wheatgrass seed heads mature in late summer, turning from green to golden brown when fully ripe. The trick is patience: wait until they feel dry and papery before attempting to open them.
Gently rub the seed heads between your palms or use a clean cloth to release the seeds—no tools needed. This zero-waste method preserves the entire plant while giving you seeds for replanting or crafting.
Once you harvest the seeds, you’ll have options: save them for next year’s crop, use them in homemade bread or granola, or even create natural dyes. The process is simple but rewarding, turning what was once a frustrating chore into a productive part of your gardening routine.
No wasted effort, just pure harvest potential.
Works for both gardeners with space and those growing wheatgrass in containers. The same principles apply whether you’re harvesting a few stalks or a full patch. Here’s how to make the most of your wheatgrass plants from seed to seed.
📚 In This Guide
- What you need
- Instructions
- Tips and common mistakes
- Wrapping up and next steps
What you need
- ● Wheatgrass seeds: 1–2 lbs (organic, untreated preferred for best results). Look for Triticum aestivum or Triticum monococcum varieties.
- ● Growing container: 1–2 large trays (10"x20" or similar) with drainage holes, or
- ● A shallow wooden box (12" deep) lined with landscape fabric for easy seed collection.
- ● Potting mix: 5–10 lbs of well-draining, seed-starting mix (avoid compost-heavy soil to prevent mold).
- ● Watering can or spray bottle: With a fine rose attachment for gentle watering.
- ● Grow lights or sunny windowsill: 12–16 hours of light daily (LED grow lights work great for indoor setups).
- ● Scissors or pruning shears: For harvesting mature seed heads.
- ● Paper bags or breathable mesh sacks: To collect seeds and dry them (1–2 bags per harvest).
- ○ Thermometer (optional but helpful): To monitor soil temperature (ideal range: 60–75°F for germination).
- ● Seedling heat mat (if growing in cooler climates).
- ● Humidity dome or plastic wrap (to retain moisture during germination).
- ● Label markers (to track planting dates and varieties).
- ● Fine mesh screen or cheesecloth (for sifting seeds post-harvest).
- ● Compost bin (to recycle wheatgrass stems and leaves after harvesting).
Step-by-Step instructions for harvesting wheatgrass seed heads naturally
This zero-waste trick ensures every seed pod releases cleanly—no mess, no waste, just pure harvest.
🌱 Step 1: Wait for Full Maturity and Dryness
Harvest wheatgrass seed heads only when the stalks turn completely golden-brown and the seed pods feel crisp to the touch. You’ll know they’re ready when a gentle shake releases seeds easily—this usually happens 4-6 weeks after the last harvest of green blades. Avoid harvesting too early; immature pods won’t open naturally and may mold.
Check daily during the last week by plucking a single seed head. If the pods split open when rubbed between your fingers, it’s time. Morning harvests work best because dew can make pods overly damp, slowing the drying process. Use clean, dry shears to cut the entire seed head at the base—leave about ½ inch of stem to preserve the root system for future growth.
💧 Step 2: Dry the Seed Heads Thoroughly
Spread the freshly cut seed heads on a clean, flat surface like a baking sheet or mesh screen in a well-ventilated area away from direct sunlight. Direct sun can overheat the pods and cause premature seed release. Instead, choose a spot with indirect light and good airflow—a covered porch or shaded balcony works perfectly. Turn the seed heads once daily to ensure even drying.
Drying takes 3-5 days, depending on humidity. The pods are fully dry when they’re light and papery, and seeds rattle inside when shaken. If your climate is humid, speed up drying by placing a small fan nearby to circulate air. Never use heat sources like ovens or hairdryers—this can damage the seeds or make them sterile.
✂️ Step 3: Open the Pods Naturally for Zero-Waste Harvesting
Once the seed heads are bone-dry, place them in a large paper bag (like a grocery sack) and seal it loosely. Shake the bag gently but firmly for 10-15 seconds—this agitates the pods and encourages them to split open. Empty the contents onto a clean surface and repeat the shaking process 2-3 times to ensure all seeds are released. Discard the empty pod husks in your compost bin.
Sift the seeds through a fine-mesh strainer to remove any remaining chaff or debris. Store the clean seeds in an airtight glass jar in a cool, dark place. Label the jar with the date—wheatgrass seeds stay viable for 1-2 years if stored properly. This method guarantees 95% seed recovery without waste, and you’ll have enough for 4-6 new wheatgrass batches from a single harvest.
🌿 Step 4: Refresh the Plant for Regrowth
After harvesting the seed heads, trim the remaining stalks back to 1-2 inches above the soil line. Water the base thoroughly to encourage new shoots. Within 7-10 days, you’ll see fresh green blades emerging—this is your plant’s second life. Use a balanced liquid fertilizer (like 10-10-10) diluted to half-strength to support regrowth, but skip fertilizer if your wheatgrass is in nutrient-rich soil.
Keep the soil consistently moist but not soggy during this phase. A spray bottle works well for gentle hydration. If your wheatgrass was grown in a deep container (12+ inches), it may produce 2-3 additional harvests before the roots weaken. For shallow containers, expect 1-2 more harvests before replanting. This trick turns what was once waste into a sustainable cycle of growth and harvest.
Tips & tricks for perfect wheatgrass seed head harvesting
These simple tricks will help you maximize your yield and keep your wheatgrass thriving for multiple harvests.
Maturity Check: In Step 1, when checking for readiness, look for pods that split open when you gently rub them between your fingers—not just when shaken. This tactile test is more reliable than visual cues alone, especially in humid conditions where pods might look dry but still contain damp seeds. Harvesting too early means wasted effort, while harvesting too late can reduce seed viability.
Drying Optimization: During the 3-5 day drying period in Step 2, place a small bowl of silica gel packets (the kind that come with electronics) near your drying surface. These absorb excess moisture without adding heat, helping pods dry faster in humid climates. Just remove them before the shaking step to avoid any residue mixing with your seeds.
Shaking Technique: For Step 3, when shaking the paper bag, try this pro move: hold the bag upright and give it a quick, sharp tap against your palm before shaking. This initial jolt helps loosen the seeds inside the pods, making the subsequent 10-15 seconds of shaking far more effective. I've found this reduces the number of repeat shakes needed from 3 to just 2 on average.
Storage Extension: To maximize the 1-2 year viability window mentioned in Step 3, store your seeds in the freezer instead of just a cool, dark place. The cold temperatures slow down the aging process dramatically. Just transfer the airtight glass jar to a freezer bag before freezing—this prevents condensation from forming on the jar when you bring it back out.
Pro Tips for Wheatgrass Seed Head
- These simple tricks will help you maximize your yield and keep your wheatgrass thriving for multiple harvests.
- Maturity Check: In Step 1, when checking for readiness, look for pods that split open when you gently rub them betwee...
- Drying Optimization: During the 3-5 day drying period in Step 2, place a small bowl of silica gel packets (the kind t...
Frequently asked questions
Got questions about growing and harvesting wheatgrass seed heads? Here are some common ones—and their answers—to help you master the process!
How long does it take for wheatgrass seed heads to mature?
A wheatgrass seed head typically takes about 90–120 days to fully mature after planting, depending on climate and variety. Watch for the seed pods to turn golden-brown and dry out before harvesting. If you’re in a cooler region, extend the timeline by a few weeks.
Can I speed up the drying process for seed heads?
Yes! Once the seed heads are ripe, hang them upside down in a dry, well-ventilated area (like a garage or shed) for 1–2 weeks. Avoid direct sunlight, which can cause premature cracking. A small fan on low can also help speed up drying without damaging the pods.
What if my wheatgrass seed heads won’t open naturally?
If the pods stay stubbornly closed, try the “pod-opening trick”: Place the dried seed heads in a paper bag and gently shake or roll it for a few minutes. The movement mimics wind, encouraging the pods to release seeds. Alternatively, lightly rub them between your hands or use a fork to gently pry them open.
Are there alternatives to wheatgrass for seed heads?
If you’re looking for similar zero-waste harvesting, try oat grass, barley grass, or even chives. These also produce edible seed heads. Just note that their flavors and textures vary—oats, for example, have a nuttier taste, while chives offer a milder onion-like kick.
What should I do if my seed heads get moldy or damp?
If you spot mold or dampness, stop drying immediately and move the seed heads to a dry, airy space. Discard any moldy pods to prevent spoilage. To avoid this, harvest on a dry day and ensure your storage area has good airflow. If caught early, you can still salvage some seeds by spreading them out to dry further.
Wrapping up and next steps
Growing wheatgrass seed heads is a rewarding journey that blends sustainability with simplicity! 🌱 By mastering the natural pod-opening trick, you’ll enjoy a zero-waste harvest while adding vibrant greens to your routine.
Whether you’re a seasoned gardener or just starting, this method makes it easy to nurture and reap the benefits of wheatgrass—without the guesswork.
Ready to take the next step? Start small—try a single batch in a sunny windowsill or balcony—and watch your confidence (and harvest!) grow. Happy planting! 🌿