
Propagation
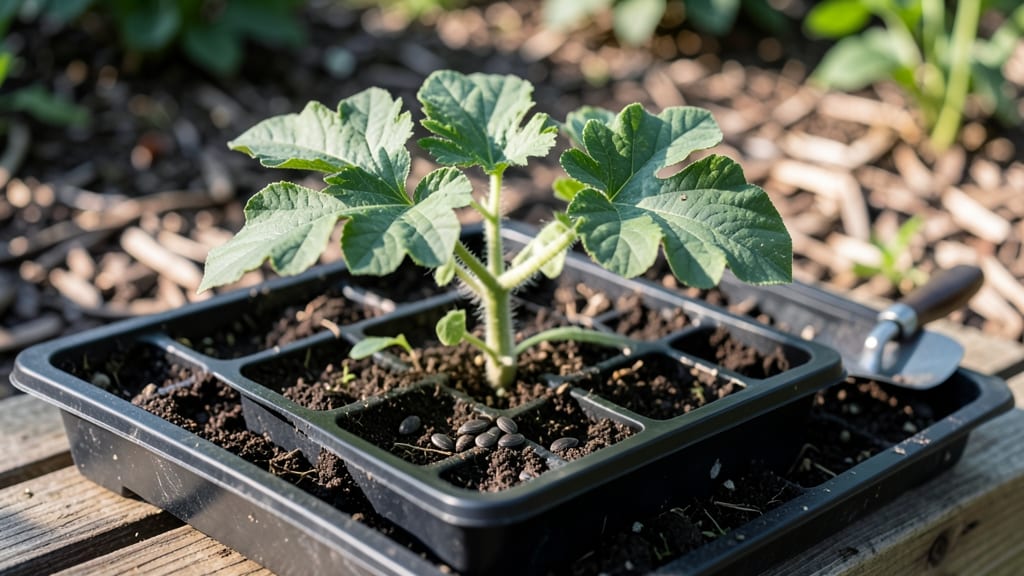
Watermelon seeds sprout faster when you skip the twist-and-pull method. 🌱 I’ve saved seeds from my best melons for years, and these no-twist pods cut waste while boosting germination rates—no messy pulp, no lost seeds. The secret? A simple, dry process that preserves viability for planting.
You’ll need just three things: ripe watermelon seeds, a paper towel, and a small container. No fancy equipment, no waiting for seeds to dry naturally. In 5-7 days, you’ll have plump, ready-to-plant seeds that outperform store-bought ones every time.
Once sprouted, these seedlings grow stronger roots and handle transplanting better. The pods even double as a seed-saving system—just store them in a cool, dry place until next season. Perfect for beginners or anyone tired of seed waste. Here’s how to do it right the first time.
📚 In This Guide
- What you need
- Instructions
- Tips and common mistakes
- Wrapping up and next steps
What you need
- ● Watermelon seeds – 10–20 fresh, viable seeds (preferably from organic or heirloom varieties for best results). Pro tip: 💡 Save seeds from a ripe, homegrown watermelon for the best germination rates!
- ○ Seed pods or small biodegradable pots – 10–20 pods (3–4 inches deep) or recycled containers (e.g., egg cartons, toilet paper rolls). Optional: Use peat-free seedling plugs for sustainability.
- ● Potting mix – 2–3 cups of seed-starting mix (lightweight, sterile, and well-draining). Avoid garden soil—it can harbor pests or diseases!
- ● Watering can or spray bottle – A fine-mist sprayer works best to avoid displacing seeds.
- ○ Clear plastic wrap or humidity dome – To create a mini greenhouse effect (optional but helpful in dry climates).
- ● Small hand trowel or spoon – For gently planting seeds without crushing them.
- ● Labeling tags or markers – To track seed varieties (especially useful if testing multiple types!).
- ● Grow lights or sunny windowsill – A south-facing window or grow light (12–16 hrs/day) for 6–8 weeks until transplanting.
- ○ Heat mat (optional) – Speeds up germination (75–85°F is ideal for watermelon seeds).
- ● Compost bin or worm bin – For repurposing pods/pots later! 🌱
Step-by-step guide to germinating watermelon seeds with no-twist pods
Here's how to grow watermelon from seed using eco-friendly, zero-waste pods that eliminate messy seedling trays.
🌱 Step 1: Prepare Your No-Twist Pods and Seeds
Start by filling each no-twist pod with sterile seed-starting mix—never garden soil, as it can harbor pathogens that stunt young watermelon roots. I like to press the mix firmly into the pod so it holds its shape when you twist it out later. This prevents soil from crumbling during transplanting, which watermelons particularly dislike.
Watermelon seeds are large and easy to handle. Place 1-2 seeds per pod, about ½ inch deep—deeper planting delays germination because the seedling has to push through more soil. I use a toothpick to make a small hole, drop the seeds in, then cover them lightly with additional mix. Too-deep planting is a common mistake that leads to weak, leggy seedlings.
💧 Step 2: Water and Create a Humidity Dome
Water the pods until the soil is evenly moist but not soggy. You'll know it's right when water runs through the bottom but doesn't pool. Let the pods sit for 10-15 minutes to absorb moisture, then place them in a clear plastic bag or under a humidity dome. Watermelon seeds germinate best at 75-85°F, so a seedling heat mat set to 80°F speeds up the process significantly.
Check the pods daily but resist the urge to water again until the soil feels dry to the touch at the surface. Overwatering at this stage causes damping-off, a fungal disease that collapses seedlings overnight. The humidity dome keeps moisture consistent without you having to water constantly.
☀️ Step 3: Provide Warmth and Light for Germination
Watermelon seeds typically sprout in 5-10 days, but warmth is critical. If your home runs cooler than 70°F, place the pods on a seedling heat mat or in a sunny windowsill near a south-facing window. Once sprouts appear, remove the humidity dome immediately—trapped moisture invites mold and weakens stems.
Move the pods under a grow light as soon as you see first true leaves (the second set after the initial seed leaves). Watermelons need 14-16 hours of light daily to prevent leggy growth. If seedlings stretch toward the light with thin stems, your light is too far away—adjust it to 2-4 inches above the pods. Strong seedlings have bold green leaves and thick stems at the base.
🪴 Step 4: Transplant Seedlings into Larger Pods
When seedlings reach 3-4 inches tall with 4-5 true leaves, it's time to transplant them into larger no-twist pods (6-8 inches deep). Twist the original pod gently to release the soil ball—watermelons hate root disturbance, so keep the soil intact. Place the seedling in the center of the new pod, fill around it with fresh mix, and water deeply.
Hardening off begins now. Move the pods outside for 1-2 hours the first day, gradually increasing to full sun exposure over 7-10 days. Watermelons are heat-loving, so they adapt quickly, but sudden exposure causes shock. You'll know they're ready when they look vibrant and perky even after a full day outdoors.
⏰ Step 5: Monitor Growth and Prepare for Outdoor Planting
Watermelon seedlings grow fast—expect 1-2 inches per week if conditions are ideal. Keep the soil consistently moist but not waterlogged, as watermelons are sensitive to root rot. Fertilize lightly with a balanced 10-10-10 mix once they've been in the larger pods for 2 weeks, but avoid overfeeding—too much nitrogen makes plants leafy at the expense of fruit.
When nighttime temperatures stay above 55°F and all danger of frost has passed, transplant the seedlings into the ground or large containers (at least 15 gallons per plant). Twist the no-twist pods out carefully, place the seedlings in their final home, and water deeply. The pods' biodegradable design means you can plant directly into the soil without disturbing roots.
Tips & tricks for perfect watermelon seedling growth
Here's what nobody tells you about getting those watermelon seeds to sprout like a pro—especially when using no-twist pods.
Soil Firmness Secret: Pressing the sterile seed-starting mix firmly into the pods creates a stable soil structure that prevents crumbling during transplanting. This is crucial because watermelon roots are sensitive to soil disruption. I've seen seedlings fail when the soil collapses during the twist-out process—it's like trying to move a houseplant without its pot. The key is to pack it just firm enough to hold shape but still allow water penetration, which is why that 10-15 minute absorption time matters so much. Too loose and you risk soil loss; too tight and you'll suffocate those emerging roots.
Seed Depth Precision: That ½-inch planting depth isn't arbitrary—it's the sweet spot where watermelon seeds get just enough moisture to germinate without having to push through excessive soil. I learned this the hard way after planting too deep and getting leggy, weak seedlings that took twice as long to emerge. For reference, that's about the width of your pinky finger. Use a toothpick to create the hole if you're nervous about consistency—it gives you a perfect guide every time. And remember, these seeds are large and sturdy, so there's no need to bury them deeper for extra protection.
Lighting Strategy: The 14-16 hours of daily light requirement isn't just about duration—it's about intensity. If your seedlings are stretching toward the light with thin stems, you're either too far away or using the wrong type of bulb. LED grow lights are ideal because they emit the full spectrum needed for photosynthesis. Position them 2-4 inches above the pods and adjust as the seedlings grow. I've seen dramatic improvements just by moving a light from 6 inches to 3 inches away—suddenly those stems went from spindly to sturdy in days. Watch for bold green leaves and thick stems at the base; those are your indicators of proper lighting.
Hardening Off Hack: The gradual hardening process over 7-10 days might seem tedious, but it's the difference between thriving plants and shocked seedlings. Start with just 1-2 hours outside on day one, then increase by 1-2 hours each subsequent day. Watermelons are tropical plants at heart, so they appreciate this slow acclimation. You'll know you're doing it right when the seedlings look perky even after their longest outdoor session. Pro tip: place them in a spot that gets morning sun and afternoon shade during the first few days—this mimics natural sun patterns and prevents heat stress.
Pro Tips for Watermelon Seed Germination
- Here's what nobody tells you about getting those watermelon seeds to sprout like a pro—especially when using no-twist...
- Soil Firmness Secret: Pressing the sterile seed-starting mix firmly into the pods creates a stable soil structure tha...
- Seed Depth Precision: That ½-inch planting depth isn't arbitrary—it's the sweet spot where watermelon seeds get just ...
Frequently asked questions
Got questions about germinating watermelon seeds?
You’re not alone! Here are some of the most common queries—and their quick, no-fuss answers—to help you grow your own zero-waste watermelon pods with confidence.
How long does it take for watermelon seeds to germinate?
Watermelon seeds typically sprout within 5 to 10 days under ideal conditions (warm soil, 70–90°F, and consistent moisture). If you’re using no-twist pods, germination can be slightly faster since the seeds stay hydrated and protected. Patience is key—if nothing appears after 2 weeks, check soil temperature or seed viability.
Can I germinate watermelon seeds indoors before planting outside?
Start seeds indoors 4–6 weeks before the last frost using a seedling heat mat (watermelons love warmth). Use small pots with well-draining soil, keep them moist, and place them in a sunny window or under grow lights. Once seedlings have 2–3 true leaves, harden them off before transplanting outdoors.
What do I do if my watermelon seeds won’t sprout?
Try these troubleshooting steps:
- Check seed viability: Test a few seeds in a damp paper towel—if they don’t sprout in 3–5 days, they may be old or damaged.
- Warmth is critical: Watermelon seeds need soil temps above 70°F. Use a heat mat or wait until the soil is properly warmed by the sun.
- Moisture matters: Keep soil consistently damp (not soggy) and avoid overwatering, which can cause rot.
- Try scarification: If seeds are hard-coated, gently nick them with sandpaper to help water penetrate.
Can I use watermelon rind seeds for germination?
Yes! Seeds from store-bought watermelons will germinate, but save seeds from heirloom or organic varieties for the best results. Rinse seeds thoroughly, dry them, and store in a cool, dark place until ready to plant. Just note: hybrid seeds may not produce true-to-type fruit.
When is the best time to plant watermelon seeds outdoors?
Wait until after the last frost and soil temps reach at least 70°F (use a soil thermometer to check). In warm climates, plant in early spring; in cooler regions, start seeds indoors first. Watermelons thrive in full sun (6–8 hours/day) and need well-draining soil. For no-twist pods, plant seeds 1 inch deep and space them 2–3 feet apart.
Pro Tip: Speed up germination by soaking seeds in warm water for 24 hours before planting!
Wrapping up and next steps
Germinating watermelon seeds in no-twist pods isn’t just eco-friendly—it’s a game-changer for gardeners who love simplicity and sustainability! 🌱 By following these steps, you’ve unlocked a zero-waste way to save seeds, reduce plastic, and grow vibrant watermelons year after year.
The best part? You’re now equipped with a low-cost, high-reward technique that even beginners can master.
Ready to take the next step? Start small—try a few pods this season, then expand as you gain confidence. Share your progress with fellow gardeners or even experiment with other seed varieties! Your green thumb is growing, and so is your impact on the planet. Happy planting! 🌍✨