
Lawn
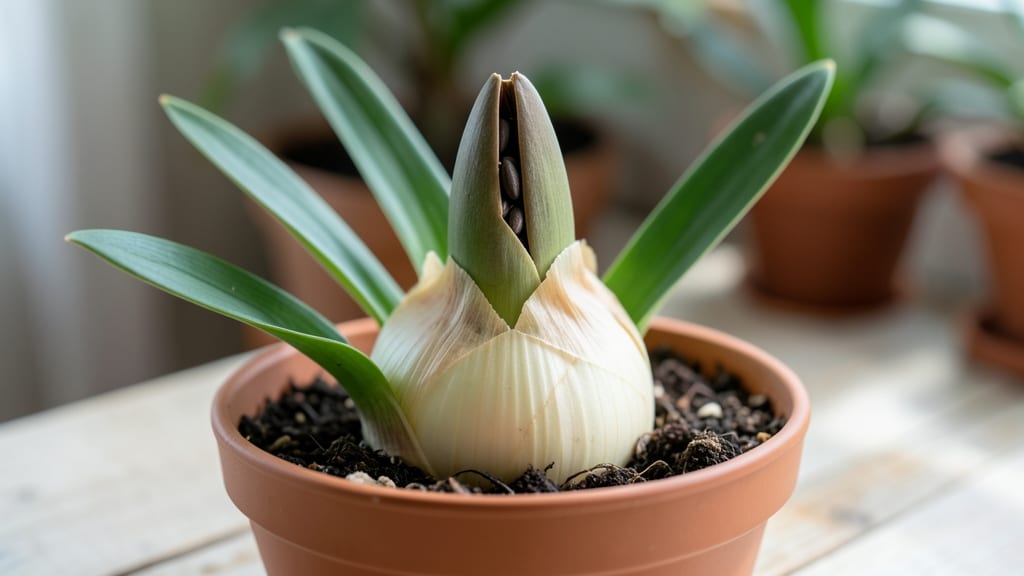
Those papery amaryllis seed pods hold the secret to growing your own rare blooms—without the twist-and-pull frustration. 🌱 I’ve wrestled with stubborn seed pods for years, but there’s a simple, zero-waste way to crack them open that actually preserves the seeds inside.
The trick? A little patience and the right timing.
You’ll need just three things: a sharp knife, a clean cutting board, and a small bowl to catch the seeds. Once the pod turns brown and starts splitting on its own, slice it open lengthwise—no twisting required—and you’ll find flat, black seeds ready for planting.
These aren’t fussy; they’ll germinate in basic potting mix with just the right warmth.
Plant them shallowly in a tray with damp soil and keep them cozy at 70-75°F under bright, indirect light. In about 6-8 weeks, you’ll spot tiny green shoots pushing through.
The real magic? These seedlings grow into mature plants that’ll reward you with dramatic blooms in just 2-3 years—far faster than buying bulbs.
Here’s the best part: no waste, no guesswork. The pods themselves break down into the soil, and the seeds you save could produce plants with unique colors or patterns. Perfect for gardeners who love a challenge and want to propagate their favorite amaryllis varieties without spending a dime.
📚 In This Guide
- What you need
- Instructions
- Tips and common mistakes
- Wrapping up and next steps
What you need
- ● Fresh or dried amaryllis seed pods – Collect 2-3 mature pods (ensure they’re fully brown and slightly papery to the touch).
- ● Sharp scissors or pruning shears – For cleanly snipping open pods (sterilize with rubbing alcohol if reusing).
- ● Paper towels or parchment paper – A single sheet to line your workspace and catch debris.
- ● Small bowl or container – To collect seeds (a 3-inch diameter dish works perfectly).
- ○ Rubbing alcohol (70% isopropyl) – A small amount for sanitizing tools (optional but recommended).
- ○ Glove (optional) – Protects hands from seed pods’ mildly sticky residue.
- ○ Magnifying glass (optional) – Helps spot tiny seeds if your vision isn’t 20/20.
- ● Labeling marker – To mark containers with date harvested (if storing seeds long-term).
- ● Compost bin – For disposing of pod husks (zero-waste approved!).
How to open amaryllis seed pods naturally without twisting
Here’s my go-to method for harvesting seeds without damaging the pods or wasting a single bit of the plant.
🌱 Step 1: Wait for Pods to Ripen Fully
Leave the seed pods on the plant until they turn a deep, papery brown and begin to split open naturally. This usually takes 8-12 weeks after flowering, depending on your climate. You’ll know they’re ready when the outer skin cracks slightly along the seams—this is your signal that the seeds inside are mature and dry.
If you pick them too early, the seeds won’t germinate well. I’ve learned the hard way that forcing them open prematurely leads to shriveled, nonviable seeds. Patience here ensures strong, viable seeds for next season.
🪴 Step 2: Gently Remove Pods and Prepare for Opening
Carefully twist the pods off the stem at the base—don’t pull too hard, or you’ll tear the pod open before you’re ready. Lay them on a clean, dry surface like a baking sheet or paper towel. I like to work with them on a sunny windowsill, where the natural light helps me spot any hidden damage or mold.
If the pods are still slightly green inside, leave them in a warm, dry spot for another 3-5 days to finish drying. Overripe pods can rot if left too long, so timing matters. You’ll see the seeds inside clearly once the pod is fully dry and papery.
✂️ Step 3: Split Pods Without Twisting or Damaging Seeds
Use a sharp pair of scissors or a small knife to carefully slice the pod lengthwise along its natural seam. Avoid cutting through the seeds—aim for the thin, fibrous center where the pod naturally splits. I like to make a shallow cut first, then gently peel the pod open like a book.
Once split, tip the pod over a clean bowl or envelope to catch the seeds. The inner lining often holds them in place, so tap lightly to release them. If seeds stick to the pod, use a soft brush or your fingers to coax them free. Never shake the pod—this can cause seeds to scatter or get lost.
💧 Step 4: Dry and Store Seeds Properly
Spread the seeds on a paper towel in a single layer and let them air-dry for 24-48 hours in a warm, dry place. This prevents mold and ensures they stay viable for planting. I place a small fan nearby to speed up drying without disturbing them.
Once completely dry, transfer the seeds to a labeled envelope or small jar. Store them in a cool, dark place—like a sealed container in the fridge—to maintain viability for up to 2 years. Label with the date and variety to keep track of your seed stock.
☀️ Step 5: Plant or Save for Next Season
If you’re ready to plant, sow the seeds in well-draining potting mix at a depth of ¼ inch, keeping the soil lightly moist but not soggy. Place the container in a warm spot with bright, indirect light. Germination can take 4-8 weeks, so be patient.
For long-term storage, I recommend testing a few seeds each year to check viability. If they’re still strong after a couple of years, you’ve done everything right. This zero-waste method lets you enjoy the full cycle of your amaryllis—from bloom to seed and back again.
Tips & tricks for perfect amaryllis seed pod harvesting
Here's what nobody tells you about maximizing your seed yield without a single wasted pod.
Ripeness is Everything: The 8-12 week waiting period isn't just about patience—it's about seed viability. Look for pods that develop a papery texture and natural cracks along the seams. I've found that pods left too long on the plant (beyond 12 weeks) can develop mold, while those harvested too early (before 8 weeks) produce seeds that won't germinate. This window is your sweet spot for perfect seeds.
Lighting Matters: When preparing pods in Step 2, place them on a sunny windowsill—not just for aesthetics. Natural light helps you spot any hidden mold or damage that might compromise your seeds. I've noticed that pods with even slight green spots inside need that extra 3-5 days of drying time to prevent future rot during storage.
Precision Cutting Technique: In Step 3, when making that initial shallow cut, think of it like opening a book. The natural seam of the pod is actually a thin fibrous membrane that separates cleanly when you follow this line. Using a sharp knife or scissors prevents crushing the seeds inside. I've ruined entire batches by being too aggressive with the cut—always aim for that delicate center line.
Drying Strategy: The 24-48 hour drying period is where many people go wrong. Spread seeds in a single layer on paper towels, but don't stack them—this prevents mold growth. I've found that placing a small fan nearby speeds up drying without disturbing the seeds. If you're in a humid climate, you might need to extend this to 48 hours to ensure complete dryness before storage.
Pro Tips for Amaryllis Seed Pod
- Here's what nobody tells you about maximizing your seed yield without a single wasted pod.
- Ripeness is Everything: The 8-12 week waiting period isn't just about patience—it's about seed viability. Look for po...
- Lighting Matters: When preparing pods in Step 2, place them on a sunny windowsill—not just for aesthetics. Natural li...
Frequently asked questions
Got questions about harvesting and using amaryllis seed pods? You’re not alone! Here are some of the most common queries—and their answers—to help you navigate this eco-friendly twist-free process with confidence.
How do I know when amaryllis seed pods are ready to harvest?
Seed pods are ready when they turn light brown and feel slightly papery to the touch. If they’re still green, they need more time (usually 4–6 weeks after flowering). Avoid harvesting if pods are hard or unopened—this can delay germination or reduce seed viability.
Can I save amaryllis seeds from store-bought bulbs?
Yes! Many grocery-store amaryllis bulbs (like Hippeastrum hybrids) produce seed pods, but germination rates may vary. For best results, opt for heirloom or open-pollinated varieties. If your store-bought bulb doesn’t produce pods, try cross-pollinating with a neighbor’s plant using a paintbrush.
What’s the best way to store amaryllis seeds until planting?
Store seeds in a cool, dry place (like a paper envelope in the fridge) for up to 3 months. Keep them away from moisture to prevent mold. For longer storage, dry seeds completely and refrigerate in a sealed container with silica gel packets.
Why aren’t my amaryllis pods opening naturally?
Pods may resist opening if they’re too moist or not fully mature. Try gently twisting the pod (like a twist-off jar) or placing it in a warm, sunny spot for 1–2 days. If pods stay closed, they might need a light freeze (place in the fridge for 24 hours) to mimic winter dormancy.
Can I use amaryllis seeds for anything other than growing new plants?
Beyond propagation, dried seed pods make rustic decorations (hang them as mobiles or use in floral arrangements). Crushed seeds can even be used as a natural dye for fabric (produces soft brown hues). Just ensure pods are fully dry before creative projects!
Wrapping up and next steps
Discovering the amaryllis seed pod is like unlocking a zero-waste treasure—simple, creative, and sustainable! 🌱 With just a few tools and a little patience, you can transform these pods into practical, twist-free storage solutions while reducing waste.
Whether you're a gardening enthusiast or a DIY lover, this project is your next eco-friendly adventure.
Ready to give it a try? Gather your materials, follow the steps, and enjoy the satisfaction of crafting something useful from nature’s own packaging! Share your creations with the community and inspire others to embrace zero-waste living. 💚