
Propagation
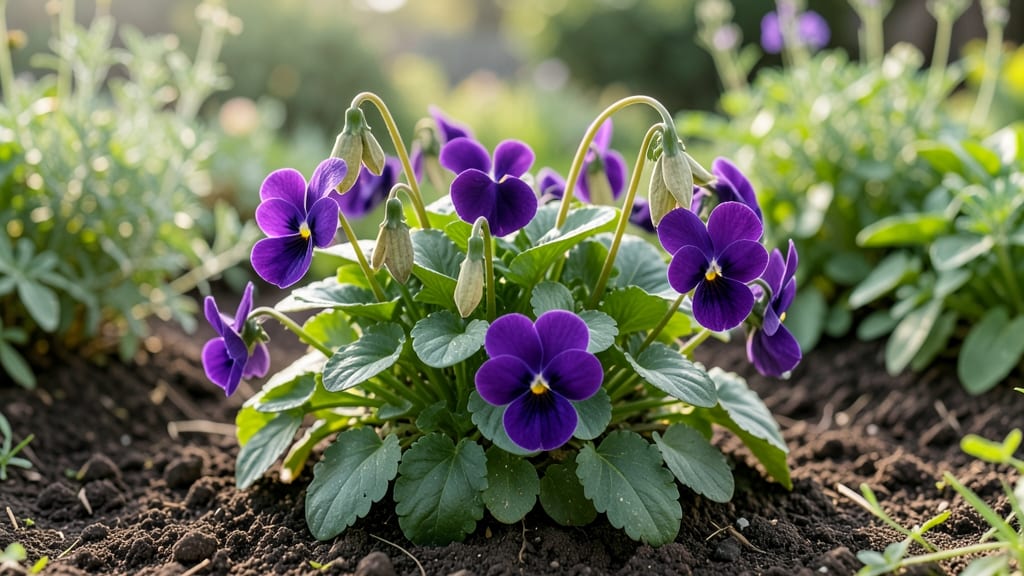
Harvesting viola seed pods before they twist open means you'll never waste another seed again. 🌿 Those little green pods hold the secret to growing more violas for free, and the key is timing—collect them when they're still firm but starting to turn brown.
I learned this the hard way after watching seeds scatter everywhere last spring, but now I save every one. The trick is simple: pick the pods when they're about half ripe, then let them dry indoors for a week before gently squeezing them open.
You'll need a small bag or envelope to store the seeds, and a flat surface to spread them out while they dry. No special tools required—just patience and a keen eye for the right moment. Once dried, you'll have tiny, wrinkled seeds ready for planting.
Viola seeds germinate best in cool weather, so sow them in early fall or late winter for the most reliable results. The first sprouts appear in just 10-14 days, and you'll have blooms by next spring if you keep them happy.
This method works for pansies too, and it's perfect for gardeners who love zero-waste practices. Just avoid letting the pods dry completely on the plant—once they twist open, the seeds are gone forever. Here's how to do it right!
📚 In This Guide
- What you need
- Instructions
- Tips and common mistakes
- Wrapping up and next steps
What you need
- ● Mature viola seed pods: 5–10 fully ripe, brown, and slightly wrinkled pods (harvest when they naturally open or are ready to split).
- ● Pruning shears or sharp scissors: Small, clean pair (sterilize with rubbing alcohol if reusing).
- ● Paper bags or envelopes: 2–3 breathable brown paper bags (or seed envelopes) for drying and storage.
- ● Labeling tags or masking tape: To mark varieties and harvest dates (e.g., "Viola ‘Moonlight’ – 2024").
- ● Fine-mesh sieve or sifter: 1–2 mesh sizes (e.g., 0.02-inch or 0.04-inch) for separating seeds from chaff.
- ○ Ruler or measuring tape: For precise pod measurements (optional but helpful for tracking maturity).
- ● Small container (e.g., glass jar or plastic box): With a lid for short-term seed storage (airtight but not sealed).
- ● Glove: Lightweight gardening glove to protect hands from prickly stems.
- ● Magnifying glass: For inspecting seed viability or tiny pods.
- ● Desiccant packet: For long-term seed storage (place in container with seeds).
- ● Notebook: To log growing conditions, pod characteristics, or germination notes.
- ● Twist-tie or rubber band: To secure paper bags temporarily during drying.
How to harvest viola seed pods without twisting or breaking them
Violas produce delicate seed pods that snap easily—here’s my foolproof method for collecting seeds without losing them to frustration.
🌿 Step 1: Identify Mature Seed Pods
Wait until pods turn from green to brown and papery—this signals seeds are fully mature. Gently squeeze a pod between your fingers; if it feels dry and crumbly inside, it’s ready. I check plants twice weekly in late summer to catch them at peak ripeness.
Harvest on a dry morning after dew has evaporated. Wet pods stick to fingers and tear when pulled. If you miss the window, pods may split open on their own, scattering seeds everywhere.
✂️ Step 2: Snip Pods Cleanly at the Stem
Use clean, sharp scissors (not your fingers!) to cut pods ¼ inch above the stem. Twisting risks breaking the pod and losing seeds mid-harvest. I lay a sheet of newspaper beneath plants to catch any stray pods or seeds that drop.
Place harvested pods in a brown paper bag—the texture prevents moisture buildup that could rot seeds. Label the bag with the viola variety and harvest date. A pencil works fine; no fancy tags needed.
🪴 Step 3: Dry Pods Fully Before Opening
Spread pods in a single layer on a mesh screen or clean towel. Keep them in a warm, dry spot (like a sunny windowsill) for 7–10 days. They’re ready when pods feel lightweight and hollow when tapped.
Don’t rush drying—moisture inside speeds up mold. If pods develop fuzzy spots, toss them immediately. Once completely dry, place them in a small envelope and store in a cool, dark place for up to 2 years. Viola seeds stay viable longer than most flowers!
🌱 Step 4: Extract Seeds Without Losing Them
Hold a dried pod over a white plate or sheet of paper and gently squeeze it between your palms. Seeds will spill out cleanly if pods are fully dry. I tap the pod lightly first—sometimes seeds rattle inside before falling.
Discard any empty pods or debris. Viola seeds are tiny (like poppy seeds), so use a fine-mesh strainer to collect them if they scatter. Store seeds in a sealed envelope with a silica gel packet to absorb any lingering moisture.
⏰ Step 5: Plant or Store for Next Season
For immediate planting, scatter seeds on moist potting mix and lightly press them in. Viola seeds need light to germinate, so don’t cover them. Keep soil damp (not soggy) and expect sprouts in 2–4 weeks under bright, indirect light.
If saving for later, label your envelope with the variety and date. Viola seeds are self-sowing, so you might find surprise seedlings popping up in your garden next spring—just thin them to avoid overcrowding.
Tips & tricks for perfect viola seed pod harvesting
These little tricks will help you turn a frustrating task into a seamless, zero-waste gardening win.
Timing Secret: I check my viola plants twice weekly in late summer—this consistency is key. Mature pods turn brown and papery, but they don't stay that way long. If you wait too long, they'll split open on their own, scattering seeds everywhere. The dry morning timing is non-negotiable—wet pods stick to fingers and tear when pulled, which is how I lost my first batch of seeds!
Equipment Upgrade: That ¼-inch above the stem cut is precise, but don't stress about perfect measurements. Use clean, sharp scissors—anything dull will crush pods. I keep a small pair dedicated just for seed harvesting. For the drying process, a mesh screen or clean towel works perfectly, but I've also used an old wooden cutting board in a pinch. Just avoid plastic, which can trap moisture.
Drying Wisdom: The 7–10 days drying time might feel long, but rushing leads to mold. I place my pods on a sunny windowsill during the day and move them to a cool spot at night. If you notice fuzzy spots developing, toss those pods immediately—they're already compromised. Once completely dry, the pods should feel lightweight and hollow when tapped. This is your cue they're ready for seed extraction.
Seed Collection Hack: Viola seeds are tiny—like poppy seeds—so use a white plate or sheet of paper for contrast when extracting. I tap the pod lightly first to hear if seeds are rattling inside. If they are, a gentle squeeze will release them cleanly. For stubborn pods, a fine-mesh strainer catches any seeds that scatter during extraction. This simple step has saved me from losing seeds to the wind more times than I can count!
Pro Tips for Viola Seed Pods
- These little tricks will help you turn a frustrating task into a seamless, zero-waste gardening win.
- Timing Secret: I check my viola plants twice weekly in late summer—this consistency is key. Mature pods turn brown an...
- Equipment Upgrade: That ¼-inch above the stem cut is precise, but don't stress about perfect measurements. Use clean,...
Frequently asked questions
Got questions about harvesting viola seed pods? You’re not alone! Here are some of the most common queries—plus quick, practical answers to keep your seed-saving game strong.
When are viola seed pods ready to harvest?
Seed pods are ready when they turn dry and papery (usually 4–6 weeks after flowering). If they’re still green, they’re not mature yet—wait a few more days! Pro tip: Gently squeeze a pod; if seeds rattle inside, it’s harvest time!
Why do viola seed pods twist open on their own?
Violas have dehiscent seed pods—they naturally twist open to release seeds when dry. To prevent seed loss, harvest pods before they split open! Use tweezers or scissors to snip them off the stem.
Can I save seeds from hybrid violas?
Probably not! Hybrid violas (like Viola × wittrockiana) often produce sterile seeds or plants that don’t match the parent. For true-to-type seeds, stick to heirloom or open-pollinated varieties.
How should I store viola seeds?
Let harvested pods dry completely (1–2 weeks in a cool, dark place), then remove seeds and store them in a paper envelope or airtight container. Keep them in the fridge for up to 2–3 years!
What if my viola seed pods never form?
Check for these issues:
- Poor pollination: Hand-pollinate with a paintbrush if bees aren’t visiting.
- Overcrowding: Thin plants for better airflow and flowering.
- Cold stress: Violas need consistent temps (50–75°F) to set seed.
Wrapping up and next steps
Harvesting viola seed pods doesn’t have to be a struggle—with the right techniques, you can save seeds effortlessly while embracing a zero-waste approach! 🌱 These delicate pods reward patience with vibrant blooms year after year, making them a gardener’s secret weapon.
Whether you’re a beginner or a seasoned green thumb, mastering this skill connects you to nature’s cycle in a sustainable way.
Now that you’re equipped with the know-how, why not take the next step? Try experimenting with different viola varieties or share your seed-saving success with fellow gardeners. Every seed saved is a tiny victory for our planet—and your future garden! 🌟