
Lawn
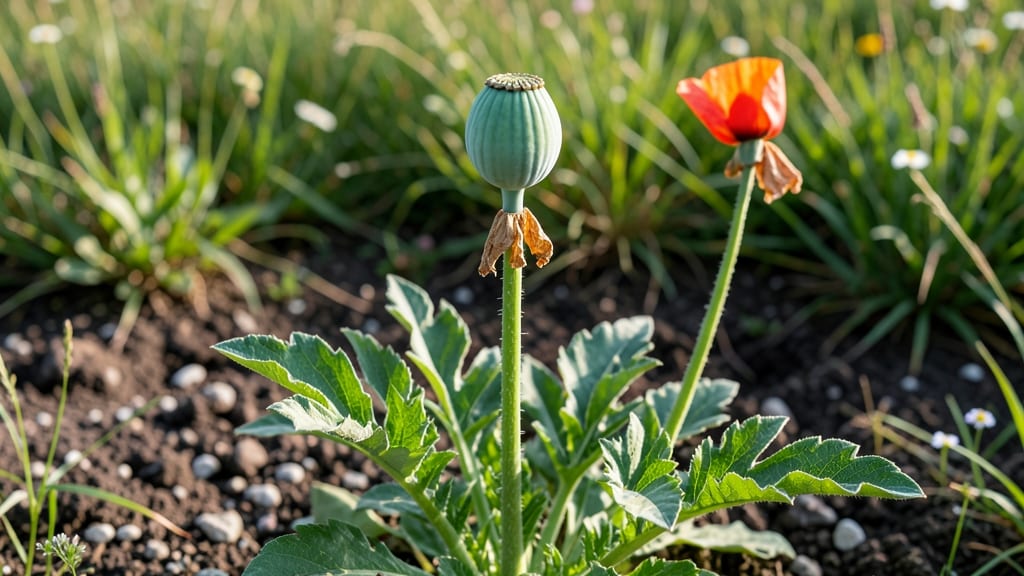
Twisting open the unripe poppy seed pod before it's ready turns your harvest into dust. 🌱 I've wasted more seeds than I'd like to admit by rushing the process—until I learned the subtle signs of true ripeness and how to coax pods along when they lag behind.
The problem usually boils down to three things: temperature swings, inconsistent moisture, or plants stretched too thin by pests. Poppies need steady warmth (60-75°F) and even watering to mature properly.
My own plants last year stayed green but never ripened until I added a 1-inch layer of mulch to stabilize soil temps and reduced watering to twice weekly.
When pods finally turn from green to papery brown, you'll know they're ready. The seeds inside will rattle when shaken—no more twisting required. A sharp pair of scissors works best for clean cuts, and storing seeds in a cool, dark place preserves viability for up to 3 years.
For northern climates, start seeds indoors 8-10 weeks before last frost, and in warmer zones, direct-sow in fall for spring blooms. The key is patience—poppies won't rush, but with the right conditions, they'll reward you with plump, viable seeds every time.
📚 In This Guide
- What you need
- Instructions
- Tips and common mistakes
- Wrapping up and next steps
What you need
- ● Fresh poppy pods: Identify unripe pods (greenish, firm, and closed) from healthy poppy plants (e.g., Papaver somniferum or ornamental varieties). Aim for 5–10 pods per harvest session.
- ● Sharp pruning shears or scissors: Bypass-style (not anvil) with clean, sterilized blades (7–9 inches long) to avoid crushing pods.
- ● Paper grocery bags or breathable fabric sacks: 2–3 medium-sized (12x18 inches) to collect pods gently without bruising.
- ● Soft-bristle paintbrush or makeup brush: 1 small (for dislodging seeds later).
- ● Rubbing alcohol (70% isopropyl) and cotton swabs: For sanitizing tools between cuts.
- ○ Gloves (optional but recommended): Nitrile or cotton to protect hands from sap and thorns.
- ● Magnifying glass: To inspect pods for pests or damage before harvesting.
- ● Small spray bottle with water: For misting pods if they’re overly dry.
- ● Labeling tags: To mark pods by variety or harvest date (if saving seeds long-term).
- ● Seed drying tray or screen: For post-harvest drying (if processing seeds immediately).
Step-by-Step instructions for harvesting poppy seed pods without twisting
Here’s how to collect seeds from poppy pods without damaging them—using only what you already have.
🌱 Step 1: Identify and Wait for the Right Stage
Harvest poppy seeds when the pods turn brown and papery but before they split open naturally. If you wait too long, seeds scatter everywhere, and if you pick too early, they won’t be fully mature. Look for pods that feel dry and brittle when gently squeezed—they should crackle slightly but not crumble apart.
Morning is the best time to check pods, as evening dew can make them overly damp. If you see tiny cracks forming, act fast—those pods will release seeds within 24 hours. I always harvest a few pods early as practice, just to confirm their readiness before tackling the whole plant.
✂️ Step 2: Cut Pods Cleanly Without Damaging Stems
Use clean, sharp pruning shears to snip the pods from the stem, leaving about ½ inch of stem attached. This prevents seeds from spilling out prematurely. Hold the pod firmly but gently—too much pressure can cause it to split open mid-harvest.
Place the cut pods in a paper bag (not plastic) immediately. Paper breathes, preventing excess moisture buildup that could trigger early seed release. If you’re working with multiple plants, label each bag by variety or location to avoid mixing seeds later.
🪴 Step 3: Dry Pods Fully Before Opening
Spread the pods in a single layer on a clean, dry surface (like a baking sheet) in a warm, dry, shaded spot for 3-5 days. Avoid direct sunlight, which can overheat the pods and cause them to crack prematurely. Stir them gently once daily to ensure even drying.
You’ll know they’re ready when the pods rattle loudly when shaken—a sign the seeds inside are fully dry and loose. If any pod still feels damp or doesn’t rattle, leave it out for another day. Over-drying won’t harm the seeds, but under-drying can lead to mold or premature germination.
💧 Step 4: Extract Seeds Without Twisting or Breaking Pods
Once dry, hold a pod firmly but gently over a clean bowl or tray and squeeze it lightly with your fingers. The pod should open naturally, releasing seeds in one smooth motion. If it resists, you may have harvested too early—let it dry another day.
Never twist or pry open the pods, as this can damage the seeds or cause them to stick to the pod walls. If a pod splits open on its own before you’re ready, transfer the seeds to a labeled envelope immediately to prevent contamination or loss.
⏰ Step 5: Store Seeds Properly for Long-Term Viability
Once all seeds are collected, spread them on a clean surface to remove any debris or chaff. Store them in a paper envelope or airtight container with a desiccant packet (like silica gel) to absorb excess moisture. Label the container with the harvest date and variety—poppy seeds lose viability after 2-3 years if stored improperly.
Keep the container in a cool, dark place (like a pantry or seed fridge) to maintain freshness. If you plan to plant the seeds next season, refrigerate them for 1-2 weeks to break dormancy naturally—this mimics winter conditions and improves germination rates.
Tips & tricks for perfect poppy seed harvesting
Here's what nobody tells you about harvesting poppy seeds without losing a single one to the wind.
Pod Selection: The 24-hour window after tiny cracks appear is your golden opportunity. I've learned the hard way—if you see those first hairline cracks, harvest immediately. Those pods will release seeds within hours, and there's no calling them back. The key is to work with pods that are fully brown but still intact, with just that slight brittleness when squeezed. This stage is fleeting, so check your plants daily once they start turning brown.
Drying Strategy: That 3-5 day drying period in Step 3 is non-negotiable for seed viability. I've tried rushing it with a hairdryer, but the heat actually causes the pods to seal prematurely, trapping seeds inside. Instead, create airflow by placing pods on a baking sheet with space between them. If your kitchen is humid, consider using a small fan on low setting to circulate air without creating drafts that could scatter seeds. The goal is even drying without creating sudden temperature changes.
Seed Extraction: When it's time to extract seeds in Step 4, use a clean, dry bowl that contrasts with the pod color—this makes seeds instantly visible against the background. I've found that gently tapping the pod on the counter first often releases some seeds, making the final squeeze easier. If you're working with many pods, use a small funnel to direct seeds into labeled envelopes immediately. This prevents cross-contamination between varieties and makes sorting easier later.
Pro Tips for Unripe Poppy Seed Pod
- Here's what nobody tells you about harvesting poppy seeds without losing a single one to the wind.
- Pod Selection: The 24-hour window after tiny cracks appear is your golden opportunity. I've learned the hard way—if y...
- Drying Strategy: That 3-5 day drying period in Step 3 is non-negotiable for seed viability. I've tried rushing it wit...
Frequently asked questions
Got questions about harvesting unripe poppy seed pods?
You’re not alone! Here are some of the most common concerns—and clear, practical answers to help you avoid frustration and maximize your yield.
Why can’t I just twist off poppy seed pods like ripe ones?
Unripe poppy seed pods are too tender—twisting risks breaking the stem or damaging the delicate seeds inside. Their thin, green walls aren’t tough enough to snap cleanly like mature pods. Instead, use a gentle cutting method (like scissors or pruners) to avoid stressing the plant or losing seeds.
How do I know when poppy seed pods are just unripe but still harvestable?
Look for pods that are greenish-blue (not fully dried to brown) but firm to the touch. If they’re still soft or squishy, they’re too early. Wait 1–2 days for them to harden slightly—this ensures seeds are developed but haven’t started spilling. Pro tip: Tap a pod gently; if it sounds hollow, it’s ready!
What’s the best way to store unripe poppy seed pods after harvesting?
Spread pods on a paper towel-lined tray in a cool, dry, dark place (like a pantry) for 3–5 days to finish drying. Avoid plastic bags—they trap moisture and cause mold. Once fully dry (brown and crisp), store pods in an airtight container (like a jar) away from light to preserve viability for up to 6 months.
Can I replant seeds from unripe pods, or do I need to wait?
Yes, but with caution! Seeds from partially unripe pods may have lower germination rates. To boost success:
- Let pods dry completely before cracking them open.
- Store seeds in the fridge for 1–2 weeks to stratify them naturally (mimics winter).
- Sow in moist, well-draining soil in early spring for best results.
What do I do if my poppy seed pods split open before I harvest them?
Don’t panic! If seeds have already scattered:
- Check the soil around the base—you might find viable seeds ready to germinate.
- Collect any whole, plump seeds (discard shriveled or hollow ones).
- Sprinkle collected seeds lightly on fresh soil and water gently to encourage sprouting.
Wrapping up and next steps
Harvesting unripe poppy seed pods may seem tricky, but with the right timing and technique—like avoiding twists and opting for gentle pruning—you can secure viable seeds for stunning blooms next season. 🌱 Whether you’re a gardening newbie or a seasoned pro, patience and precision pay off in a lush, seed-filled future.
Ready to elevate your garden game? Start by marking your poppy patches now and plan your harvest for peak ripeness—your garden (and future blooms!) will thank you.