
Propagation
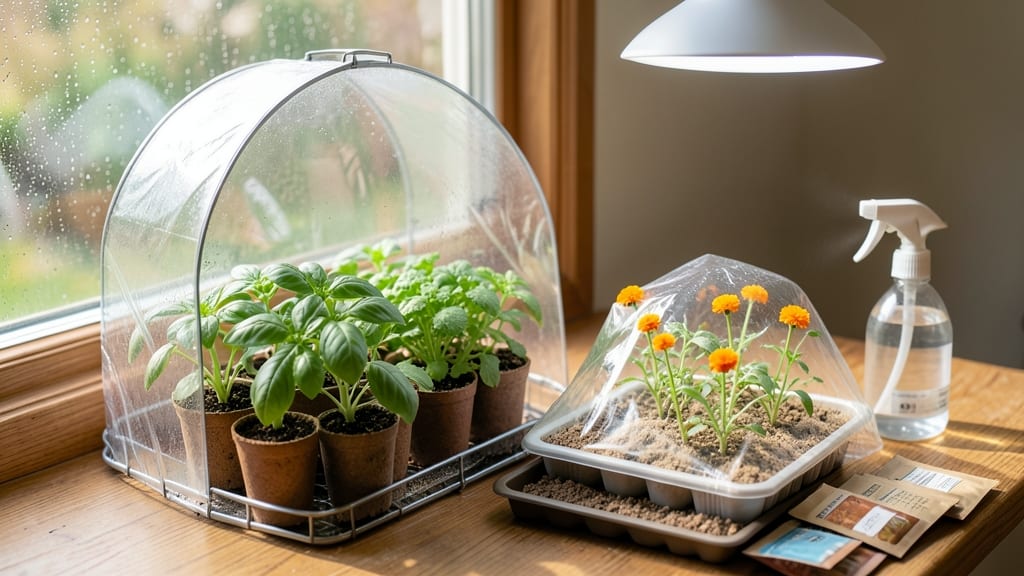
A small seed starting greenhouse cuts your germination time in half while keeping seedlings safe from drafts and pests. 🌱 I finally got past the "mysterious seedling deaths" phase after switching to this setup—no more waiting weeks for stubborn seeds to sprout when they could be thriving in the right conditions.
You’ll need just a few basics: a clear plastic dome (or even a repurposed baking dish with a lid), a heat mat for bottom warmth, and a grow light on a timer.
The magic happens when you combine consistent 70-75°F soil temps with humidity trapped under the dome—exactly what finicky seeds like tomatoes and peppers crave. Most beginners overlook the heat mat, but it’s the difference between fast germination and weeks of waiting.
Within 7-10 days, you’ll see those first tiny sprouts pushing through the soil, and the greenhouse keeps them protected until they’re strong enough to handle the real world.
The clear plastic creates a mini ecosystem where moisture stays balanced, and you avoid the heartbreak of damping-off fungus that wipes out entire trays.
Works for any seed type, from delicate lettuce to tough-as-nails marigolds. Once you master this, you’ll never go back to the old "hope for the best" method. Here’s how to set it up right the first time.
📚 In This Guide
- What you need
- Instructions
- Tips and common mistakes
- Wrapping up and next steps
What you need
- ● Greenhouse Structure: 1x Mini greenhouse kit (e.g., 12"–24" tall, 12"–18" diameter) or
- ● 1x Clear plastic storage bin (10–20 gallons) with a lid
- ● 1x Plastic dome or cloche (for DIY setups)
- ● Growing Medium: 1 bag seed-starting mix (sterilized, peat-free or coco coir blend preferred)
- ● 1–2 biodegradable seedling pots (2–3" diameter) or 1 seed tray with cell inserts
- ● Seeds: Your chosen small seeds (e.g., lettuce, herbs, or flowers)
- ○ Climate Control: 1x small heat mat (optional but helpful for cold climates)
- ● 1x spray bottle (for gentle watering)
- ● 1x humidity dome (if not using a sealed greenhouse)
- ● Lighting: 1x grow light (LED or fluorescent, 12–16" above seedlings)
- ● OR a sunny windowsill (south-facing, 6+ hours of light)
- ● 1x digital thermometer/hygrometer (to monitor temp/humidity)
- ● 1x small fan (for airflow, prevents damping-off)
- ● 1 roll breathable row cover (for extra insulation)
- ● 1x label maker (to track seed varieties)
How to build a small seed starting greenhouse for rapid germination
Here’s how I create a mini climate-controlled space that speeds up germination by days.
🪴 Step 1: Choose and Prepare Your Base Container
Start with a clear plastic storage bin (at least 12x12x6 inches) or a repurposed glass cake stand—both let you control humidity and light while keeping seeds warm. If using a plastic bin, drill 2-3 small drainage holes in the bottom to prevent waterlogging. I like to line the bottom with a folded paper towel to catch any excess water while still allowing airflow.
For a glass greenhouse, use a clear glass jar with a lid (like a quart-sized mason jar) or a two-tier cake stand for layering. The key is clear sides—this lets you monitor moisture levels and seed progress without disturbing the environment. Place your container in a consistently warm spot (like on top of a refrigerator or near a sunny window).
☀️ Step 2: Set Up Light and Heat for Fast Germination
Place a grow light (or a south-facing window) 2-3 inches above your seeds—this mimics spring sunlight and prevents leggy seedlings. If using a grow light, keep it on for 14-16 hours daily to simulate long daylight hours. For warmth, I use a seedling heat mat set to 75-85°F—this is critical for fast germination, especially for slow starters like tomatoes or peppers.
If you don’t have a heat mat, place the greenhouse on a warm appliance (like the top of a fridge or a heated counter). Check the soil temperature with your finger—it should feel warm but not hot to the touch. Avoid direct sunlight at first; seedlings can overheat in a closed container.
💧 Step 3: Plant Seeds and Maintain Ideal Humidity
Fill the container with moistened seed-starting mix (not garden soil—it’s too dense). Plant seeds ¼ inch deep, cover lightly with a sprinkle of mix, and mist the surface with a spray bottle until the soil looks evenly damp but not soggy. Place the lid (or a clear plastic wrap) on top to trap humidity—this keeps the environment 80-90% humidity, which is perfect for germination.
Check daily for condensation on the lid—this means the humidity is just right. If the lid fogs up, you’re golden. If it stays dry, mist the soil again lightly. Don’t overwater—too much moisture leads to mold or damping-off. Once seeds sprout, remove the lid immediately to prevent fungal growth.
⏰ Step 4: Monitor and Adjust for Consistent Growth
Watch for first sprouts in 3-10 days (depending on the seed). As soon as you see green shoots, move the greenhouse to a bright, indirect light spot (like a grow light on a timer). If seedlings grow leggy or pale, they need more light—raise the light source 1 inch higher or extend daylight hours.
After 7-10 days, when seedlings have 2-3 true leaves, gradually remove the lid for 10-15 minutes daily to harden them off. This prevents shock when you eventually transplant. Keep the soil consistently moist but never waterlogged—tap the container gently to check if the top inch feels dry.
🌱 Step 5: Transition to Independent Growth
Once seedlings are 3-4 inches tall and have 4-5 true leaves, they’re ready to move out of the greenhouse. Transplant them into individual pots with fresh soil, water deeply, and place them under stronger light. Over the next 5-7 days, let them adjust to room conditions before moving outside.
Here’s the thing—this mini greenhouse isn’t just for speed. It’s also a disease-free zone if you keep it clean. Wipe the lid with rubbing alcohol weekly, and avoid touching seedlings to prevent contamination. With this setup, you’ll see faster, stronger seedlings than store-bought starts.
Tips & tricks for perfect mini seed starting greenhouses
A few simple tweaks can turn your DIY greenhouse into a seed germination powerhouse. Here's what I've learned from years of testing different setups.
Container Choice Matters: For the 12x12x6-inch plastic storage bin option, I recommend using a bin with slightly higher sides (like a 12x12x8-inch) if you're growing taller seeds like beans or corn. The extra height gives seedlings room to grow without touching the lid. For glass options, quart-sized mason jars work perfectly for small batches, but if you're starting multiple varieties, the two-tier cake stand gives you more flexibility to separate seeds by type.
Light Positioning Secret: That 2-3 inch distance from seeds to light is crucial, but here's the thing—adjust it based on seed type. Fast germinators like lettuce can handle the full 14-16 hours of light right away, while slower starters like tomatoes benefit from starting with just 12 hours until they sprout. Also, position your light so it's centered over the container—uneven light causes lopsided growth.
Humidity Hack: The 80-90% humidity target is perfect, but here's how to verify it: Place a small bowl of water inside with your seeds. If the water level drops by more than ½ inch in 24 hours, your humidity isn't high enough. For glass containers, condensation on the sides is your best indicator—it should look like the inside of a car window on a cold morning.
Temperature Troubleshooting: That 75-85°F range is ideal, but if your seeds aren't sprouting in the expected 3-10 days, check your heat source. Place a thermometer inside the container (not touching the bottom) for accurate reading. If it's consistently below 70°F, move to a warmer spot or add a second heat source. For glass containers, dark-colored lids absorb more heat—consider painting yours black if needed.
Pro Tips for Small Seed Starting Greenhouse
- A few simple tweaks can turn your DIY greenhouse into a seed germination powerhouse.
- Container Choice Matters: For the 12x12x6-inch plastic storage bin option, I recommend using a bin with slightly higher sides (like a 12x12x8-inch) if you're growing taller seeds like beans or corn.
- Light Positioning Secret: That 2-3 inch distance from seeds to light is crucial, but here's the thing—adjust it based on seed type.
Frequently asked questions
What’s the best time of year to start seeds in a small greenhouse?
A small seed-starting greenhouse works year-round, but timing depends on your climate. For most gardeners, start indoors 6–8 weeks before the last frost date. If you’re in a warm zone, you can begin as early as February or even January for heat-loving plants like peppers. Use a seed-starting chart to align germination with outdoor conditions!
How do I control humidity and prevent mold in a tiny greenhouse?
Humidity is key! Place a humidity dome or mist seeds lightly daily. For ventilation, crack the lid or add a small fan. Avoid overwatering—soggy soil breeds mold. If you spot fuzzy growth, remove affected seedlings and improve airflow. A dehumidifier (even a small one) can help in damp climates.
Can I reuse soil from last year’s greenhouse?
Not without sterilizing it first! Old soil may harbor diseases or pests. Mix in fresh seed-starting mix (sterile and light) or bake soil in the oven at 200°F for 30 minutes to kill pathogens. Alternatively, use coco coir or perlite for a clean slate. Fresh soil = happier seedlings!
What temperature range is ideal for most seeds?
Most seeds thrive between 65–75°F, but some need warmth (e.g., peppers: 80–90°F) or cool conditions (e.g., lettuce: 55–65°F). Use a seed heat mat for warmth-loving plants or place the greenhouse in a cool basement for cold crops. A thermometer ensures you’re in the sweet spot!
Are there budget-friendly alternatives to a commercial greenhouse?
Try a clear plastic storage bin with a lid, a repurposed aquarium, or even a DIY greenhouse from PVC pipes and plastic sheeting. Add a grow light (like a T5 LED) for extra warmth. Dollar stores sell mini propagators—check for deals! Just ensure it’s well-ventilated and easy to clean.
Wrapping up and next steps
A small seed starting greenhouse is your secret weapon for faster, healthier germination—no matter your space or skill level! By controlling temperature, humidity, and light, you’ll give tiny seeds the perfect boost to grow into strong, vibrant plants.
Whether you’re a seasoned gardener or just starting, this mini climate-controlled setup makes propagation effortless and rewarding.
Ready to grow with confidence? Start by gathering your supplies, then build or assemble your greenhouse—your future harvests will thank you! 🌱✨