
Planting
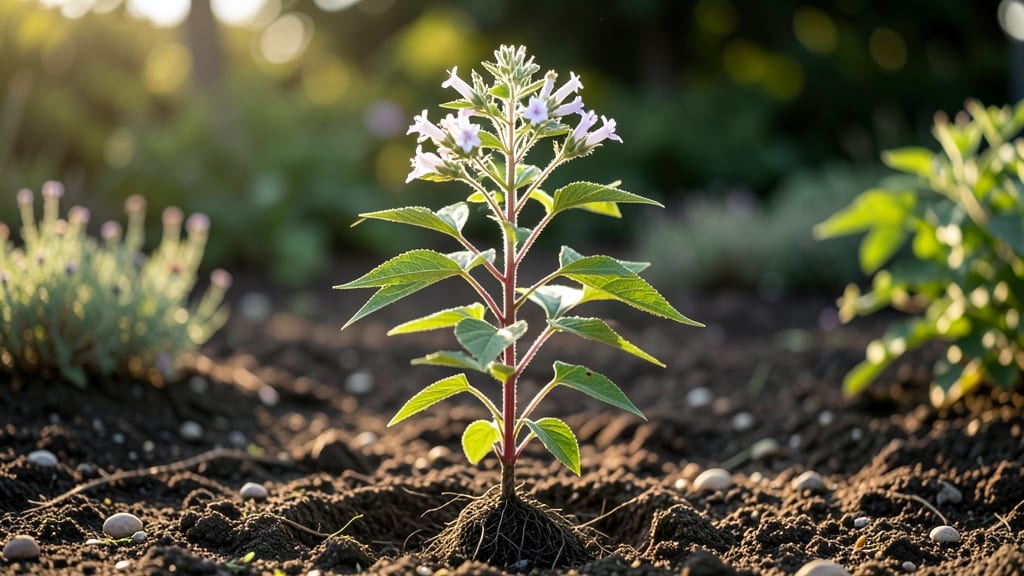
Growing sesame plants unlocks those nutty, toasty seeds we all love—but most gardeners never try because they think it’s too tricky. 🌱 I’ve grown sesame for three years now, and the secret isn’t complicated: it’s about heat, patience, and knowing when to let those pods dry without twisting.
The payoff? Fresh seeds straight from your garden, no store-bought shortcuts.
Sesame thrives in warm climates (think zones 7-11) and needs full sun—at least 6-8 hours daily—so don’t bother in shady spots. The soil should drain well but hold moisture; a light compost mix works wonders.
Plant seeds ½ inch deep, 6 inches apart, after the last frost when soil hits 70°F. Water gently—sesame hates soggy roots—and wait for those first leaves to appear in 7-10 days.
Here’s the magic: sesame pods mature in 90-120 days, but they must dry on the plant. Twisting them too soon ruins the seeds—wait until they turn golden and rattle when shaken.
Once harvested, store pods in a cool, dry place for 2-3 weeks to finish drying. The seeds inside? Crunchy, nutty perfection, ready for baking, snacking, or saving for next year’s crop.
Watch for spider mites in dry heat (spray with water to deter them) and whitefly (neem oil helps). And if your pods twist before drying? That’s usually a sign of uneven watering.
With the right conditions, you’ll get two harvests per season—double the seeds, zero waste. Ready to grow your own stash?
📚 In This Guide
- What you need
- Instructions
- Tips and common mistakes
- Wrapping up and next steps
What you need
- ● Sesame seeds: 1–2 lbs (0.5–1 kg) of organic, non-GMO seeds (e.g., Sesamum indicum). Choose a variety suited to your climate (e.g., Bunsi for short seasons or Tifkiz-1 for heat tolerance).
- ● Seed-starting soil: 5–10 lbs (2–4.5 kg) of well-draining, sterile potting mix (e.g., Miracle-Gro Seed Starting Potting Mix).
- ● Containers or garden bed: Indoor/early start: 4–6 biodegradable seedling pots (3–4 inches deep) or a seed tray with cell inserts.
- ● Outdoor transplanting: Rows spaced 12–18 inches apart in loose, sandy loam soil (pH 6.0–7.5).
- ● Watering can or hose: With a gentle spray nozzle (sesame seeds dislike soggy soil!).
- ● Fertilizer: Starter: 1 tbsp (15 mL) of balanced fertilizer (10-10-10) per gallon of water for seedlings.
- ● Growth: 1 cup (240 mL) of compost or slow-release granular fertilizer (e.g., Osmocote) per 10 sq ft of bed.
- ● Hand trowel or transplanting tool (for delicate seedling handling).
- ○ Gloves (optional but helpful for thorny varieties like Sesamum radiatum).
- ● Pruning shears (to trim leggy stems or remove damaged pods).
- ● Row cover or shade cloth (30–50% shade for hot climates; 1–2 oz/sq ft).
- ○ Stakes or trellis (optional, for varieties like Sesamum alatum that may vine).
- ● Climate: Sesame thrives in warm weather (70–90°F / 21–32°C). Avoid planting until soil temps reach 60°F (15°C).
- ● Sunlight: Full sun (6–8+ hours daily). Partial shade may reduce yield.
- ● Time: 70–120 days to maturity (varies by variety). Plan ahead for a zero-waste harvest!
- ● Knowledge: Sesame pods are twist-resistant—learn to gently twist and pull (not cut) for whole-seed extraction.
Step-by-Step instructions for growing sesame plants
Here’s how to grow sesame plants from seed to harvest—with tips to avoid brittle pods and maximize your yield.
🌱 Step 1: Start Seeds Indoors for a Strong Head Start
Sesame thrives in warm soil, so begin seeds indoors 6-8 weeks before your last frost date. Fill 2-inch-deep seed trays with sterile seed-starting mix (not garden soil—it’s too dense). Plant 2-3 seeds per cell, pressing them just ¼ inch deep—any deeper delays germination. Cover lightly with mix and mist gently until the surface feels damp but not soggy.
Place the tray in a warm spot (75-85°F)—a seedling heat mat speeds things up. Keep the soil consistently moist but never waterlogged. You’ll see sprouts in 7-14 days, depending on your climate. Once seedlings have 2 true leaves, thin to the strongest one per cell. This prevents overcrowding and gives roots room to grow.
☀️ Step 2: Harden Off and Transplant for Outdoor Success
After 4-6 weeks indoors, sesame seedlings are ready for the garden. Start hardening them off by placing them outside in partial shade for 1-2 hours the first day, gradually increasing exposure over 7-10 days. Watch for dark green leaves and sturdy stems—these signal they’re ready for full sun.
Choose a sunny, well-draining spot with 6+ hours of direct sunlight daily. Sesame hates soggy soil, so amend heavy clay with compost or sand to improve drainage. Transplant seedlings 12 inches apart in rows 18 inches apart. Dig holes just deep enough to cover the root ball, then water deeply to settle the soil. Mulch lightly with straw to retain moisture without smothering plants.
💧 Step 3: Maintain Consistent Moisture and Fertility
Sesame plants are drought-tolerant once established, but deep, infrequent watering keeps pods from cracking. Water at the base (not overhead) every 2-3 days until the top inch of soil feels dry. Overhead watering encourages fungal diseases, so aim for 1 inch of water per week during dry spells. Reduce watering as pods mature to toughen the stems.
Feed lightly with a balanced fertilizer (10-10-10) at planting and again when flowers appear. Too much nitrogen makes plants leafy but reduces seed production. You’ll know fertility is right when plants grow 2-3 feet tall with branching stems and yellow flowers forming at the tips. Avoid late-season fertilizing—it delays maturity.
⏰ Step 4: Harvest at Peak Ripeness for Maximum Yield
Sesame pods mature in 90-120 days, depending on your variety. Harvest when most pods turn brown but before they split open—this ensures zero-waste collection. Twist pods gently by hand; they should release seeds easily if fully ripe. If pods resist, leave them a day or two longer. Cut stems with clean shears and hang bundles upside down in a dry, well-ventilated area for 1-2 weeks to dry completely.
Once fully dry, rub pods between your hands to release seeds. Store in an airtight container in a cool, dark place for up to 6 months. For twist-resistant pods, avoid overwatering in late summer—this keeps stems firm and prevents premature splitting. If pods crack open too soon, try harvesting earlier or reducing water slightly as they mature.
✂️ Step 5: Save Seeds for Next Year’s Planting
Sesame seeds stay viable for 2-3 years if stored properly. After harvesting, winnow out debris by pouring seeds onto a white sheet of paper and gently blowing away chaff. Store only plump, uniform seeds in a sealed jar away from moisture and light. Label with the variety and harvest date—older seeds germinate more slowly.
For next season, soak seeds overnight before planting to soften the outer shell and speed germination. Sesame is a short-season crop, so plan ahead to avoid frost. With these steps, you’ll grow twist-resistant pods and enjoy a zero-waste harvest every time.
Tips & tricks for growing sesame plants
Real talk: Sesame plants might seem finicky, but these small tweaks make all the difference between brittle pods and a bountiful harvest.
Warmth is Non-Negotiable: In Step 1, those 75-85°F temperatures aren't just suggestions—they're crucial. If your home stays cooler, consider using a seedling heat mat or placing trays near a sunny window with a clear plastic cover to trap warmth. I once skipped this and my germination rate dropped by half. The seeds need warmth to break dormancy, so don't cut corners here.
Thinning Saves Headaches: When you reach the 2-true-leaves stage in Step 1, resist the urge to keep all seedlings. Thin to just one strong plant per cell—crowded roots compete for nutrients, leading to weak stems that snap when you harvest. Use small scissors to snip at soil level rather than pulling, which disturbs the remaining plants' roots. Trust me on this: proper spacing now means twist-resistant pods later.
Sunlight Strategy: For Step 2's hardening off, I've found that gradually increasing sunlight exposure by 1-2 hours daily prevents shock. Start with morning sun (cooler temperatures) before moving to full afternoon heat. Sesame plants can handle intense sun once hardened off, but sudden exposure causes leaf scorch. Watch for leaves that look slightly wilted but perk up when watered—that's normal and means they're adjusting.
Harvesting Hack: In Step 4, when pods turn brown but resist twisting, don't force them. Instead, cut the entire stem and hang it upside down in a dry place. The pods will naturally release seeds when fully dry, saving you from struggling with stubborn pods. This method also prevents seed loss from premature cracking—just like the instructions say, but with less frustration.
Pro Tips for Sesame Seed Plant
- Real talk: Sesame plants might seem finicky, but these small tweaks make all the difference between brittle pods and a bountiful harvest.
- Warmth is Non-Negotiable: In Step 1, those 75-85°F temperatures aren't just suggestions—they're crucial.
- Thinning Saves Headaches: When you reach the 2-true-leaves stage in Step 1, resist the urge to keep all seedlings.
Frequently asked questions
Got questions about growing a sesame seed plant? You’re not alone! Here are answers to the most common queries to help you cultivate twist-resistant pods with confidence.
How long does it take for sesame seeds to grow from seed to harvest?
A sesame seed plant typically takes 85–120 days to mature, depending on the variety and climate. Early-maturing types (like Tif sesame) may be ready in ~90 days, while slower varieties can stretch to 150 days. Warm weather (75–90°F) speeds up growth—plant in spring or summer for best results!
Do sesame plants need a lot of water?
Sesame plants are drought-tolerant but thrive with moderate watering. Water deeply once a week (or more in extreme heat) to prevent stress, but avoid soggy soil—overwatering can cause root rot. Reduce watering 2 weeks before harvest to boost seed quality and prevent pod twisting.
Can I grow sesame seeds indoors?
Sesame plants need full sun (6+ hours/day) and plenty of space (12–18 inches apart), making indoor growth tricky. However, you can try a sunny windowsill or grow light setup for seedlings, then transplant outdoors when sturdy. For full harvests, a greenhouse or outdoor bed is ideal.
Why are my sesame pods twisting or cracking?
Twisted or cracked pods often signal over-maturity, uneven watering, or poor pollination. To prevent this:
- Harvest pods before they fully dry on the plant (when ~70% ripe).
- Ensure consistent moisture (not too dry or wet).
- Hand-pollinate flowers if bees are scarce (use a soft brush).
- Choose twist-resistant varieties like ‘Bharati’ or ‘Pant Sesame 1’.
What’s the best alternative if sesame seeds don’t grow well in my climate?
If your area is too cool or humid for sesame, try these zero-waste, pod-producing alternatives:
- Flax seeds: Cold-hardy, omega-3-rich, and easy to dry for harvest.
- Sunflower seeds: Fast-growing (60–90 days) and great for snacking.
- Chia seeds: Drought-resistant and packed with fiber.
- Buckwheat: Not a true seed but produces edible “grain” pods.
All thrive in similar warm conditions but offer backup options!
Wrapping up and next steps
Growing a sesame seed plant isn’t just rewarding—it’s a step toward sustainable, zero-waste living! 🌱 From twist-resistant pods to nutrient-packed seeds, this versatile crop proves that small efforts yield big rewards.
Whether you’re a beginner or a seasoned gardener, your harvest could soon be gracing your kitchen with homemade tahini, oils, or snacks.
Ready to take the next step? Start small—plant a few seeds in a pot or patch of soil—and watch your garden (and pantry) transform! 🌟 Review the full guide to troubleshoot, optimize, and celebrate your thriving sesame plants.