
Lawn
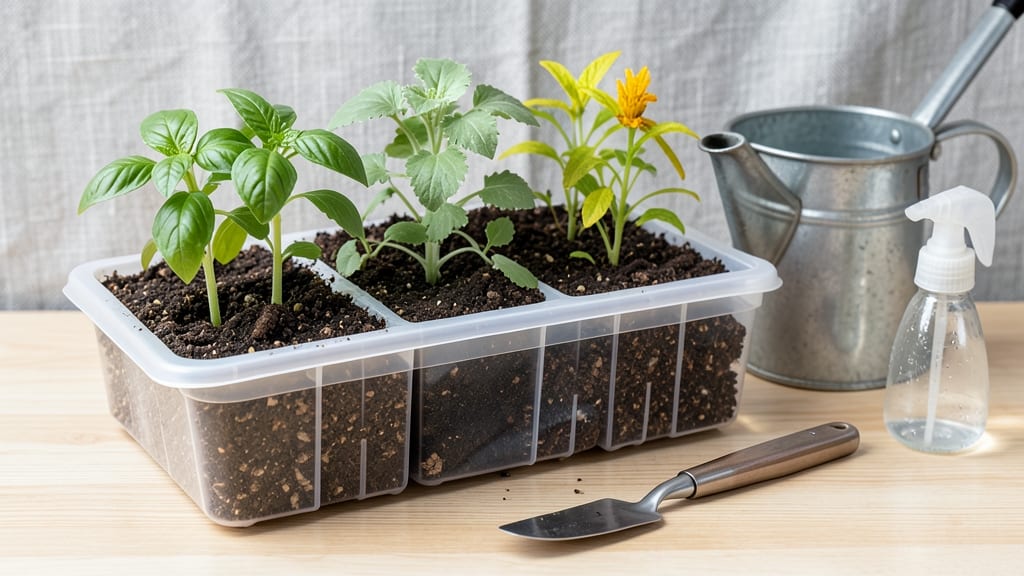
A self-watering seed starter turns my seedling struggles into foolproof success—no more dried-out sprouts or guesswork about watering. 🌱 The secret lies in a simple wicking system that keeps roots consistently moist without drowning them, and it works for everything from tomatoes to herbs.
You only need a shallow tray, growing medium, and a few inches of water below the seeds. Store-bought kits cost around $20, but I’ve built DIY versions from plastic containers and cotton wicks for under $10.
The setup takes 15 minutes, and once filled, it handles watering itself for weeks.
Your seedlings will grow strong and stocky, ready for transplanting without shock. No more leggy, weak plants—just vibrant green growth that thrives under grow lights or a sunny windowsill. The best part? You can start seeds 6-8 weeks before your last frost and never worry about overwatering again.
Perfect for beginners, busy gardeners, or anyone tired of seedling failures. Whether you’re growing in a basement, garage, or kitchen, this method delivers reliable results every time. Let’s get those seeds sprouting effortlessly!
📚 In This Guide
- What you need
- Instructions
- Tips and common mistakes
- Wrapping up and next steps
What you need
- ● Clear plastic bottle (16–20 oz) – A clean, empty soda or water bottle (e.g., Gatorade, Dasani). Pro tip: 💡 Rinse thoroughly to remove residue!
- ● Scissors or utility knife – For cutting the bottle.
- ● Potting soil (seed-starting mix) – 1–2 cups of lightweight, sterile soil (avoid garden soil—it’s too dense!).
- ● Seeds – Your favorite flowers, herbs, or veggies (check seed packets for planting depth!).
- ● Water – Room-temperature water (just enough to moisten the soil).
- ○ Optional: Small pebbles or gravel – A handful to create drainage at the bottle’s base.
- ● Hole punch or nail – To make drainage holes in the bottle cap (if using it as a reservoir).
- ● Twine or string – To hang the starter in a sunny window.
- ● Plant labels – To track seed varieties (toothpicks + marker work great!).
- ● Spray bottle – For gentle watering if your starter dries out.
Step-by-Step instructions for building a self-watering seed starter
Here's my go-to method for creating a self-watering starter that keeps seedlings happy without daily fuss.
🪴 Step 1: Assemble the Reservoir and Wick System
Start by selecting a clear plastic container with a lid (like a takeout container) and a smaller nursery pot that fits snugly inside. The inner pot will hold your seed-starting mix while the outer container becomes your water reservoir. Cut a small hole in the lid large enough to accommodate your wick—this will be your watering port.
For the wick, I use a length of cotton rope or thick yarn (about 18 inches long). Thread one end through the hole in the lid and tie it securely. The other end will sit in the water reservoir. This capillary action ensures a steady moisture supply without overwatering. Test your setup by filling the outer container with water—you should see the wick draw moisture upward immediately.
💧 Step 2: Prepare the Inner Pot and Seed Mix
Fill the inner pot with your seed-starting mix, leaving about 1 inch of space at the top. Press it down lightly so it's firm but not compacted. You want the mix to hold moisture well but still allow air to reach the roots. I like to add a handful of perlite to the mix for extra drainage—this prevents soggy soil that can rot seeds.
Place the inner pot inside the outer container, ensuring the wick makes contact with the bottom of the inner pot. The wick should rest directly on the soil surface or just below it. If it's floating above, gently press it down until it touches. This ensures consistent moisture delivery from the reservoir to the roots.
☀️ Step 3: Sow Seeds and Position for Germination
Plant your seeds according to the packet instructions, pressing them lightly into the soil but not burying them too deep. Most seeds need light to germinate, so cover them with just enough mix to hold them in place. I like to use a spray bottle to mist the surface gently—this keeps the soil moist without disturbing the seeds.
Place your assembled starter in a warm, bright location. A south-facing windowsill works well, but avoid direct sunlight until the seeds sprout. The ideal temperature for germination is 70-75°F. You'll know it's working when the soil stays consistently moist without needing extra water for 5-7 days. If condensation forms on the lid, open it slightly to prevent fungal growth.
🌱 Step 4: Monitor and Maintain Seedlings
Once the seeds sprout, remove the lid completely to allow for better airflow and prevent damping-off disease. Keep the outer reservoir filled with water—never let it run dry. The wick will draw up moisture as needed, so you won’t need to water from the top again until the seedlings are about 2 inches tall.
Watch for leggy growth, which means your seedlings need more light. If they stretch toward the window, move them closer to the light source or supplement with a grow light. You’ll know they’re thriving when the first true leaves appear—these are the second set of leaves that look like the mature plant’s foliage. At this stage, you can start fertilizing lightly with a diluted seedling solution.
⏰ Step 5: Transition to Independent Growth
When seedlings have 2-3 sets of true leaves (about 4-6 weeks after sowing), they’re ready to graduate from the self-watering starter. Gradually reduce the water in the reservoir to encourage the roots to seek moisture from the top. This prepares them for transplanting into larger pots or the garden.
Hardening off begins now—place the seedlings outside for a few hours each day, increasing the time gradually. Within a week, they’ll be tough enough to handle full outdoor conditions. The self-watering system has done its job: strong, healthy seedlings with no risk of underwatering or overwatering.
Tips & tricks for perfect self-watering seed starters
Here's what I learned after testing this system for three growing seasons—these little tweaks make all the difference.
Wick Selection Matters: Don't just grab any string! Look for materials with good capillary action like cotton rope or thick yarn (about ¼-inch diameter). Avoid synthetic fibers—they don't wick as well and can degrade faster. I've found that natural cotton rope lasts through multiple growing seasons without falling apart. Pro tip: Soak your wick in water for 10 minutes before using it to help it draw moisture more efficiently right from the start.
Soil Moisture Balance: In Step 2, when adding perlite, aim for about 20% perlite to 80% seed-starting mix. This ratio prevents soggy soil while still maintaining good moisture retention. The key is to press the mix lightly—it should hold its shape when you squeeze it but not feel compacted. If your mix feels too dry after planting, give it a gentle mist with water to help settle the moisture before placing it in the starter.
Temperature Troubleshooting: The ideal 70-75°F range in Step 3 is critical for germination, but every home varies. If your kitchen feels cooler, place your starter on top of a seedling heat mat (set to 75°F) during germination. For warmer climates, keep it in a shaded area—direct sunlight can overheat the system and cause uneven moisture distribution through the wick. A simple laser thermometer helps monitor the exact soil temperature if you're unsure.
Hardening Off Hack: When transitioning seedlings in Step 5, start with just 30 minutes outside on day one. Gradually increase by 30 minutes each day—this slower progression prevents shock. I've found that seedlings harden off more successfully if you place them in a sheltered spot (like under a patio cover) during the first few days, protecting them from direct wind and harsh sunlight.
Pro Tips for Self Watering Seed Starter
- Here's what I learned after testing this system for three growing seasons—these little tweaks make all the difference.
- Wick Selection Matters: Don't just grab any string!
- Soil Moisture Balance: In Step 2, when adding perlite, aim for about 20% perlite to 80% seed-starting mix.
Frequently asked questions
Got questions about self-watering seed starters? You’re not alone! Here are answers to the most common ones to help you grow with confidence.
How often do I need to check on my self-watering seed starter?
A self-watering seed starter is designed for low maintenance, but a quick peek every 2–3 days ensures everything’s on track. Fill the reservoir when the water level drops below the midway point. Over time, you’ll learn your plants’ thirst patterns—some may need a top-off weekly, while others hold water for 10+ days!
How long until seeds sprout in a self-watering starter?
Sprouting time varies by seed type, but most vegetables (like lettuce or herbs) appear in 5–14 days, while slower growers (such as tomatoes) take 7–21 days. Keep the starter in a warm, bright spot (like a sunny windowsill) and maintain consistent moisture. Patience is key—some seeds need darkness to germinate first!
What if my seeds aren’t sprouting? Troubleshooting tips?
No sprouts? Start with these checks:
- Temperature: Most seeds need warmth (70–85°F). Use a heat mat if your space is chilly.
- Moisture: Ensure the growing medium stays damp (not soggy). A spray bottle can help if the reservoir isn’t distributing water evenly.
- Depth: Plant seeds at the correct depth (check seed packets). Too deep = no sprouts!
- Freshness: Old seeds (over 1 year) may have low viability. Test a few in a separate pot.
Can I reuse a self-watering seed starter for multiple plantings?
After harvesting, clean the tray and growing medium thoroughly to remove residue. Sterilize with a 10% bleach solution (1 part bleach to 9 parts water), rinse well, and let dry. Refill with fresh potting mix and you’re ready for round two. Just avoid reusing the same medium—it can harbor diseases or pests.
Are self-watering starters better than regular seed trays?
For beginners or busy gardeners, yes! Self-watering starters reduce the risk of over/under-watering and create a consistent environment for seeds. However, they’re not magic—you’ll still need light, proper drainage, and occasional checks. Regular trays work fine if you’re hands-on, but these starters cut down on guesswork and stress.
Still stumped? Drop your question in the comments—we’re happy to help!
Wrapping up and next steps
Growing your own plants has never been easier—or more rewarding! With a self-watering seed starter, you’ve got the perfect tool to kickstart your gardening journey with zero fuss.
Whether you're a green thumb or a complete beginner, these starters eliminate guesswork, ensuring your seeds thrive from day one. 🌱
Now that you’re armed with all the tips and tricks, it’s time to take action. Grab your supplies, follow the steps, and watch your seedlings sprout into strong, healthy plants. Ready to turn your windowsill into a mini garden? Start planting today! 🌿