
Propagation
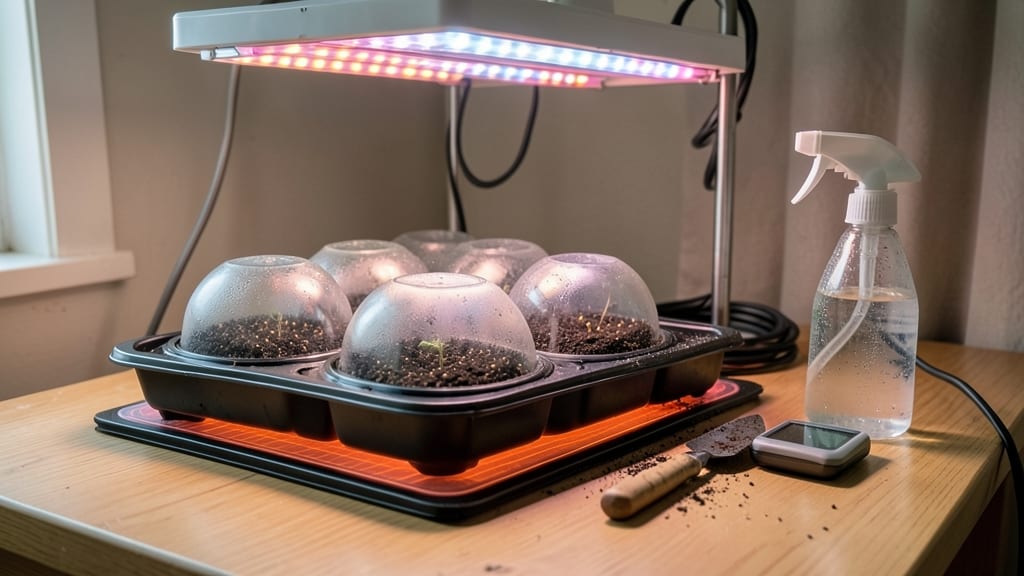
Seed starting warming mats cut germination time in half—no more waiting weeks for tiny sprouts to appear. 🌱 I remember my first batch of slow-to-germinate tomatoes taking nearly three weeks to crack the soil surface; now, with a warming mat, those same seeds pop up in less than a week.
The secret? Consistent, gentle heat that mimics spring soil temperatures without the guesswork of bottom-watering or heat lamps.
These mats work by creating a cozy, even layer of warmth—typically around 70-85°F—that encourages seeds to break dormancy faster. You’ll need a seed tray, growing medium, and your chosen seeds, but no fancy setup: just plug the mat into an outlet and place your tray on top.
The real magic happens when you combine this with proper moisture—never soggy, never dry—and patience for the first green shoots.
What you’ll get is a head start on the growing season, stronger seedlings, and fewer failed batches. My basil seeds now sprout in 5 days instead of 14, and the difference in plant vigor is noticeable from day one.
The mats also help prevent damping-off, a fungal disease that strikes weak, chilled seedlings. For beginners, this is the closest thing to a germination guarantee.
Just watch for overheating—most mats have built-in thermostats, but always check soil temps with your finger—and avoid overwatering, which can create cold spots. Works for almost any seed, from finicky peppers to stubborn herbs. Ready to speed up your starts?
📚 In This Guide
- What you need
- Instructions
- Tips and common mistakes
- Wrapping up and next steps
What you need
- ● Seed-starting warming mat (1–2, depending on seedling volume; 12"x20" or larger for optimal coverage)
- ● Seed trays or pots (biodegradable or plastic; 2–6" deep, with drainage holes)
- ● Growing medium (sterilized seed-starting mix or coco coir; 1–2 cubic feet per tray)
- ● Seeds (pre-treated or untreated; check packet for specific heat requirements)
- ○ Thermometer (optional but helpful; 0–120°F range for monitoring mat temperature)
- ● Spray bottle (for gentle watering to avoid disturbing seeds)
- ● Humidity dome or plastic wrap (to retain moisture and warmth)
- ● Grow lights (LED or fluorescent; 12–16 hours/day for photosynthesis)
- ● Heat mat cover (insulated mat or reflective foil to lock in warmth)
- ● Seedling labels (to track varieties and planting dates)
- ● Timer (for consistent light cycles if using grow lights)
Step-by-step instructions for using seed starting warming mats
Here's how to harness heat for faster, more reliable germination—no guesswork involved.
🔥 Step 1: Position the Mat Under Trays
Place your seed starting warming mat on a flat, stable surface—like a countertop or table—before arranging seed trays on top. The mat should cover the entire area where your trays will sit, ensuring even heat distribution. I like to leave a ½-inch gap around the edges of the trays so heat doesn’t escape and concentrate under the soil.
Most mats have a plug-in cord, so position the outlet nearby to avoid stretching the cord. If your setup has a thermostat, set it to the recommended temperature for your seeds—usually 75-85°F for most vegetables and herbs. You’ll notice the mat stays warm to the touch even when not in use, so never leave it unattended with children or pets nearby.
🌱 Step 2: Prepare Trays and Moisten Soil
Fill your seed trays with moistened seed starting mix—just damp enough to hold together when squeezed but not dripping. I like to use a spray bottle to avoid overwatering, as soggy soil can suffocate seeds before they even sprout. Once filled, place the trays on the warming mat and press down lightly to ensure full contact with the heat source.
Cover the trays with clear plastic domes or wrap them in plastic wrap to trap humidity. This creates a mini greenhouse effect, which works hand-in-hand with the mat’s heat to speed up germination. Check the soil moisture every 2-3 days—it should feel like a damp sponge, not a wet rag.
⏰ Step 3: Monitor Germination and Adjust Heat
Most seeds will sprout within 3-10 days, depending on the type. You’ll see the first tiny green shoots push through the soil—this is your cue that the heat is working. If your mat has an adjustable thermostat, reduce the temperature slightly (to 70-75°F) once germination begins to prevent over-heating the delicate seedlings.
Watch for condensation on the plastic cover—this is normal and indicates the right humidity level. If the soil dries out, mist lightly with water, but avoid removing the cover until 50% of seeds have sprouted. At that point, lift the cover daily for 10-15 minutes to harden off the seedlings and prevent damping-off disease.
🌿 Step 4: Transition to Light and Maintain Even Growth
Once seedlings emerge, move the trays under grow lights or to a sunny windowsill—warming mats are only for germination, not ongoing growth. Place the lights 2-4 inches above the seedlings and keep them on for 14-16 hours daily. You’ll notice leggy growth if the light isn’t strong enough, so adjust as needed.
After 2-3 weeks, when seedlings have their first true leaves, you can remove them from the warming mat entirely. At this stage, focus on keeping the soil consistently moist and rotating the trays daily to ensure even light exposure. This prevents them from stretching toward one side.
Tips & tricks for perfect seed germination with warming mats
These little-known tricks will help you maximize your warming mat's potential and avoid the most common germination pitfalls.
Heat Distribution Secret: The ½-inch gap around your trays isn't just about heat escape—it's about creating a microclimate where warm air circulates evenly. I've found that placing a small piece of aluminum foil behind the trays reflects heat upward, which can shave 1-2 days off germination time for slower starters like peppers. Just don't let it touch the mat's surface.
Temperature Transition: That 75-85°F range is perfect for breaking dormancy, but here's what nobody tells you: The moment you see those first green shoots, your seeds have already used up most of their internal energy reserves. Dropping to 70-75°F as instructed helps prevent over-heating, but I've noticed seedlings actually grow faster when you pair this with a gentle fan on low setting—just enough to create airflow without drying the soil.
Soil Moisture Hack: The 2-3 day moisture check interval works great, but I've developed a better system: Use a small piece of clear plastic wrap to cover just one corner of each tray. If condensation forms within 24 hours, your soil is perfectly moist. If it stays dry, it's time to mist. This visual cue eliminates guesswork and prevents both overwatering and drying out.
Light Transition Timing: Moving seedlings to grow lights or sunny windowsills after 2-3 weeks is critical, but here's the part people miss: The first 10-15 minutes of light exposure should be indirect. I place a sheer white curtain between the seedlings and light source for the first day, then gradually remove it over 3 days. This prevents the shock of sudden bright light that causes leggy growth.
Pro Tips for Seed Starting Warming Mats
- These little-known tricks will help you maximize your warming mat's potential and avoid the most common germination pitfalls.
- Heat Distribution Secret: The ½-inch gap around your trays isn't just about heat escape—it's about creating a microclimate where warm air circulates evenly.
- Dropping to 70-75°F as instructed helps prevent over-heating, but I've noticed seedlings actually grow faster when you pair this with a gentle fan on low setting—just enough to create airflow without drying the soil.
Frequently asked questions
Got questions about seed starting warming mats? You’re not alone! Here are answers to the most common queries to help you grow with confidence.
How do warming mats speed up germination?
Warming mats provide consistent, gentle heat (usually 65–85°F) that mimics natural soil conditions, helping seeds break dormancy faster. Without them, cool soil can delay germination by days or even weeks—especially for slow starters like tomatoes or peppers. Think of them as a cozy blanket for your seeds!
When should I use a warming mat for seed starting?
Use a warming mat from the moment you sow seeds until they sprout. Most seeds benefit from warmth for 12–24 hours daily, but check your seed packet—some (like lettuce) prefer cooler temps post-germination. Turn the mat off once seedlings emerge to avoid leggy growth.
Can I use a heating pad or DIY alternative instead?
Yes! A low-wattage heating pad (like a pet bed warmer) works in a pinch, but warming mats are safer and more efficient. DIY options include:
- Layering towels over a warm (not hot) water bottle.
- Using a seedling heat mat (designed for plants) under trays.
- Placing trays on top of a refrigerator (gentle warmth).
Why aren’t my seeds germinating with the warming mat?
Check these troubleshooting steps:
- Moisture: Ensure soil is damp (not soggy) before and after turning on the mat.
- Temperature: Use a thermometer to confirm the mat stays in the ideal range (most are 70–75°F).
- Seed viability: Test old seeds by soaking a few in water—if they sink, they’re likely good.
- Light: Seeds need darkness to germinate; cover trays with a lid or towel until sprouts appear.
Do warming mats work for all types of seeds?
Not all seeds need them! Fast-germinating seeds (like radishes or beans) may not require extra heat, but warmth-loving crops (tomatoes, peppers, eggplants) thrive with them. Cool-season seeds (spinach, carrots) can even rot if over-heated. Always match the mat to your seed type!
Wrapping up and next steps
Starting seeds with a warming mat isn’t just a trick—it’s a game-changer for gardeners eager to see faster, stronger germination. 🌱 By providing consistent, gentle heat, these mats create the ideal conditions for seeds to break dormancy and sprout with confidence.
Whether you're a seasoned green thumb or a curious beginner, this tool puts the power of precision heat right at your fingertips.
Now that you’re armed with the how-to and FAQs, it’s time to get growing! Grab your warming mat, pick your favorite seeds, and watch your garden dreams take root—literally. Ready to turn those tiny seeds into thriving plants? Let’s grow! 🌿✨