
Propagation
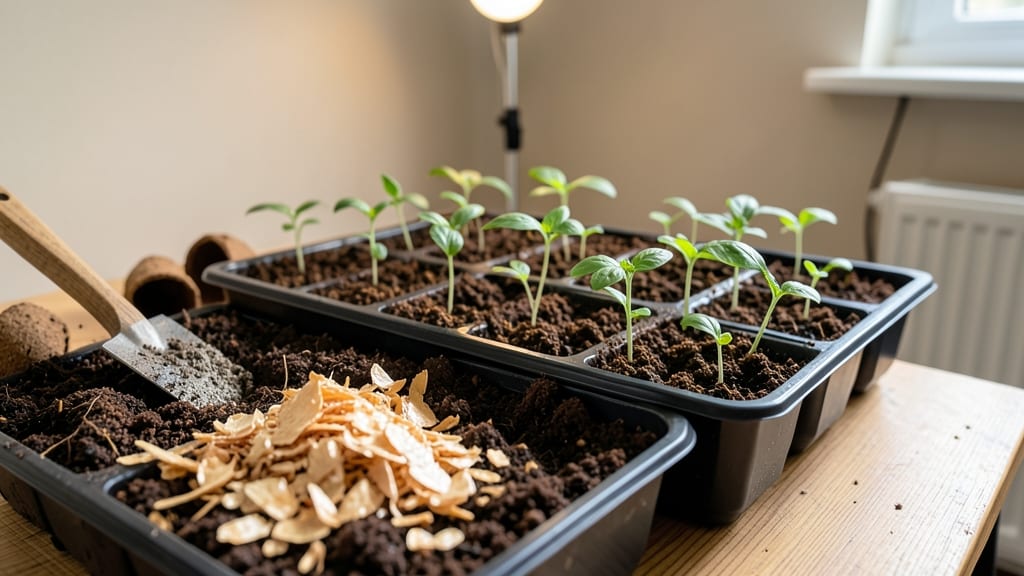
Starting seeds with vermiculite means faster roots and stronger seedlings. 🌱 I've used it for years to outpace damping-off and give seedlings the perfect head start—no more leggy, weak sprouts struggling in heavy soil. This fluffy, lightweight mineral holds moisture without smothering roots while letting air circulate.
Mix it 50/50 with peat moss or perlite for ideal drainage, and your seeds will germinate in half the time compared to regular potting mix. The key is keeping it damp (not soggy) and warm (70-75°F), which triggers quick root development.
By the time you transplant, those seedlings will have a dense root ball ready to thrive. No more struggling to coax weak starts into growth—they'll bolt out of the soil with vigor. Just avoid overwatering (vermiculite can stay damp too long) and keep lights close but not touching the trays.
Works for everything from tomatoes to delicate herbs. Here's how to set it up for foolproof results every season."
📚 In This Guide
- What you need
- Instructions
- Tips and common mistakes
- Wrapping up and next steps
What you need
- ● Vermiculite: 2–5 lbs (depending on seedling volume; medium-grade is ideal for seed starting)
- ● Seedling trays or pots: 2–4 inch cells or small pots (biodegradable options work too!)
- ● Seeds: Your chosen variety (check seed packet for depth requirements)
- ● Water: Room-temperature, preferably filtered or dechlorinated
- ● Spray bottle: For gentle hydration (avoids displacing seeds)
- ● Labeling tags: To track seed varieties and planting dates
- ● Small hand trowel or scoop: For even vermiculite distribution
- ○ Fine-mesh screen: Sifts vermiculite for a fluffier texture (optional but helpful)
- ○ Heating mat (optional): Speeds up germination for slow starters like peppers or tomatoes
- ● Grow lights or sunny windowsill: 12–16 hours of light daily after sprouting
- ○ Perlite or coconut coir: Mix in 10–20% for extra aeration (optional)
- ● Humidity dome or plastic wrap: Retains moisture during early stages (remove after sprouting)
Step-by-Step instructions for germinating seeds in vermiculite
Here's how I use vermiculite to grow strong, fast-starting seedlings—no soil mess, no compaction.
🌱 Step 1: Prepare Your Vermiculite and Containers
Fill clean 2-3 inch deep seed-starting trays or small pots with the vermiculite. I use a mix of 50% vermiculite and 50% perlite for even better drainage and aeration. Moisten the vermiculite lightly with warm water until it feels like a wrung-out sponge—damp but not dripping. You'll know it's right when you squeeze a handful and just a few drops fall out.
Gently fluff the mix with your fingers to break up any clumps. Vermiculite expands when wet, so avoid compacting it. If you're using a tray, press the vermiculite down just enough to create a level surface for planting. This ensures seeds stay in place without sinking too deep.
🌱 Step 2: Sow Seeds at the Right Depth
Plant seeds at a depth of about twice their diameter—this keeps them close enough to the surface for quick germination. I use a toothpick to make small holes in the vermiculite, then drop one seed per hole. Cover lightly with a sprinkle of additional vermiculite, just enough to hide the seed but not bury it too deeply.
Mist the surface gently with a spray bottle to settle the seeds. Avoid heavy watering—vermiculite drains fast, and you want the moisture to stay near the seeds. Label each tray with the seed type and date, because seedlings look identical until they sprout their first true leaves.
💧 Step 3: Provide Warmth and Consistent Moisture
Cover the tray with a clear plastic dome or plastic wrap to retain warmth and humidity. Seeds germinate fastest in 75-85°F soil. A seedling heat mat helps maintain this temperature and speeds up germination time. Check daily but resist the urge to water—vermiculite holds moisture well, and overwatering can drown seeds before they sprout.
Once 50% of seeds have sprouted, remove the dome immediately to prevent damping-off, a fungal disease that attacks young seedlings. You'll see the first tiny leaves emerge in 3-10 days, depending on the seed type. Keep the vermiculite moist but never soggy—it should feel like a damp sponge at all times.
☀️ Step 4: Move to Bright Light for Strong Growth
The instant seedlings break through the soil, they need 14-16 hours of light daily. Place them under a grow light or in a south-facing window within 2-4 inches of the light source. Without enough light, seedlings stretch toward the source, becoming weak and leggy.
Strong seedlings have thick stems and dark green leaves. If you notice them leaning or growing pale, your light is too far away. Adjust the height so the light just grazes the top leaves. Rotate the tray a quarter turn daily to encourage even growth—you'll see them grow straighter and fuller within a few days.
⏰ Step 5: Transition to Soil Before Transplanting
When seedlings develop their first true leaves (not the initial seed leaves), it's time to transition them to soil. Gently remove each seedling from the vermiculite, being careful not to damage the delicate roots. Plant them in a lightweight potting mix at the same depth they were growing in vermiculite.
Water lightly after transplanting and place them in a shaded area for 24 hours to reduce stress. Vermiculite dries out fast, so keep the soil moist but not waterlogged. Within 7-10 days, your seedlings will be ready to harden off and move outdoors or into larger containers.
Tips & tricks for perfect seed starting with vermiculite
These simple tricks will help you avoid common pitfalls and get the fastest, healthiest starts for your seedlings.
Mixing Ratio Matters: The 50% vermiculite and 50% perlite mix in Step 1 is key for aeration and drainage. I've found that skipping the perlite can lead to compacted roots that struggle to breathe. If you don't have perlite, you can substitute fine horticultural sand in a 60/40 ratio instead—just be careful not to overwater since sand drains faster.
Temperature Tip for Faster Germination: The 75-85°F range in Step 3 is ideal, but not all homes stay that warm. If your space runs cooler, place your seed trays directly on top of your refrigerator (not inside) for consistent warmth. I've seen germination times cut in half when using this trick—especially helpful for slower-starting seeds like parsley or carrots.
Light Positioning Secret: Those 14-16 hours of light in Step 4 need to be consistent, but placement matters just as much. I position my grow lights about 3 inches above the seedlings when they're tiny, then gradually raise them to 6 inches as they grow. This prevents leggy growth while ensuring they get enough light without burning. A simple timer on your grow lights can automate this perfectly.
Transplanting Transition: The 24-hour shaded recovery period in Step 5 is crucial but often overlooked. During this time, place a small fan on low setting near the seedlings to gently dry their leaves. This mimics natural conditions and helps prevent fungal issues when they eventually move outdoors. It's amazing how much stronger they become after just this one extra step.
Pro Tips for Seed Starting Vermiculite
- These simple tricks will help you avoid common pitfalls and get the fastest, healthiest starts for your seedlings.
- Mixing Ratio Matters: The 50% vermiculite and 50% perlite mix in Step 1 is key for aeration and drainage. I've found ...
- Temperature Tip for Faster Germination: The 75-85°F range in Step 3 is ideal, but not all homes stay that warm. If yo...
Frequently asked questions
Can I reuse vermiculite for seed starting?
Vermiculite is not reusable for seed starting due to contamination risks—fungi, bacteria, or old seeds can linger. However, you can repurpose it for non-seed tasks like soil amendments or composting (sterilize first by baking at 200°F for 30+ minutes). Always use fresh vermiculite for new seeds!
How long does it take for seeds to sprout in vermiculite?
Germination time varies by seed type, but vermiculite’s moisture-retention and aeration often speed up sprouting compared to soil. Most seeds (e.g., herbs, flowers) sprout in 5–14 days; veggies like tomatoes or peppers may take 7–21 days. Keep the mix consistently moist (not soggy) and warm (70–85°F) for best results.
What’s a good vermiculite-to-seed ratio in a tray?
For a standard 10x20" seed tray, mix 1 part vermiculite to 1 part perlite or coconut coir (50/50 ratio) for optimal drainage and root growth. For tiny seeds (e.g., lettuce, carrots), lightly press them into the surface—no need to bury deeply! Larger seeds (beans, peas) can be planted ½ inch deep.
What are the best alternatives to vermiculite for seed starting?
If vermiculite isn’t available, try these lightweight, sterile options:
- Coco coir: Holds moisture well but drains faster (mix with perlite).
- Peat moss: Retains moisture but can compact over time.
- Rockwool cubes: Great for hydroponic setups (sterile and pH-neutral).
- Seed-starting soil mix: Pre-fertilized blends (e.g., ProMix) work but may need perlite for aeration.
For fast germination, vermiculite still wins for root development!
Why are my seeds rotting in vermiculite?
Overwatering or poor airflow are the top culprits. Troubleshoot with these fixes:
- Check moisture: Press a finger into the mix—it should feel damp like a wrung-out sponge, not dripping.
- Improve ventilation: Use a fan on low (24/7) to circulate air and prevent mold.
- Adjust depth: Bury seeds no deeper than their width (e.g., sunflower seeds = ½ inch max).
- Sterilize tools: Clean trays/pencils with rubbing alcohol to avoid fungal spread.
If rot persists, switch to a 50/50 vermiculite-perlite mix for better drainage.
Wrapping up and next steps
Starting seeds with vermiculite is a game-changer for gardeners—it’s lightweight, moisture-retentive, and perfect for fast root growth! 🌱 Whether you're a beginner or a seasoned pro, this medium simplifies germination and gives your seedlings a strong foundation.
Now that you’re armed with the right knowledge, it’s time to roll up your sleeves and get growing!
Your next step? Grab your supplies, follow your plan, and watch those tiny seeds transform into thriving plants! Happy gardening! 🌿