
Lawn
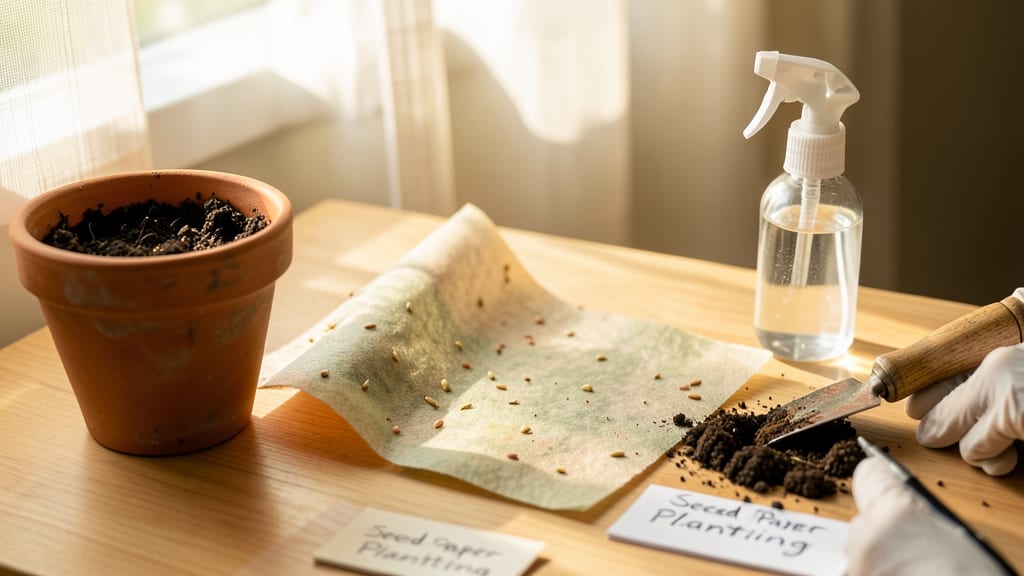
Looking for seed paper instructions? ✨ This biodegradable paper embeds wildflower seeds directly into the material—no soil prep, no mess, just beautiful blooms that spread naturally.
I’ve used it for everything from wedding favors to pollinator gardens, and the best part? You can plant it anywhere, anytime, without digging or tilling.
The magic happens when you soak the paper until it softens, then press it into moist soil. Within days, you’ll see tiny sprouts pushing through, and in just a few weeks, you’ll have vibrant wildflowers that attract bees and butterflies.
It’s perfect for beginners because there’s no transplanting—just plant, water, and watch nature take over.
This method works best in spring or fall when temperatures are mild, but some hardy varieties like cosmos or sunflowers can even handle late summer plantings. The paper breaks down completely, leaving no trace behind—just a carpet of wildflowers that thrive on their own.
Whether you’re gifting a living plant or creating a pollinator-friendly garden, seed paper turns every seed into a sustainable, zero-waste planting solution. Ready to try it? Here’s how to get started without a single mistake.
📚 In This Guide
- What you need
- Instructions
- Tips and common mistakes
- Wrapping up and next steps
What you need
- ● Recycled paper: 1 sheet (old newspapers, junk mail, or printer paper—avoid glossy or coated pages).
- ● Wildflower or herb seeds: 1–2 teaspoons (choose fast-growing varieties like marigolds, basil, or clover).
- ● Water: ½ cup (room temperature).
- ● Blender: 1 (high-speed preferred for finer pulp).
- ● Fine-mesh strainer or cheesecloth: 1 (to remove excess water).
- ● Baking sheet: 1 (lined with parchment paper or a silicone mat).
- ● Rolling pin or smooth object: 1 (a water bottle works in a pinch!).
- ● Natural dyes: Turmeric (yellow), beet juice (pink), or coffee grounds (brown) for colored paper.
- ● Essential oils: 2–3 drops (e.g., lavender or citrus) for a subtle scent.
- ● Dried flowers or petals: Sprinkle into the pulp for decorative flair.
- ● Hair dryer or fan: To speed up drying (place on low heat!).
- ● Cardstock or template: Pre-cut shapes (hearts, stars) for creative designs.
Step-by-Step instructions for crafting seed paper
This eco-friendly method turns every seed into a planting tool—here’s how to make it work perfectly.
🌱 Step 1: Gather and Prepare Your Materials
Start with 4 sheets of seed paper (pre-made or homemade blend of recycled paper pulp and wildflower seeds). If making from scratch, blend 2 cups recycled paper (shredded and soaked overnight) with 1 cup water until smooth. Add 1 tablespoon psyllium husk powder as a binder—this creates the perfect adhesive base for seeds.
For each sheet, mix in 1 teaspoon wildflower seeds (like cosmos or bachelor’s buttons) evenly. The key here is uniform distribution—spread seeds thinly to avoid clumping. I like to sprinkle them over the pulp while it’s still wet, then fold the paper gently to trap them inside. Real talk: if seeds pool in one corner, your paper will grow unevenly later.
💧 Step 2: Form and Dry the Seed Paper
Lay the pulp-seed mixture onto a smooth, non-stick surface (like a silicone baking mat) in an even layer. Use a wooden spoon or ruler to spread it to 1/16-inch thickness—too thick and it won’t dry properly; too thin and seeds won’t adhere. Cover with a clean cloth and press gently to remove air bubbles.
Let it dry completely for 24-48 hours in a shady, well-ventilated spot. Avoid direct sunlight or heat—it’ll warp or crack. You’ll know it’s ready when the paper feels stiff and slightly crisp to the touch. Store finished sheets in a sealed container until planting to preserve moisture balance.
☀️ Step 3: Plant and Maintain Your Seed Paper
Soak the seed paper in warm water for 10-15 minutes until pliable. Press it gently into moist, prepared soil in your garden bed or container. The paper will break down naturally, releasing seeds while adding organic matter. Space sheets 2-3 inches apart for optimal growth—crowding leads to weak, competitive seedlings.
Keep the soil consistently moist (not soggy) for the first 2-3 weeks—this is critical for germination. You’ll see first sprouts in 7-14 days, depending on seed type. Once plants reach 2 inches tall, reduce watering slightly but maintain even moisture. The paper’s decomposition adds nutrients, so no extra fertilizer is needed unless your soil is nutrient-poor.
✂️ Step 4: Thin and Transplant as Needed
When seedlings are 3-4 inches tall, thin weaker plants to leave the strongest 1-2 per sheet. Use clean scissors to snip at soil level—avoid pulling to prevent disturbing roots. If growing in containers, transplant thinned seedlings to individual pots with well-draining soil to prevent root rot.
Here’s the thing—seed paper works best in partial sun to full shade. If your garden gets full sun, plant in early spring or late summer to avoid drying out. Watch for yellowing leaves—this signals either overwatering or insufficient light. Adjust care based on what you observe, and you’ll have vibrant wildflowers in 6-8 weeks!
Tips & tricks for perfect seed paper crafting
A few game-changing techniques that'll transform your seed paper from good to extraordinary.
The Pulp Thickness Secret: That 1/16-inch thickness in Step 2 is non-negotiable for even drying. I learned this the hard way—thicker layers crack while drying, and thinner ones don't hold seeds properly. Use a ruler to check thickness before spreading, and gently press with a second sheet of parchment paper to create even pressure. This ensures every seed stays embedded where you want it.
Seed Distribution Hack: For Step 1, think of seeds like confetti—you want them scattered evenly but not overlapping. Try this: lightly mist the wet pulp with water from a spray bottle, then sprinkle seeds while gently shaking the container. This creates a more natural, even distribution than just pouring them on. After folding, give the paper a quick shake to settle seeds deeper into the pulp.
Drying Environment Matters: The 24-48 hour drying time in Step 2 is your window for success. Humidity is the silent saboteur—if your air feels heavy, spread a fan nearby to circulate air without direct airflow. I place my drying sheets on a wire rack in a bathroom with the exhaust fan running. This prevents warping while maintaining even moisture loss. Check for stiffness by gently flexing the edges—it should hold its shape but still feel slightly pliable.
Planting Timing Tip: When you're ready to plant in Step 3, soak the paper for exactly 12 minutes in warm water before pressing into soil. This gives it enough pliability to mold perfectly while preventing it from dissolving too quickly. Press firmly into moist soil—think of it like tucking in a blanket. The first 2-3 weeks are critical for germination, so use a spray bottle to keep soil consistently moist without oversaturating.
Pro Tips for Seed Paper Instructions
- A few game-changing techniques that'll transform your seed paper from good to extraordinary.
- The Pulp Thickness Secret: That 1/16-inch thickness in Step 2 is non-negotiable for even drying.
- Seed Distribution Hack: For Step 1, think of seeds like confetti—you want them scattered evenly but not overlapping.
Frequently asked questions
Got questions about seed paper? We’ve got answers! Here are some of the most common queries to help you get started with your eco-friendly planting project.
How long does it take for seeds embedded in paper to germinate?
Germination time varies by seed type, but most seed paper sprouts within 7–21 days under ideal conditions. Keep the paper moist (not soggy) and in indirect sunlight or a seedling tray until you see tiny green shoots. Patience is key—some delicate seeds may take longer!
Can I plant seed paper directly in the ground?
Seed paper is designed for direct soil planting. Simply place it on prepared soil, press lightly, and water gently. The paper will decompose naturally, leaving seeds to grow. For best results, plant in well-draining soil and avoid burying it too deep.
What if my seed paper gets wet before planting?
No worries! Seed paper is water-resistant but not waterproof. If it gets damp, store it in a cool, dry place (like a sealed bag with a paper towel) until you’re ready to plant. Avoid extreme moisture—it can accelerate germination or cause mold. A little dampness is fine, but keep it from sitting in water.
Are there alternatives if I can’t find seed paper?
Yes! You can make your own by mixing wildflower seeds with flour and water, then pressing into thin sheets to dry. Commercial options like hemp paper or biodegradable seed tapes also work. Just ensure the material breaks down safely in soil.
Why aren’t my seeds sprouting after planting?
Check these common issues: insufficient light, inconsistent watering, or poor soil quality. Seed paper needs moisture + warmth + indirect light to germinate. If using outdoor seed paper, ensure it’s not buried too deep. Try replanting a small section to test conditions!
Wrapping up and next steps
Creating your own seed paper is a simple yet impactful way to reduce waste while bringing life to your garden—literally! By following these instructions, you’ve turned everyday materials into a biodegradable, plantable masterpiece.
Whether you’re a gardening newbie or a seasoned eco-warrior, this project proves that small actions can grow big results.
Ready to turn your green thumb into a zero-waste legend? 🌱 Next, grab your seed paper and a sunny spot—your future garden awaits! Share your blooms with #SeedPaperMagic and inspire others to join the movement.