
Lawn
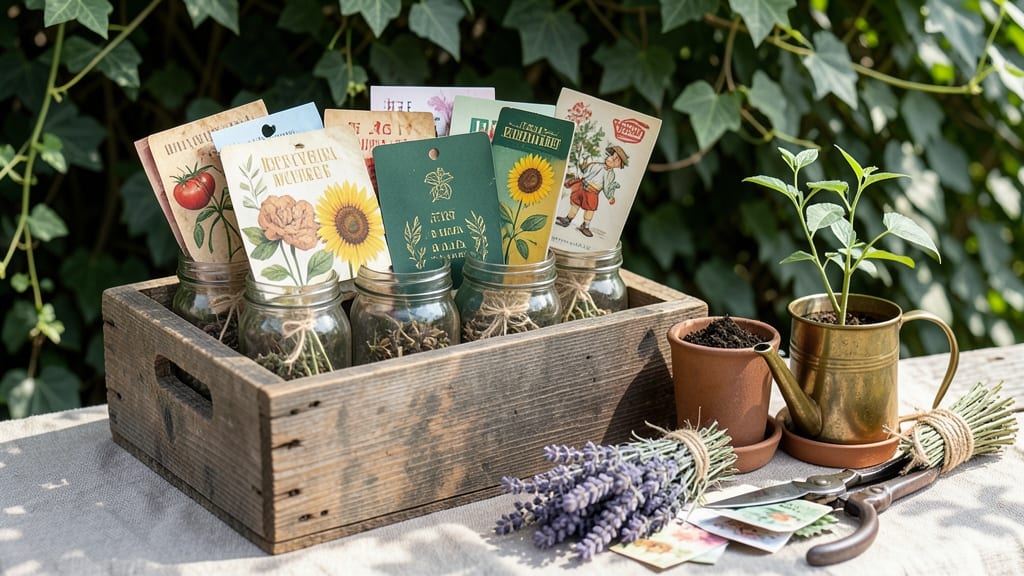
My seed packet art collection turned a blank wall into a living garden gallery—each vintage label tells a story of blooms yet to come. 🌸 These aren't just planting instructions; they're colorful, nostalgic pieces that celebrate gardening's beauty before the first sprout appears.
I frame my favorites in shadow boxes, creating decor that doubles as a wish list for next season's flowers.
You don't need fancy supplies—just seed packets with eye-catching designs and basic crafting tools. Old frames, washi tape, or even a simple string garland can transform these into statement pieces. The best part? Every piece represents a plant you can actually grow, connecting your decor to real garden magic.
Imagine sunflowers peeking through framed heirloom tomato packets or zinnias blooming next to their own vintage labels. This art isn't just pretty—it's functional. Hang it in your kitchen as a planting reminder or create a garden map using packets as labels for each bed.
Perfect for cottage-core lovers, plant parents, or anyone who wants decor that tells a story. Let's turn those seed envelopes into something even more special than what grows from them!
📚 In This Guide
- What you need
- Instructions
- Tips and common mistakes
- Wrapping up and next steps
What you need
- ● Seed packets: 10–20 packets (mix of shapes, colors, and sizes for variety—think sunflowers, marigolds, or heirloom tomatoes!)
- ● Cardstock or thick paper: 1–2 sheets (8.5" x 11" or larger) for backing/structural support.
- ● Mod Podge or glue stick: 1 bottle (matte or glossy finish—your choice!).
- ● Scissors or craft knife: 1 pair (sharp for clean cuts!).
- ● Ruler and pencil: 1 each (for measuring and marking designs).
- ○ Clear sealant spray: 1 can (optional but recommended for durability outdoors).
- ● Embellishments: Twine, dried flowers, pressed leaves, or washi tape for extra flair.
- ● Frame or shadow box: 1–2 (to display finished art like gallery-worthy pieces!).
- ● Acrylic paint: Small bottles (for customizing seed packets or adding details).
- ● Stencils or stenciling tools: 1 set (if you want to add patterns or text).
- ● Hot glue gun: 1 (for 3D elements like hanging mobiles or layered designs).
How to create stunning seed packet art displays
Turn ordinary seed packets into eye-catching garden decor that doubles as a functional planting guide.
🪴 Step 1: Gather and Prepare Your Seed Packets
Collect 4-6 seed packets with vibrant designs or clear labeling—think heirloom tomatoes, colorful peppers, or fragrant herbs. Remove the seeds carefully, saving them for future planting. I like to use a small craft knife to gently slit the top edge of the packet, then fold back the flap to expose the seeds without tearing the paper.
Lay the packets flat on a clean surface and smooth out any creases. If the paper feels stiff, lightly mist it with water and let it dry flat. This ensures clean edges for cutting and prevents warping when you attach them to your display. For extra durability, you can seal the edges with a thin layer of Mod Podge or clear acrylic sealer.
✂️ Step 2: Design Your Layout and Cut Shapes
Sketch a simple design on paper first—think wreaths, frames, or layered collages. I often create a grid or spiral pattern where packets overlap slightly for dimension. Use a ruler and pencil to mark cutting lines, keeping at least ½ inch margin from the edges to avoid fraying.
Cut out your shapes with sharp scissors or a craft knife. For intricate designs, trace around stencils or use a Cricut machine for precision. If you're working with delicate packets, reinforce the back with a thin layer of cardstock before cutting to prevent tearing. Pro tip: Cut a few extra pieces in case of mistakes—this project is more forgiving than it looks!
🌿 Step 3: Assemble Your Art Piece
Arrange your cut-outs on a backing board or frame, adjusting for balance and visual flow. Use a glue stick for lightweight packets or a stronger adhesive like E6000 for heavier paper. Press each piece firmly and hold for 10-15 seconds to ensure a secure bond. For a 3D effect, layer packets slightly and add small floral picks or twine to create depth.
Let the glue dry completely before handling. If you're mounting this outdoors, seal the entire piece with a weatherproof varnish to protect it from rain and sun. I like to add a small tag with planting instructions or the seed variety names—it turns your art into a functional garden guide!
☀️ Step 4: Display and Maintain Your Creation
Hang your finished piece in a sunny spot where it can inspire your garden planning. For outdoor displays, attach it to a wooden frame or trellis with rust-resistant screws. Indoors, use command hooks for easy removal. Rotate your displays seasonally to keep your garden fresh and exciting—spring for flowers, summer for herbs, and fall for pumpkins and gourds.
To preserve your seed packet art long-term, avoid direct sunlight and moisture. If packets fade, you can always create a new display with fresh packets. The best part? Every time you plant from these seeds, you’re bringing your art to life in your garden!
Tips & tricks for perfect seed packet art displays
Transforming seed packets into garden art is all about precision and creativity—here's how to elevate your project effortlessly.
Selection Tip: Choose seed packets with bold, contrasting colors and clear labeling for maximum visual impact. I always select packets with large, graphic designs—they create more interesting textures when layered. For a cohesive look, stick to a color palette (like warm reds and greens) rather than mixing too many hues. This keeps your display harmonious and intentional.
Cutting Technique: When cutting your seed packet shapes in Step 2, I recommend using a self-healing cutting mat to protect your work surface and prevent slipping. For intricate designs, trace your shapes onto the packet first with a light pencil line—this gives you a guide without marking the final design. And remember that ½-inch margin? Use a ruler to mark it precisely, or create a simple stencil from cardstock to ensure consistency across all pieces.
Adhesive Strategy: For lightweight packets, a glue stick works beautifully, but for heavier paper or outdoor displays, E6000 is worth the investment. Here's my trick: Apply a thin line of glue to the back of each piece rather than dabbing it all over—this prevents glue from showing through the paper and keeps your design crisp. Press firmly for those 10-15 seconds; patience here prevents bubbles and misalignment.
Durability Boost: If you're creating an outdoor display, seal your finished piece with a weatherproof varnish before adding any decorative elements like twine or floral picks. This prevents moisture from seeping through and warping the paper. I like to use a clear, matte varnish—it adds a subtle sheen while protecting the colors. For extra longevity, consider laminating your pieces before assembly, especially if you're using delicate seed packets.
Pro Tips for Seed Packet Art
- Transforming seed packets into garden art is all about precision and creativity—here's how to elevate your project effortlessly.
- Selection Tip: Choose seed packets with bold, contrasting colors and clear labeling for maximum visual impact.
- Cutting Technique: When cutting your seed packet shapes in Step 2, I recommend using a self-healing cutting mat to protect your work surface and prevent slipping.
Frequently asked questions
about seed packet art—because creativity deserves clarity! Here’s what you’ve been wondering:What’s the best way to preserve seed packet art after planting?
Once your edible blooms are planted, seal designs with a clear acrylic spray or Mod Podge to protect them from moisture. For outdoor displays, opt for weather-resistant materials like laminated seed packets or waterproof vinyl decals. Display them in sunny, sheltered spots (like a greenhouse or patio) to keep colors vibrant!
How long does seed packet art last before seeds expire?
Most seed packets retain viability for 1–2 years when stored properly (cool, dry, dark). Check the expiration date on the packet—if it’s past that, test germination by soaking seeds in water for 24 hours (sprouting = good!). For long-term projects, store seeds in airtight containers with silica gel to extend their life.
Can I use seed packet art for indoor decor without planting?
Frame empty, decorative seed packets (like heirloom tomato or chili pepper varieties) as wall art, or arrange them in shadow boxes with twine and dried flowers. For a 3D touch, glue packets to wooden slices or floating shelves. Just avoid planting if seeds are expired—focus on aesthetics!
What if my seed packet art gets damaged before planting?
No worries! Use clear nail polish to seal small tears or iron-on patches for larger fixes. For a fresh look, recreate the design with new packets or print high-res images of the original art onto waterproof paper. Pro tip: Take photos of your designs first—they’re great backups!
Are there seed varieties better suited for artistic displays?
Yes! Opt for colorful, compact varieties like cherry tomatoes, ornamental peppers, or edible flowers (e.g., nasturtiums, marigolds). These offer bold hues and textures while thriving in containers. Avoid sprawling vines (like cucumbers) unless you’re designing a vertical garden—stick to low-maintenance, show-stopping picks!
Wrapping up and next steps
Seed packet art transforms your garden into a vibrant, edible masterpiece—where beauty meets functionality! 🌸 Whether you’re a seasoned gardener or a creative beginner, these designs add charm while growing delicious blooms and herbs.
Start small with a single packet or go bold with a full border; the key is letting your imagination bloom.
Ready to turn your green space into a living work of art? Grab a few seed packets, sketch your vision, and dive in! Share your creations with us—we’d love to see your edible garden decor come to life. 🌱✨