
Lawn
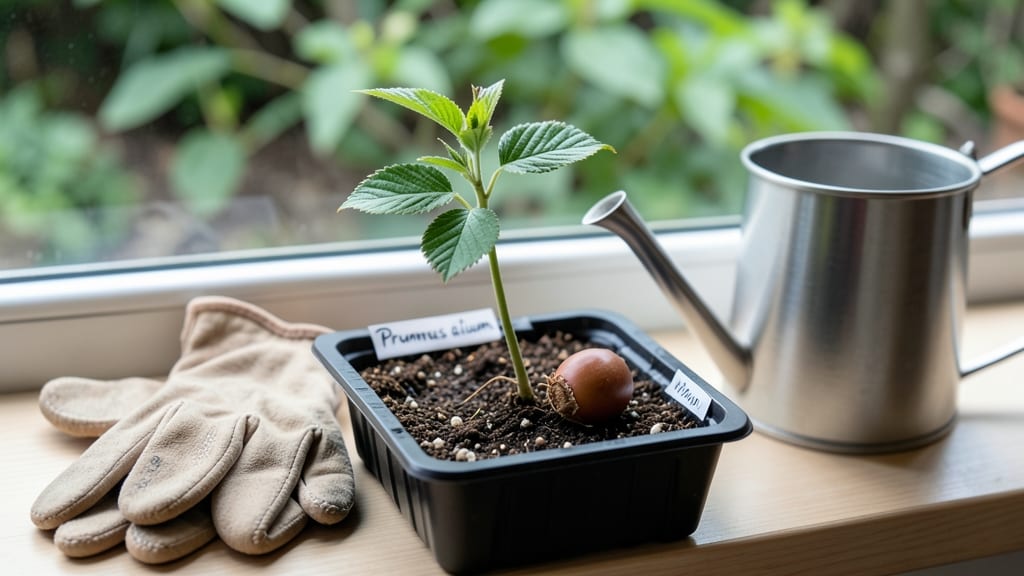
Extracting a cherry seed without the messy pulp is half the battle—and I’ve perfected a twist-free method that works every time. 🌱 The real magic happens when you skip the guesswork on soil, light, and timing, so your seeds sprout reliably instead of sitting dormant for months.
My first batch took three tries before I cracked the germination code, but now I get strong seedlings within 4-6 weeks with minimal fuss.
You’ll need just three supplies: ripe cherries (sweet or tart), a bowl of water, and a small pot with well-draining soil. The secret?
A quick soak to loosen the seed from its pit, then planting at ½-inch depth in a mix of 50% potting soil and 50% perlite—this keeps roots from rotting while they establish. Most gardeners overwater here, but cherry seeds need consistent moisture, not soggy soil.
By the time your seedlings hit 3-4 inches tall, they’ll be ready to transplant outdoors after the last frost—or you can keep them indoors under a grow light if you’re in a cooler zone.
The first true leaves signal it’s time to thin to the strongest sprout, and within 2-3 years, you’ll have a sturdy young tree (even if it’s not fruit-bearing yet).
Here’s the twist: not all cherry seeds grow true to type, so if you want a specific variety, grafting later might be worth it. But for ornamental or wild-type trees, this method delivers hardy, twist-free starts that outperform store-bought seedlings. Ready to try it?
📚 In This Guide
- What you need
- Instructions
- Tips and common mistakes
- Wrapping up and next steps
What you need
- ● Cherry seeds: 3–5 fresh, plump seeds (harvested from ripe cherries—avoid bird-pecked or shriveled ones!)
- ● Paper towels or coffee filters: 2–3 sheets (for stratification)
- ● Plastic bag with a zip-top: 1 (to create a humid environment)
- ● Refrigerator: (for cold stratification—no need to buy anything extra!)
- ● Small pots (3–4 inches wide): 1–2 (biodegradable or regular)
- ● Potting mix: 1 bag (well-draining, seed-starting blend)
- ● Spray bottle: 1 (for gentle watering)
- ● Twist tie or rubber band: 1 (to secure the bag during stratification)
- ● Seedling heat mat: (speeds up germination in cooler climates)
- ● Grow lights: (if natural light is limited)
- ● Plant labels: (to track progress)
- ● Fertilizer (balanced, low-nitrogen): (once seedlings sprout)
- ● Pruning shears: (for future shaping—not needed yet!)
Step-by-Step guide to extracting cherry seeds without the twist
Here's how to handle those stubborn cherry pits like a pro—no frustration, just seeds ready for planting.
🍒 Step 1: Select and Prepare Ripe Cherries
Choose firm, fully ripe cherries without bruises—they yield the most viable seeds. Wash them gently to remove any debris that might interfere with extraction. I like to work with about 10-12 cherries at a time; it's enough to practice without overwhelming your workspace.
Spread them on a clean towel or paper towel to air-dry for 10-15 minutes. This step is crucial because damp pits can mold if left in a sealed container. You'll know they're ready when the surface feels slightly tacky but not sticky.
🪴 Step 2: Extract Pits with Precision
Gently squeeze each cherry between your thumb and forefinger to release the pit. Avoid crushing the fruit—this can damage the seed inside. I find using a small spoon to pry open stubborn cherries helps without bruising the pit. Place the pits in a single layer on a fresh paper towel.
Inspect each pit for cracks or soft spots—these won't germinate well. Discard any damaged ones immediately. The good pits should feel firm and smooth to the touch, with no visible imperfections. This is where patience pays off; rushing leads to broken seeds.
💧 Step 3: Clean and Dry the Seeds
Rinse the pits under cool water to remove any remaining fruit residue. Use your fingers to gently scrub away any clinging flesh, but avoid excessive pressure that could crack the pit. Once clean, lay them out on a clean towel in a single layer again.
Let them dry completely for 24-48 hours in a warm, dry place. You'll know they're fully dry when the outer shell feels lightweight and the seeds rattle slightly when shaken. Store them in a sealed container with a desiccant packet to prevent moisture buildup.
⏰ Step 4: Stratify for Successful Germination
Cherry seeds require stratification to break dormancy. Place the dried pits in a plastic bag with a damp paper towel—just enough moisture to keep it damp, not soggy. Seal the bag and refrigerate for 8-12 weeks. Check monthly to ensure the towel stays moist.
During stratification, you'll see the seed inside the pit begin to sprout slightly. This is normal and indicates the process is working. Once the recommended time passes, remove the pits and plant them immediately in well-draining soil. The stratification step is what makes the difference between seeds that sprout and those that rot.
🌱 Step 5: Plant Stratified Seeds
Fill small pots with a mix of 50% potting soil and 50% perlite for excellent drainage. Plant each pit 1 inch deep, spacing them 2 inches apart to allow room for growth. Water gently until the soil feels evenly moist but not waterlogged.
Place the pots in a warm, sunny spot with indirect light for the first 2-3 weeks. You'll notice the first signs of germination as tiny sprouts push through the soil. Be patient—cherry seeds can take 4-6 weeks to sprout consistently. Once they reach 3-4 inches tall, transplant to larger containers or the garden.
Tips & tricks for perfect cherry seed extraction
Those stubborn cherry pits don't have to be a headache—these pro tips will make the process smoother and more reliable.
Selection Matters: The quality of your cherries directly impacts germination success. Look for cherries that are completely ripe but still firm to the touch—overripe cherries often have softer pits that crack easily during extraction. I've found that dark red or black cherries tend to have more robust pits than lighter varieties, making them ideal for seed saving.
Precision Extraction: When gently squeezing the cherries in Step 2, apply even pressure around the entire fruit. The pit should release cleanly without requiring force—if you feel resistance, try a small spoon to gently pry open the cherry instead of squeezing harder. Remember, damaged pits won't germinate, so take your time with each one. The goal is to preserve the seed's integrity while removing all fruit residue.
Drying Strategy: For the 24-48 hour drying period in Step 3, I recommend using a fan on low setting to circulate air around the pits. This prevents moisture buildup in the container and speeds up the drying process. Place the pits on a wire cooling rack over a towel to allow air to flow underneath as well. Proper drying is critical—pits that aren't completely dry will develop mold during stratification.
Stratification Insight: During the 8-12 week stratification period in Step 4, you'll notice condensation forming inside the bag. This is normal and indicates proper moisture levels. If you see excessive condensation (like water droplets), open the bag slightly to let some moisture escape. The damp paper towel should remain moist but never soggy—think of it like wringing out a sponge until just damp. This balance is what triggers the internal chemical changes needed for germination.
Pro Tips for Seed Of Cherry
- Those stubborn cherry pits don't have to be a headache—these pro tips will make the process smoother and more reliable.
- Selection Matters: The quality of your cherries directly impacts germination success. Look for cherries that are comp...
- Precision Extraction: When gently squeezing the cherries in Step 2, apply even pressure around the entire fruit. The ...
Frequently asked questions
Got questions about growing cherry seeds or working with their pods? You’re not alone! Here are answers to the most common queries—so you can get started with confidence.
How do I extract seeds from cherry pits safely?
Cherry pits are hard and toxic if cracked improperly. Never bite or drill them—use a nutcracker or mallet to gently split the shell. Wear gloves to avoid exposure to cyanogenic compounds. Soak the pit in water for 24 hours to soften the seed inside before planting.
How long does it take for a cherry seed to germinate?
Germination can take 4–8 weeks (or even months!) in ideal conditions. Pre-soak seeds for 24–48 hours to speed it up. Keep soil moist (not soggy) and maintain temperatures between 60–75°F. Patience is key—cherry trees grow slowly from seed!
Can I grow cherry trees from grocery store cherries?
Yes, but results vary. Store-bought cherries are often hybrid varieties, which may not produce true-to-type fruit. For better success, source seeds from local, organic cherries or a trusted nursery. If using store-bought, ensure the pit is firm and undamaged.
Why won’t my cherry seed sprout?
Common culprits: dormancy (seeds need cold stratification), poor soil (use well-draining mix), or overwatering. Try this fix: Place seeds in a damp paper towel, seal in a bag, and refrigerate for 4–6 weeks before planting. If still no luck, test viability by cutting open a few pits.
How big should my cherry seedling be before transplanting?
Wait until your seedling has 3–5 true leaves (not just cotyledons) and is at least 4–6 inches tall. Harden it off by gradually exposing it to outdoor conditions over 1–2 weeks before moving to a permanent spot. Choose a sunny location with 6+ hours of light daily.
Wrapping up and next steps
Growing cherry seeds can be a rewarding—and surprisingly simple—way to cultivate your own tree, even if you’re new to gardening. With the right tools and a few twist-free pods, you’ll unlock an easy method for extracting seeds without the mess.
Whether you’re dreaming of a backyard orchard or just want to experiment with nature, this guide gives you the confidence to start.
Ready to take the next step? Grab a cherry pit, follow the steps, and watch your seedling grow! Happy planting—your future cherry tree awaits! 🌱✨