
Lawn
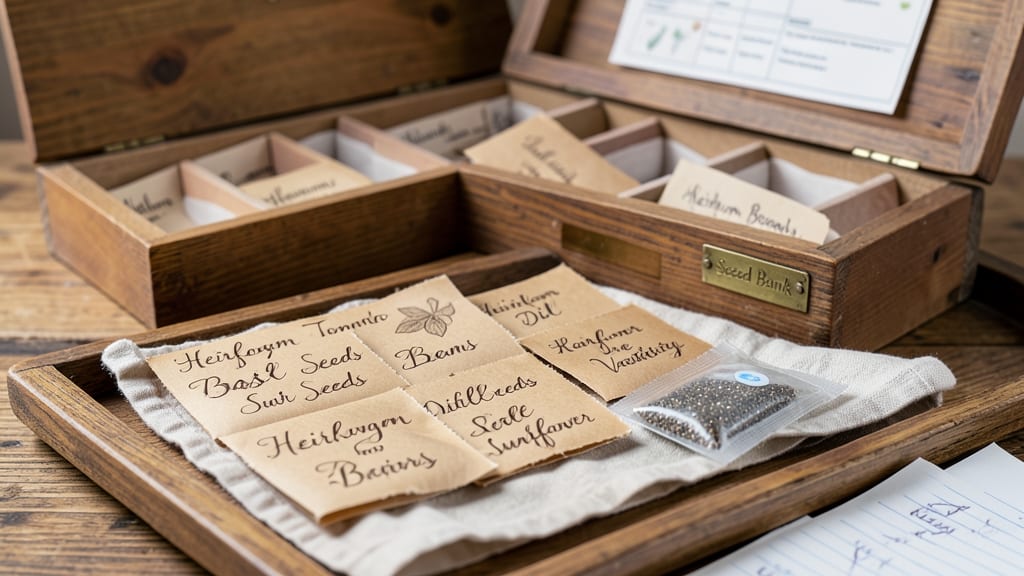
A seed bank box keeps your seeds alive for years—moist but not soggy, cool but not freezing. 🌱 I built mine after losing a batch of heirloom seeds to damp rot, and now I have a system that protects seeds through multiple planting seasons without extra effort.
The key is layered moisture control: a bottom tray for water, a raised platform for seeds, and ventilation holes to prevent mold. You can use a simple wooden box with a false bottom or repurpose a plastic container with a mesh insert.
Most seeds stay viable for 5-10 years this way, with proper care. You’ll organize seeds by type and planting date, making spring prep effortless. The setup costs under $20 and takes less than an hour—far cheaper than buying new seeds every year.
Plus, you’ll preserve varieties you can’t find in stores. Perfect for gardeners who want to save heirlooms, prep for next season, or avoid store-bought seed shortages. Here’s how to build yours!
📚 In This Guide
- What you need
- Instructions
- Tips and common mistakes
- Wrapping up and next steps
What you need
- ● Wooden box or container: At least 12" x 12" x 6" (internal dimensions). Use untreated wood like cedar or redwood to prevent mold.
- ● Moisture-absorbing materials: Silica gel packets (500g–1kg) or uncooked rice (2–3 cups)
- ● Vermiculite or perlite (1–2 cups)
- ● Seed storage bags: Mylar bags (5–10 mil thickness) with desiccant packets (or DIY with silica gel).
- ● Sealing supplies: Heat sealer or strong adhesive tape (for Mylar bags)
- ● Waterproof sealant (e.g., Silicone sealant) for the box edges
- ○ Humidity indicator cards (optional but helpful for monitoring moisture levels).
- ● Basic tools: Saw, drill, sandpaper (120–150 grit), screwdriver, and measuring tape.
- ○ Optional but useful: Digital scale (for precise seed weighing)
- ● Food-safe spray (e.g., mineral oil) to coat seeds for extra protection
- ● Label maker or waterproof markers
- ● Knowledge prereq: Basic understanding of seed moisture content (aim for <10% for most seeds).
- ● 🌡️ Temperature control: Store your box in a cool (32–41°F), dark place (like a fridge or root cellar).
- ● ✨ Layering trick: Alternate seeds with moisture absorbers (e.g., rice or silica gel) in the box to maintain balance.
- ● 📊 Label everything: Include seed type, date, and variety to avoid mix-ups later!
Step-by-step instructions for building a seed bank box
Here's how to create a simple, effective seed storage system that keeps moisture balanced and seeds viable for years.
🪴 Step 1: Select and Prepare Your Storage Box
Choose an airtight container with a tight-fitting lid—plastic or metal works best. I prefer a 5-gallon bucket with a gasket seal because it blocks moisture and oxygen perfectly. Clean the container thoroughly with a 10% bleach solution (1 part bleach to 9 parts water) to kill any mold spores. Rinse and dry completely before use.
For smaller seed collections, a mason jar with a rubber seal works well. The key is eliminating air gaps where humidity could develop. If using a wooden box, line it with plastic sheeting first to prevent moisture absorption from the wood itself.
💧 Step 2: Layer Moisture Absorbers and Desiccants
Place a thin layer of silica gel packets at the bottom of the container. These absorb excess moisture and keep humidity at the ideal 30-40% range for seed storage. I like to use food-grade silica gel because it's non-toxic and reusable after baking at 200°F for 2 hours to refresh it.
Add a layer of uncooked rice (about 1 cup) between seed packets. Rice naturally absorbs moisture and adds an extra buffer. For larger collections, alternate layers of silica gel and rice every 6-8 seed packets to maintain even moisture control throughout the box.
🌱 Step 3: Organize Seeds with Moisture Barriers
Place seed packets in a single layer, leaving ½ inch of space between them. This prevents moisture buildup from condensation. I wrap each packet in parchment paper before placing them in the box—this adds an extra moisture barrier without trapping heat.
Label each packet with the seed variety, date, and germination instructions using a waterproof marker. Store labels on the outside of the packet to avoid moisture damage. Keep packets upright or slightly angled to prevent any potential moisture pooling at the bottom.
⏰ Step 4: Seal and Store in a Cool, Dark Place
Close the container tightly and store it in a cool, dark location with a consistent temperature between 32-41°F. A basement, root cellar, or refrigerator works well. Avoid areas with temperature fluctuations or direct sunlight, as heat and light accelerate seed deterioration.
Check the box once every 6 months to ensure the silica gel remains dry. If it feels damp, replace it immediately. For long-term storage, I also add a small packet of activated charcoal to absorb any odors and prevent mold growth.
🌿 Step 5: Monitor and Refresh as Needed
Seeds stored in a properly layered box can last 5-10 years or longer, depending on the variety. Test germination annually by planting a few seeds from each packet. If germination drops below 80%, it’s time to refresh the storage conditions or replace the seeds.
If you notice condensation inside the box, open it immediately to air out and replace the moisture absorbers. Real talk: condensation is the enemy—it signals failed moisture control. Adjust your layers or storage location if this happens repeatedly.
Tips & tricks for perfect seed bank boxes
Here's what nobody tells you about keeping your seed collection safe and viable for years.
Container Selection: For maximum protection, choose containers with gasket seals—they create an airtight environment that prevents moisture intrusion. I've found that 5-gallon buckets with gasket seals work best for large collections, while mason jars with rubber seals are perfect for small batches. Avoid containers with loose lids, as even small air gaps can lead to condensation and mold growth over time.
Silica Gel Refresh: The 200°F for 2 hours refresh cycle for silica gel is crucial for maintaining its effectiveness. I place my silica gel packets on a baking sheet and bake them in my oven—just make sure to let them cool completely before using. Pro tip: Store your refreshed silica gel in a small container with a tight lid to keep it dry between uses. This simple step can extend your seed storage life by years.
Layering Strategy: When organizing your seed packets in Step 3, think of your box like a lasagna—each layer serves a purpose. Place your 1 cup of rice between every 6-8 seed packets to create even moisture control throughout. This layered approach prevents moisture buildup in dense areas while ensuring all seeds maintain that critical 30-40% humidity range.
Storage Location: The 32-41°F temperature range is non-negotiable for long-term seed viability. I store my seed bank in my basement during summer and move it to my refrigerator during winter months when basement temperatures fluctuate. A small digital thermometer helps me monitor the temperature continuously. Remember, every degree above 41°F can halve your seed's lifespan!
Pro Tips for Seed Bank Box
- Here's what nobody tells you about keeping your seed collection safe and viable for years.
- Container Selection: For maximum protection, choose containers with gasket seals—they create an airtight environment ...
- Silica Gel Refresh: The 200°F for 2 hours refresh cycle for silica gel is crucial for maintaining its effectiveness. ...
Frequently asked questions
about seed bank boxes—here’s what you need to know to keep your seeds thriving for years! Whether you're a beginner or a seasoned gardener, these answers will help you troubleshoot and optimize your setup.What’s the best moisture level for storing seeds in a seed bank box?
Seeds need low moisture (around 5-10%) to stay viable long-term. Use a moisture absorber like silica gel or rice in the bottom layer, and avoid sealing the box airtight—small vents prevent condensation. Check humidity with a hygrometer for precision!
How long can seeds last in a seed bank box?
With proper conditions (cool, dry, dark), many seeds stay viable for 5-10 years—some even decades! Factors like seed type (e.g., beans vs. corn) and storage conditions (temperature fluctuations) play a role. Label everything to track planting dates!
Can I reuse a seed bank box for different seed types?
Yes! Just clean it thoroughly between uses—sanitize with rubbing alcohol or bleach solution (rinse well). Avoid cross-contamination by storing seed types separately. Pro tip: Use smaller boxes for variety organization!
What if my seed bank box gets too warm?
Heat is the enemy! Store your box in a cool, dark place (like a basement or fridge). If temps rise above 70°F (21°C), add an insulated liner or use a cooling pack. Avoid attics or garages—consistent warmth speeds up seed deterioration.
What’s a good alternative if I don’t have a seed bank box?
No box? No problem! Use airtight containers (like mason jars or vacuum-sealed bags) with a desiccant. For bulk seeds, repurpose plastic bins with vents or even old shoeboxes lined with aluminum foil. Just prioritize moisture control!
Wrapping up and next steps
Creating a seed bank box with layered moisture control is a game-changer for preserving seeds long-term—whether you're a gardener, homesteader, or emergency prepper. 🌱 By balancing airflow, humidity, and protection, you’ll safeguard your seeds against mold, rot, and deterioration, ensuring they stay viable for years to come.
This DIY project isn’t just practical; it’s empowering, giving you control over your seed supply without breaking the bank.
Ready to take the next step? Gather your materials, follow the steps, and customize your seed bank box to fit your specific needs. Share your progress with fellow gardeners or even gift one to a friend—because great ideas grow when shared! 🌱✨