
Lawn
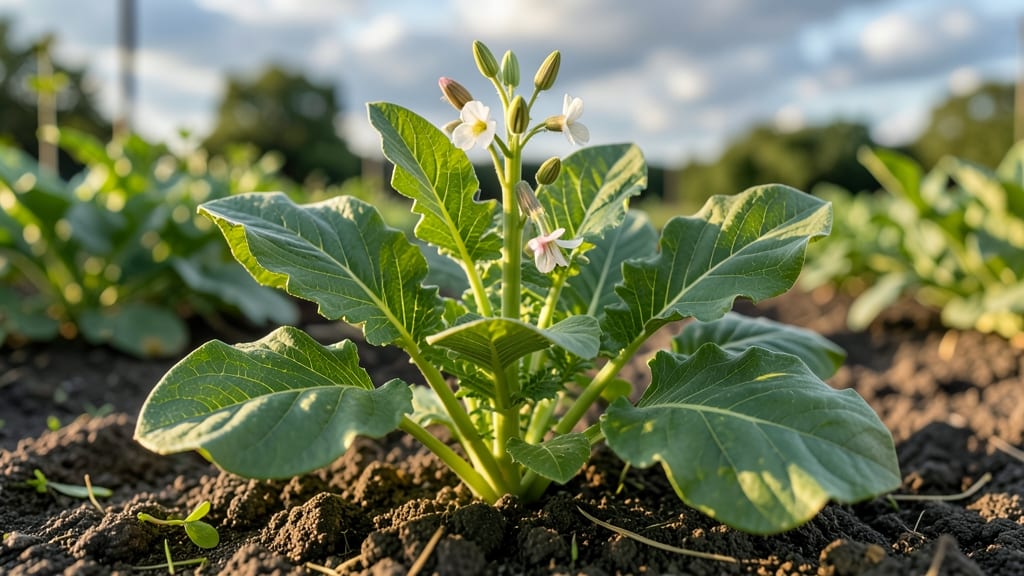
Cold-stressed radish pods split open like nature's popcorn—effortless extraction when you know the trick. 🌱 I used to struggle with sticky seed pods that shattered before I could save them, but this method changed everything.
The secret? Timing the harvest just right after a cold snap triggers the pods to open naturally, giving you dry, easy-to-handle seeds.
You'll need mature radish plants (like 'Cherry Belle' or 'French Breakfast'), a dry spot with airflow, and patience—about 2-3 weeks of drying time. The pods should turn brown and papery before splitting.
If they shatter too soon, blame heat or humidity; if they stay stubbornly closed, they need more time in a cool, dry place.
Once dry, store the seeds in paper envelopes labeled with the variety and year. Viability lasts 3-5 years if kept cool and dry. The payoff? Fresh, homegrown seeds for next season's garden—no store-bought packets needed, and you'll save money while supporting sustainable growing.
Works for any radish variety, even in small spaces. Just watch for bolting (plants going to seed too early) and harvest pods before they shatter completely. Here’s how to do it right every time!
📚 In This Guide
- What you need
- Instructions
- Tips and common mistakes
- Wrapping up and next steps
What you need
- ● Mature radish plants – Choose Daikon or winter radishes (e.g., Sakura or Black Spanish) with fully developed seed pods (about 3–4 inches long). Aim for 10–20 pods depending on your yield goals.
- ● Pruning shears or sharp scissors – For cleanly snipping pods without damaging the plant.
- ● Paper bags or breathable mesh sacks – 5–10 bags (1 per pod or 2–3 pods per bag) to allow airflow and prevent moisture buildup.
- ● Labeling tags & marker – To mark varieties and harvest dates (e.g., “Daikon – Nov 2023”).
- ● Freezer-safe container or seed envelope – For long-term storage after drying.
- ● Refrigerator or cold storage unit – Set to 32–38°F (0–3°C) for 1–2 weeks.
- ○ Thermometer – To monitor temperature (optional but handy!).
- ● Plastic wrap or humidity tray – If pods need extra moisture during stressing (rare, but useful in dry climates).
How to extract radish seeds using cold-stress splitting
Here's the foolproof method I use every year to harvest seeds from radish pods without mess or wasted effort.
🌱 Step 1: Select and Harvest Mature Radish Pods
Choose pods that have turned completely brown and dried on the vine—this means the seeds inside are fully mature. If any green remains, leave them to ripen another week. I always harvest on a dry morning after the dew has evaporated, as moisture makes handling the pods trickier. Use clean, sharp scissors to snip the stems about ½ inch above the pod.
Gently shake each pod over a clean paper towel to remove any loose debris or small insects that might have hitched a ride. This prevents contamination of your seed collection. Place the pods in a single layer on a wire rack or clean baking sheet to dry further for 3-5 days in a warm, dry spot with good air circulation.
☀️ Step 2: Cold-Stress the Pods for Easy Splitting
Place the dried pods in a sealed plastic bag with a small handful of uncooked rice or silica gel packets to absorb any remaining moisture. Store them in your refrigerator's crisper drawer for 48-72 hours. The cold stress causes the pod walls to contract slightly, making them much easier to split open without breaking the seeds.
I know it seems counterintuitive to refrigerate something you're trying to dry, but trust me—this step prevents the pods from shattering into tiny, unmanageable pieces. Remove the pods just before you're ready to work with them so they stay cool and pliable.
✂️ Step 3: Split and Clean the Seeds
Lay one pod on a clean cutting board and use a small, sharp knife to make a ¼-inch vertical slit along the seam where the pod naturally opens. Be careful not to cut too deep—you only want to separate the two halves without damaging the seeds inside. Gently pry the pod apart with your fingers or a butter knife.
Empty the seeds onto a clean white plate or piece of parchment paper. You'll see some chaff and debris mixed in—use a fine-mesh strainer or your fingers to separate the seeds from the lighter, papery material. Discard any seeds that look shriveled or discolored, as they won't germinate well.
🌿 Step 4: Dry and Store the Seeds Properly
Spread the clean seeds in a single layer on a clean, dry paper towel. Let them air-dry for 24-48 hours in a warm, dark place with good airflow. This final drying step ensures the seeds won't mold during storage. Once completely dry, they should feel hard and papery to the touch.
Transfer the seeds to a labeled envelope or small glass jar. Store them in a cool, dark place—like a pantry or seed storage box—where the temperature stays between 40-50°F. Properly stored radish seeds remain viable for 3-5 years, though they lose vigor after about 2 years.
⏰ Step 5: Test Seed Viability Before Planting
Before you commit to planting your saved seeds, do a quick viability test. Place 10 seeds between two damp paper towels in a sealed plastic bag. Keep them in a warm spot (70-75°F) and check daily. If 80% or more of the seeds sprout within 5-7 days, they're ready to plant. If fewer than half sprout, consider buying fresh seeds for better germination rates.
This test gives you confidence that your hard work paid off. I always do this test in early spring, just before my planting window opens, so I'm not caught off guard by poor germination. Radish seeds are fast to test—you'll know quickly whether to proceed or start over.
Tips & tricks for perfect radish seed extraction
These pro techniques will help you avoid common pitfalls and maximize your seed yield every time.
Selection Tip: When harvesting pods in Step 1, look for ones that make a hollow sound when gently tapped—they're the ripest and contain the most mature seeds. I've found that pods with a slight papery texture at the tip often yield the best quality seeds. Avoid any that feel damp or have soft spots, as these may contain underdeveloped seeds or attract pests.
Cold-Stress Secret: The 48-72 hour refrigeration in Step 2 is non-negotiable for successful splitting. I recommend placing the pods in the crisper drawer with a small piece of chalk inside the bag—this helps track the exact time without opening the bag and introducing moisture. Remove the pods just before you're ready to work with them to maintain their cool pliability, which makes the splitting process effortless.
Cleaning Strategy: In Step 3, use a fine-mesh strainer to separate seeds from chaff, but don't rush this process. I've found that gently tapping the strainer over a bowl helps release any seeds stuck in the mesh. For stubborn debris, a small paintbrush works wonders for dislodging seeds without damaging them. This careful separation ensures you don't accidentally discard viable seeds mixed with the lighter chaff.
Storage Wisdom: When storing your seeds in Step 4, consider adding a small silica gel packet to your labeled envelope or jar to maintain optimal dryness. The 40-50°F storage temperature range is crucial—this prevents moisture absorption that could lead to mold. I store my seeds in glass jars with tight-sealing lids, which provides both protection and easy access for future planting seasons.
Pro Tips for Radish Seed Pod
- These pro techniques will help you avoid common pitfalls and maximize your seed yield every time.
- Selection Tip: When harvesting pods in Step 1, look for ones that make a hollow sound when gently tapped—they're the ripest and contain the most mature seeds.
- Cold-Stress Secret: The 48-72 hour refrigeration in Step 2 is non-negotiable for successful splitting.
Frequently asked questions
Got questions about radish seed pods and their cold-stressed splitting? Here are some of the most common ones—plus quick, practical answers to help you master the process!
Why do radish seed pods split when exposed to cold?
Radish pods split naturally due to cold stress—a trick of nature that makes harvesting seeds easier! When temperatures drop (especially below 50°F/10°C), the pods weaken and crack open, releasing seeds. This happens because cold slows plant metabolism, causing the pods to dry out and split along their seams. It’s a shortcut for gardeners!
How long does it take for radish seed pods to split after cold exposure?
Timing varies, but most radish pods start splitting within 3–7 days of cold exposure (below 40°F/4°C). If your pods don’t split after a week, try moving them to a cooler spot (like a garage or fridge) for 24–48 hours. Patience is key—some varieties take longer, especially in humid climates!
Can I still harvest seeds if the pods don’t split?
If your pods stay intact, simply crush or slice them with a knife or scissors to release the seeds. Spread the pod debris on a tray to dry for 1–2 days, then winnow (blow away debris) to collect the seeds. No splitting? No problem!
What’s the best temperature to cold-stress radish seed pods?
Aim for 35–45°F (2–7°C) for 3–5 days to trigger splitting. Avoid freezing temps (below 32°F/0°C), as this can damage the seeds. A cool basement, unheated garage, or even a shaded outdoor spot works. Pro tip: Monitor humidity—dry conditions speed up drying and splitting!
What if my radish plants bolted too early—will the seeds still be viable?
Yes! Early bolting (flowering) doesn’t ruin seed viability—it just means your pods may be smaller. Let them mature fully (until they turn brown and dry) before harvesting. Store seeds in a cool, dark, dry place (like a sealed jar) for up to 3 years. Viability drops slightly over time, but they’ll still germinate!
Troubleshooting: My pods split, but the seeds are moldy or shriveled—what went wrong?
Mold or shriveling usually means too much moisture during drying. To fix it next time:
- Harvest seeds only on dry days or indoors with a fan.
- Avoid storing seeds in humid areas (like a damp basement).
- Spread pods on a paper towel or mesh screen for airflow.
- If mold appears, discard the batch—don’t risk poor germination.
Wrapping up and next steps
Growing radish seed pods through cold-stress splitting is a game-changer for gardeners seeking effortless seed extraction and higher germination rates! By embracing this simple technique, you’ll save time, reduce waste, and even extend your harvest season.
Whether you’re a seasoned gardener or just starting out, this method is totally doable—and the payoff is worth it.
Ready to level up your gardening game? Start small—try a few pods this season, experiment with timing, and share your success (or tweaks!) with fellow green thumbs. Happy harvesting! 🌱✨