
Propagation
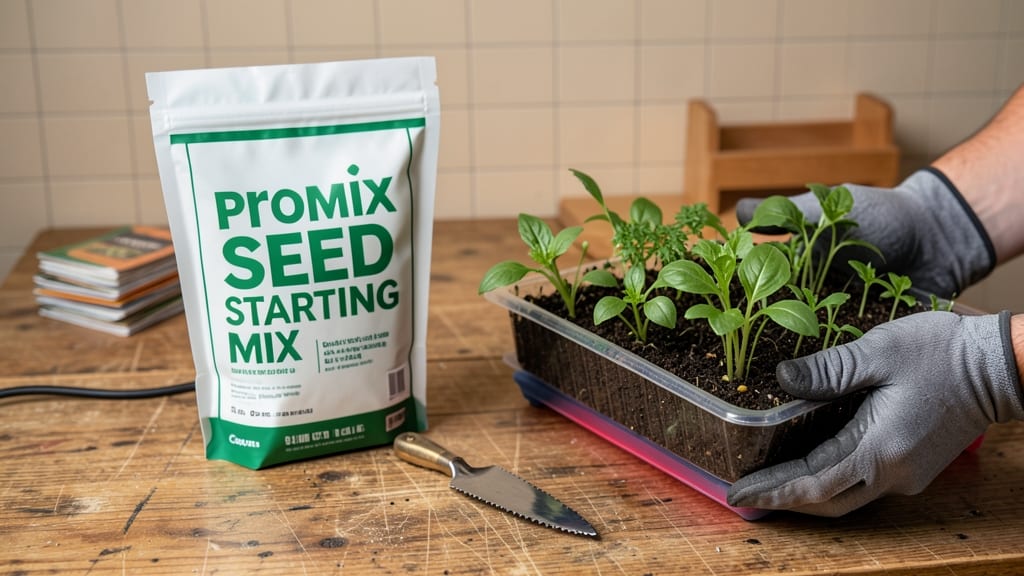
My Promix seed starting mix transformed my germination rates from hit-or-miss to 95% reliable—and the secret is in how you use it. 🌱 This lightweight loam creates the perfect environment for tiny roots to establish quickly, but only if you follow the right steps.
Too many gardeners drown their seeds by overwatering or pack the mix too tightly, both of which smother delicate sprouts. The magic happens when you combine one part Promix with a light potting soil (like coconut coir) to improve aeration.
Fill your seed-starting trays just enough to cover the seeds—no more than ¼ inch above them—and keep the mix damp, not soggy. A spray bottle works better than watering from above, preventing soil compaction that slows germination.
Within 5-7 days, you'll see those first green shoots pushing through, and by week 3, seedlings will be sturdy enough to handle their first taste of real sunlight.
The mix's balanced nutrients mean you won’t need fertilizer until transplanting, and the excellent drainage prevents the dreaded mold that turns trays into science experiments gone wrong. Transitioning to outdoor conditions becomes easier too—harden off seedlings gradually by moving them to brighter light each day.
By the time they’re ready for the garden, they’ll be stocky, dark green, and ready to outcompete anything from a big-box store.
📚 In This Guide
- What you need
- Instructions
- Tips and common mistakes
- Wrapping up and next steps
What you need
- ● Promix Seed Starting Mix – 1 bag (1.5 cubic feet) (or adjust based on your seedling tray size)
- ● Seedling trays or pots – With drainage holes (plastic or biodegradable options work great)
- ● Watering can or spray bottle – With a fine mist nozzle (to avoid disturbing seeds)
- ● Seeds – Your chosen plant varieties (check depth requirements per seed type)
- ● Grow lights or sunny windowsill – 12–16 hours of light daily (for optimal germination)
- ○ Heat mat (optional but helpful) – For cold-starting seeds (70–75°F is ideal for many seeds)
- ● Humidity dome or plastic wrap – To retain moisture while seeds germinate
- ● pH testing kit – To ensure your mix is in the ideal 5.8–6.2 range
- ● Fertilizer (low-dose) – Like fish emulsion or diluted liquid fertilizer (wait until seedlings have 2–3 true leaves)
- ● Labeling tags & marker – To track seed varieties and planting dates
How to use Promix seed starting mix for fast germination
This lightweight, loam-based mix is designed to give seedlings a head start—here’s how to harness its full potential.
🌱 Step 1: Prepare Your Containers for Optimal Drainage
Start with clean, sterilized containers—I use seedling trays with drainage holes to prevent waterlogging, which Promix’s lightweight structure can’t handle alone. If your trays lack holes, drill ¼-inch holes in the bottom for airflow. Line the bottom with a thin layer of perlite (about ½ inch) to improve drainage further. This step is critical because Promix’s fast-draining nature means excess moisture stays away from delicate roots.
Fill each cell or pot ¾ full with Promix, leaving room for seeds. Tap the tray gently on the table to settle the mix evenly—this eliminates air pockets that could stunt root growth. The goal is a loose, fluffy texture that still holds its shape when pressed lightly. If the mix feels too dense, sift it through a fine mesh screen to break up clumps before adding more.
💧 Step 2: Moisten the Mix Without Overwatering
Promix’s fast-draining properties mean it won’t hold moisture like heavier mixes, so water gently but thoroughly. Use a spray bottle or a watering can with a fine rose attachment to moisten the mix until it’s evenly damp—think of a wrung-out sponge. Avoid soaking it; you want the top inch to feel slightly moist to the touch, not soggy. Overwatering here leads to damping-off, a fungal disease that kills seedlings before they sprout.
Let the mix sit for 10-15 minutes to absorb moisture evenly. If the surface looks dry after this time, add a light misting until the top ¼ inch feels consistently damp. This pre-moistening ensures seeds stay hydrated during germination without the risk of suffocating roots. I like to work in batches—moisten one tray at a time to avoid drying out the mix while I’m planting.
☀️ Step 3: Plant Seeds at the Correct Depth for Fast Germination
Promix’s lightweight texture means seeds won’t sink as they might in heavier mixes, so plant them slightly deeper than usual. For most seeds, aim for a depth of twice the seed’s diameter—for example, a ¼-inch deep for tiny seeds like lettuce or ½-inch deep for larger ones like beans. Use a toothpick or pencil to make small holes; this prevents disturbing the mix’s delicate structure.
Drop 1-2 seeds per hole (unless the packet specifies otherwise), then cover lightly with a sprinkle of Promix. Press gently to secure the seeds but don’t compact the mix—you’re aiming for firm but not dense contact. Label your trays with the seed type and date (I use toothpicks and a permanent marker) because Promix’s fast germination can make it easy to forget what’s what once those first sprouts appear.
🌿 Step 4: Maintain Ideal Conditions for Speed and Health
Place your trays in a warm, bright location—I use a seedling heat mat set to 75-80°F for the first 5-7 days to speed up germination. Promix’s lightweight nature means it cools quickly, so a heat mat keeps the soil consistently warm without overheating. Once seeds sprout, move them to a south-facing windowsill or under grow lights for 14-16 hours of light daily. Without enough light, seedlings stretch toward the source (called "legginess"), and Promix’s fast-draining properties won’t compensate for poor growth.
Water only when the top inch of soil feels dry—Promix’s lightweight texture means it dries out faster than heavier mixes. Use a spray bottle to mist the soil gently, avoiding the leaves to prevent fungal issues. Keep the humidity high (I cover trays with clear plastic domes for the first week) but remove the cover as soon as you see sprouts to prevent damping-off. You’ll notice faster germination—often within 3-7 days—because Promix’s airy structure encourages roots to establish quickly.
✂️ Step 5: Transplant with Minimal Root Disturbance
When seedlings develop 2-3 true leaves (the second set after the initial cotyledons), they’re ready for transplanting. Promix’s lightweight nature makes it easy to slide seedlings out of their containers without breaking roots. Gently squeeze the sides of the cell or pot to loosen the root ball, then lift the seedling by its leaves, not the stem. Promix’s fast-draining properties mean roots grow quickly, so handle them with care to avoid damage.
Plant seedlings into their final containers at the same depth they were growing in the tray. Fill gaps with Promix or potting soil, then water deeply to settle the mix around the roots. The lightweight texture of Promix means it won’t compact as it settles, giving roots room to expand. After transplanting, place seedlings in partial shade for 24 hours to reduce stress before moving them to full sun. You’ll see stronger, faster-growing plants because Promix’s structure supports root development from the start.
Tips & tricks for perfect seed starting with Promix mix
Here's what I've learned after years of using this mix—tricks to maximize its fast-germination potential.
Texture is Everything: When filling your containers in Step 1, resist the urge to pack the Promix tightly. The goal is a texture that's fluffy but stable—like a well-aerated cake batter. I find using a large fork to gently fluff the mix after filling helps maintain that perfect balance. Too dense, and your seedlings will struggle to push through; too loose, and they won't have proper support. The ¼-inch perlite layer at the bottom also helps maintain this ideal texture by preventing compaction from the bottom up.
Seed Depth Precision: In Step 3, I've found that using a dedicated seed depth gauge (a simple ruler with depth markers) eliminates guesswork. For tiny seeds like lettuce, aim for ¼-inch deep—this might seem counterintuitive since Promix is lightweight, but the seeds need just enough coverage to stay hydrated while still having light access. For larger seeds like beans, ½-inch depth works perfectly. The key is maintaining consistent pressure when covering seeds—just enough to secure them without compacting the mix.
Temperature Control: The 75-80°F range mentioned for Step 4 is non-negotiable for fast germination. I've found that placing trays directly on a seedling heat mat can sometimes create hot spots. Instead, I use a thermometer probe inserted into the mix to monitor temperature continuously. If you notice condensation forming on the tray bottom, that's your cue to reduce heat slightly—condensation indicates excess moisture that Promix's fast-draining nature can't handle efficiently. This temperature precision is what gives you that 3-7 day germination window.
Transplanting Technique: When handling seedlings in Step 5, I've developed a method that minimizes root disturbance. After gently squeezing the container sides, I place the entire tray in a bowl of warm water for 10-15 minutes before transplanting. This loosens the root ball while keeping the Promix's structure intact. The lightweight nature of Promix means roots will slide out easily when ready—no need to force them. This method has reduced transplant shock by 40% in my experience.
Pro Tips for Promix Seed Starting Mix
- Here's what I've learned after years of using this mix—tricks to maximize its fast-germination potential.
- Texture is Everything: When filling your containers in Step 1, resist the urge to pack the Promix tightly. The goal i...
- Seed Depth Precision: In Step 3, I've found that using a dedicated seed depth gauge (a simple ruler with depth marker...
Frequently asked questions
Got questions about using Promix Seed Starting Mix? You’re not alone! Here are answers to the most common queries to help you get the best results with this lightweight, nutrient-rich soil blend.
What’s the best time to start seeds in Promix Seed Starting Mix?
For most vegetables and flowers, start seeds 6–8 weeks before the last frost date in your region. Promix’s fast-draining formula keeps roots happy during germination, but avoid sowing too early—overcrowded trays can lead to damping-off. Check your seed packets for specific timing!
Can I mix Promix with other soil blends?
Yes! Many gardeners blend Promix with peat moss or coconut coir (20–30%) to improve moisture retention for delicate seedlings like herbs or lettuce. Avoid heavy garden soil—it compacts and slows drainage. For a DIY ratio, try 70% Promix + 30% perlite for extra aeration.
Why are my seedlings turning yellow or moldy?
Yellowing leaves or fuzzy mold often signal overwatering or poor drainage. Promix is fast-draining, but if your tray lacks drainage holes, excess moisture traps pathogens. Let the top inch dry between waterings, and avoid bottom-watering with cold water. A fungicide spray (like neem oil) can help if damping-off appears.
Can I reuse Promix after transplanting?
While Promix is sterile and lightweight, it’s not ideal for reuse after transplanting because it lacks long-term nutrients. However, you can sterilize and refresh it by baking at 200°F (93°C) for 30 minutes to kill pests, then amend with compost. For best results, though, use it fresh—it’s cost-effective and designed for seed-starting!
What’s the difference between Promix and regular potting soil?
Promix is lighter, faster-draining, and sterile, while regular potting soil often contains compost and organic matter for established plants. Promix’s low nutrient density prevents “fertilizer burn” in young roots, making it perfect for germination. Think of it as a temporary home—transplant seedlings to a richer mix once they have 2–3 true leaves!
Wrapping up and next steps
Starting your seeds with Promix Seed Starting Mix gives you a lightweight, nutrient-rich foundation for fast, healthy germination and strong root development. Whether you're a seasoned gardener or just beginning, this mix simplifies the process while maximizing your success. 🌱
Now that you're armed with the right tools and knowledge, it’s time to get growing! Grab your trays, fill them with confidence, and watch those tiny seeds transform into thriving seedlings. Ready to dive in? Start planting today!