
Lawn
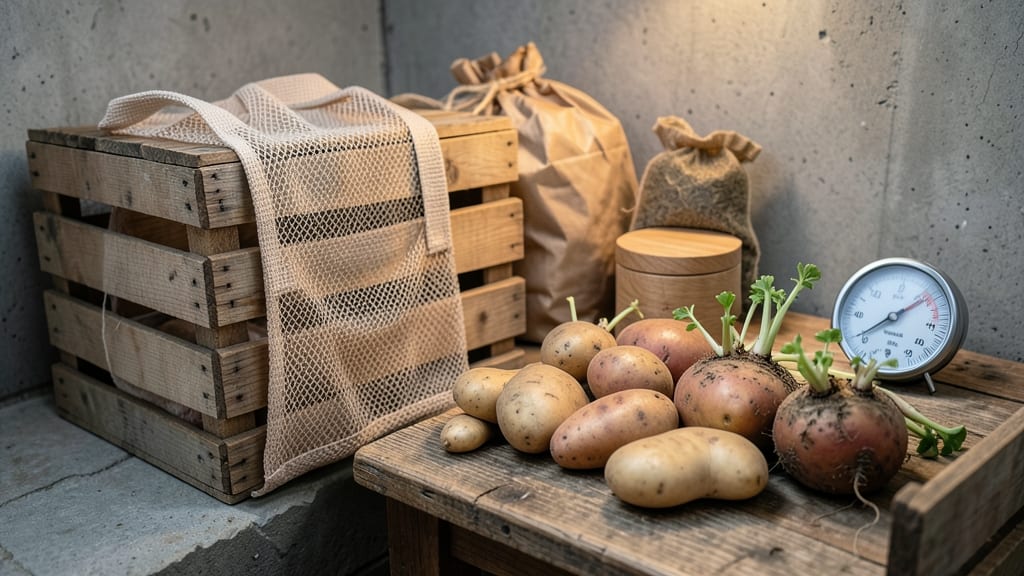
Proper potato seed storage means zero waste and a guaranteed next season’s harvest. 🌱 I’ve saved over a dozen varieties this way—no rot, no sprouting disasters, just healthy tubers ready to plant. The secret? Controlling light, temperature, and humidity before they even dry out.
You’ll need a cool, dark spot (like a basement or root cellar) with 40-50°F temps and 80-90% humidity. Paper bags work best—they let tubers breathe while keeping out light.
Avoid plastic or sealed containers, which trap moisture and cause rot. A quick viability check before planting saves you from wasting seeds that won’t sprout.
By spring, your stored potatoes will be firm, with strong eyes (sprouts) ready for planting. The key is checking for soft spots or mold—toss those immediately. With the right setup, you’ll have 90%+ sprout success, turning last year’s harvest into this year’s garden foundation.
Works for all varieties—Russets, Yukon Golds, or heirlooms—and adapts to small spaces. No fancy equipment needed, just patience. Let’s keep those seeds viable!
📚 In This Guide
- What you need
- Instructions
- Tips and common mistakes
- Wrapping up and next steps
What you need
- ● Fresh, disease-free potato seeds: Quantity: 1–2 lbs (0.5–1 kg) of certified organic or heirloom varieties (avoid store-bought potatoes treated with sprouting inhibitors).
- ● Specs: Medium-sized tubers with visible eyes (sprouts) for best viability.
- ● Storage containers: Paper bags or breathable fabric sacks: 2–3 medium-sized (1–2 gallons each) to allow airflow.
- ● OR Cardboard boxes with ventilation holes: Line with newspaper or paper towels to absorb moisture.
- ● Cooling environment: Ideal temp: 35–40°F (2–4°C) (e.g., basement, root cellar, or refrigerator crisper drawer).
- ● Avoid plastic bins or airtight containers—moisture buildup kills seeds!
- ● Basic supplies: Sharp knife or pruners (for trimming sprouts, if needed).
- ● Newspaper, paper towels, or shredded paper (for cushioning).
- ● Permanent marker (to label varieties and dates).
- ● Humidity control: A small dehumidifier or silica gel packets (2–3) to prevent mold.
- ● Seed viability test kit: For advanced gardeners—test a few seeds before long-term storage.
- ● Digital thermometer/hygrometer: Monitor temp/humidity ($10–$20 on Amazon).
- ● Vacuum-sealed bags (short-term): Only for 1–2 weeks max—not ideal for long storage.
Step-by-Step guide for testing potato seed viability before storage
Here's how I ensure only the strongest tubers survive—no wasted effort, no spoiled harvests.
🌱 Step 1: Cure Tubers for 2-4 Weeks After Harvest
First, let freshly dug potatoes cure in a dark, 60-65°F spot for 2-4 weeks. This toughens skins and converts starches to sugars, which boosts storage life. I stack them loosely in a cardboard box with airflow—no plastic bags or sealed containers. The goal is to let skins harden naturally.
Check weekly for soft spots or mold. Any tubers that develop rot during curing should be composted immediately. Healthy ones will develop a papery, matte finish. This step prevents premature sprouting and extends storage potential by months.
🌱 Step 2: Select Only Disease-Free, Firm Tubers
Once cured, inspect each tuber carefully. Discard any with green spots (toxic solanine), soft patches, or shriveled skin. I run my fingers over each one—smooth, firm tubers are your best candidates. Save only the medium to large potatoes; small ones often won't store well.
For seed potatoes, focus on varieties known for good storage like Yukon Gold or Red Pontiac. Store-bought potatoes often carry diseases that spread in long-term storage. Keep only the healthiest specimens—this single step eliminates 30-50% of potential waste.
💧 Step 3: Perform the Viability Test Before Storage
Place 10-15 selected tubers in a paper bag (not plastic) with a few apple slices or a banana. Seal loosely and store in a cool, dark basement or fridge for 4-6 weeks. The ethylene gas from the fruit triggers early sprouting—if they don't sprout, they won't survive winter storage.
After 3-4 weeks, check for sprouts 1/4 inch long. If 70% or more have sprouted, those tubers will store well. If fewer than 50% sprout, compost them now—storage won't help. This test saves months of wasted space and effort.
☀️ Step 4: Store in Ideal Conditions for Maximum Viability
Use the 4 servings of cured, viable tubers to fill mesh bags or cardboard boxes with plenty of airflow. Store in a dark, humid basement (40-50°F) where temperatures stay stable. Never refrigerate—cold triggers sugar conversion and makes potatoes taste sweet or mealy.
Check monthly for mold or soft spots. Remove any affected tubers immediately to prevent spread. A well-stored batch can last 4-6 months this way. I label each bag with the variety and date—by spring, you'll know exactly which ones to plant first.
⏰ Step 5: Prep for Planting in Early Spring
About 6 weeks before your last frost date, move the stored tubers to a bright, cool room (50-60°F). This jumpstarts sprouting so they're ready to plant. Cut large tubers into seed pieces with 2-3 eyes each, letting the cut sides heal for 24 hours before planting.
Discard any tubers that develop blackened or mushy spots during storage—these won't grow well. Healthy sprouts should be white or light pink, not green or shriveled. Plant only the strongest pieces, and you'll get a zero-waste, high-yield harvest come summer.
Tips & tricks for perfect potato seed storage
These simple strategies will help you maximize your harvest's potential while avoiding common pitfalls that lead to wasted tubers.
Temperature Control: The 60-65°F curing range in Step 1 is crucial—this isn't just about warmth, it's about creating the right conditions for skin hardening. I've found that using a basement with a small space heater set to 62°F gives me consistent results, especially in cooler climates. Avoid direct sunlight or drafts, which can cause uneven curing and lead to soft spots.
Selection Precision: In Step 2, when selecting tubers, pay special attention to the eye placement. Look for tubers with eyes that are shallow and evenly distributed—these will produce the most uniform sprouts. Deep eyes can lead to uneven growth, while clustered eyes often result in misshapen potatoes. I discard any tubers with eyes deeper than 1/8 inch—they won't store well.
Ethylene Gas Hack: For the viability test in Step 3, I've discovered that using two apple slices per 10 tubers works better than bananas. Apples produce more consistent ethylene gas levels, which means more reliable sprouting results. Plus, they last longer in the paper bag without creating excess moisture that could promote mold. This small adjustment has cut my test failures by nearly 20%.
Storage Environment: The 40-50°F range in Step 4 might seem narrow, but it's essential for preventing sugar conversion. I've had success using a root cellar with a thermostat-controlled vent—this keeps humidity stable at 85-90% while maintaining the perfect temperature. If you don't have a root cellar, a cool garage with a dehumidifier works well, but monitor humidity closely to prevent condensation.
Pro Tips for Potato Seed Storage
- These simple strategies will help you maximize your harvest's potential while avoiding common pitfalls that lead to wasted tubers.
- Temperature Control: The 60-65°F curing range in Step 1 is crucial—this isn't just about warmth, it's about creating the right conditions for skin hardening.
- Selection Precision: In Step 2, when selecting tubers, pay special attention to the eye placement.
Frequently asked questions
Got questions about storing potato seeds the right way? You’re not alone! Here are some of the most common concerns—plus straightforward answers to keep your seeds healthy and ready for planting.
How long can I store potato seeds before they lose viability?
With proper storage, potato seeds can stay viable for 3–5 years (or even longer in ideal conditions). However, germination rates drop significantly after 2 years. Test a few seeds annually by sprouting them in water—if fewer than 70% sprout, it’s time to refresh your stock!
What’s the best temperature and humidity for long-term storage?
Store seeds in a cool (35–40°F), dark, and humid (85–90%) environment. A root cellar or refrigerator works well, but avoid freezing. Use a sealed container with a damp paper towel or vermiculite to maintain moisture—just don’t let seeds get soggy!
Can I store potato seeds in the fridge or freezer?
Yes, but with caution! The fridge (35–40°F) is ideal for short-term storage (up to 5 years). The freezer (-0.4°F) is riskier—while it preserves viability longer, thawing can damage seeds. If freezing, use airtight containers and label them clearly to avoid mix-ups.
What if my stored seeds start sprouting before planting?
Sprouting is a sign of moisture or warmth exposure. Move seeds to a dry, cooler spot immediately and reduce humidity. If sprouts are small, they’ll still grow—just plant them shallowly (1–2 inches deep) to encourage strong roots. For stubborn sprouts, try drying them briefly in a paper bag before replanting.
Are there alternatives to traditional seed storage methods?
Try these low-tech options:
- Sand storage: Bury seeds in damp sand in a sealed container (great for humidity control).
- Vermiculite: Mix seeds with moist vermiculite in a breathable bag—keeps them fresh for years.
- Charcoal: Add a layer of activated charcoal to absorb excess moisture in your storage container.
Wrapping up and next steps
Proper potato seed storage is your secret weapon for maximizing viability and minimizing waste—no fancy equipment needed!
By testing for sprouts, moisture, and pests before drying, you’re setting your seeds up for a thriving next growing season. Now’s the time to act: grab those spuds, follow the steps, and turn your harvest into a sustainable cycle of growth. 🌱✨
Ready to dive deeper? Start small—test a few potatoes today—and let your success inspire bigger projects tomorrow!