
Propagation
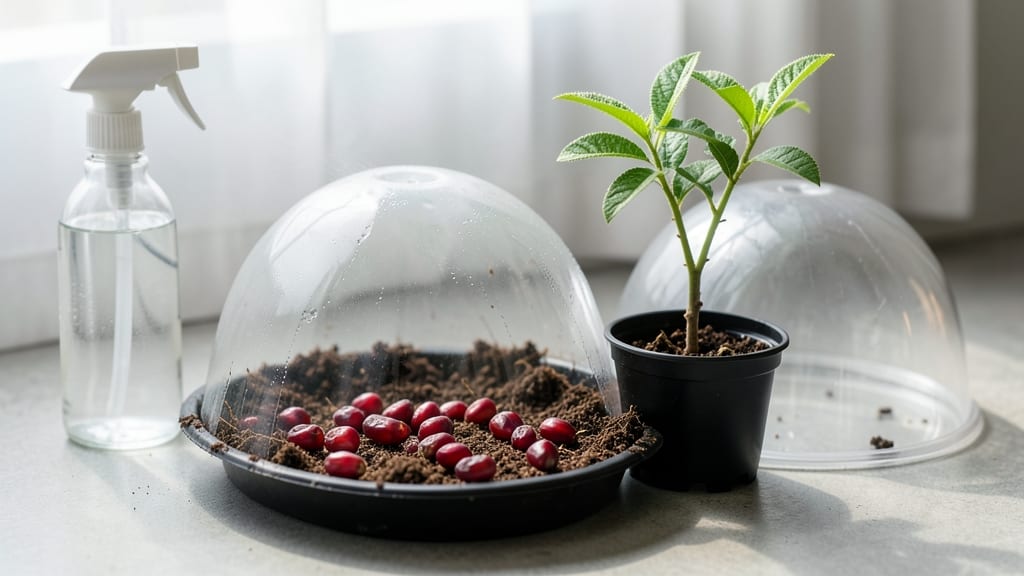
Pomegranate seed propagation from store-bought fruit is the ultimate zero-waste gardening hack—and it’s easier than you think. 🌱 I’ve cracked (literally) dozens of pods this way, and the secret to fast, mold-free germination starts with the right prep: no fancy tools, just a sharp knife and a little patience. What you end up with is a sturdy seedling that could grow into a fruit-bearing tree in just a few years.
The trickiest part is getting the seeds out cleanly without damaging them. Skip the twist-and-pull method that crushes seeds—just slice the pod open and scoop out the seeds with a spoon. Rinse them gently to remove the sticky flesh, then let them dry for 24 hours before planting.
This simple step prevents mold and speeds up germination time from weeks to just 10-14 days under the right conditions.
You’ll need a shallow container with drainage holes, a mix of 50% potting soil and 50% perlite, and a warm spot with bright, indirect light. Keep the soil lightly moist (not soggy) and cover the container with plastic wrap for a mini greenhouse effect.
Within weeks, you’ll see tiny green sprouts pushing through—proof that this method actually works, even for beginners.
Once the seedlings have 2-3 sets of true leaves, you can transplant them into individual pots. Here’s where it gets fun: these little trees are tough, drought-resistant, and can handle neglect better than most plants.
With proper care, you could be harvesting your own pomegranates in 3-5 years—and every seed you save from the store means one less piece of waste in the landfill.
📚 In This Guide
- What you need
- Instructions
- Tips and common mistakes
- Wrapping up and next steps
What you need
- ● Pomegranate seeds: 5–10 fresh, plump seeds (harvested from a ripe, organic pomegranate for best results).
- ● Paper towels or coffee filters: 2–3 sheets (for seed stratification).
- ● Plastic bag or airtight container: Small, resealable (to create humidity).
- ● Potting soil: 1–2 gallons of well-draining, sterile seed-starting mix (avoid garden soil—it’s too dense!).
- ● Small pots or seed trays: 4–6 (3–4 inch diameter) with drainage holes.
- ● Spray bottle: For gentle watering (avoid over-saturating seeds!).
- ● Twine or rubber bands: To secure plastic bags (for stratification).
- ○ Heat mat (optional): Germinates seeds faster (70–80°F ideal).
- ● Patience: Pomegranate seeds can take 4–8 weeks to germinate—don’t rush it!
- ● Warmth: Keep seeds in a spot with consistent 65–75°F temps (basements or kitchens work).
- ● Light: Bright, indirect sunlight (south-facing window or grow lights) once sprouted.
- ● Humidity control: Mist seeds daily during stratification to prevent drying.
- ○ Pomegranate variety knowledge (optional): Some varieties (like ‘Wonderful’) propagate easier than others.
Step-by-Step instructions for pomegranate seed propagation
Here’s how to extract, clean, and plant pomegranate seeds without wasting a single drop of juice.
🌱 Step 1: Extract Seeds Without Waste
Start by slicing the pomegranate in half over a bowl—this catches every seed and bit of aril. I like to use a sharp knife and cut straight down the center, pressing gently to release the seeds naturally. Avoid squeezing the fruit, as this can crush seeds or introduce mold. Once the seeds are free, rinse them under cool water to remove any clinging juice or pulp.
Spread them on a clean paper towel and let them air-dry for 24-48 hours in a warm, shaded spot. The goal is to remove moisture without overheating them—you’ll know they’re ready when they feel dry to the touch but still retain their deep red-brown color. This drying step prevents rot during storage or planting.
💧 Step 2: Stratify Seeds for Faster Germination
Pomegranate seeds need a cold stratification period to break dormancy. Place the dried seeds in a sealed plastic bag with a damp paper towel—just enough moisture to keep the towel damp, not soggy. Store the bag in your refrigerator’s crisper drawer for 8-12 weeks. Check them weekly; if the towel dries out, mist it lightly with water.
This cold treatment mimics winter conditions and tricks the seeds into thinking they’ve survived a natural dormancy cycle. After stratification, you’ll see faster and more uniform germination. Real talk: Skipping this step can leave you waiting months for sprouts—or none at all.
☀️ Step 3: Plant Stratified Seeds in Well-Draining Soil
Fill small pots (3-4 inches deep) with a mix of 50% potting soil and 50% perlite or coarse sand—this ensures excellent drainage, which pomegranates hate. Plant the seeds ½ inch deep, spacing them 2 inches apart in each pot. Water gently until the soil is moist but not waterlogged, then place the pots in a warm, bright spot with indirect light (like a south-facing window with sheer curtains).
Keep the soil consistently moist—never soggy—by watering only when the top inch feels dry. You’ll see germination in 4-8 weeks, though some seeds may take longer. Once sprouts appear, move them to a sunny window or under grow lights for 12-14 hours daily to prevent leggy growth.
✂️ Step 4: Transplant Seedlings When Ready
When seedlings reach 4-6 inches tall with 3-4 sets of true leaves, they’re ready for individual pots (6-inch diameter). Use the same well-draining soil mix and transplant carefully, keeping the root ball intact. Harden them off by placing them outdoors in a shaded spot for 1-2 hours daily over 7-10 days, gradually increasing exposure to sun and wind.
After hardening, plant them in the ground or larger containers (12+ inches deep) in full sun. Pomegranates thrive in warm climates but can survive in zones 7-11 with winter protection. Mulch around the base to retain moisture and regulate soil temperature—this is especially critical in their first year.
Tips & tricks for perfect pomegranate seed propagation
Between us, pomegranate seed propagation is one of those projects where patience pays off big time—but only if you nail the details. Here’s how to avoid common pitfalls and set your seeds up for success.
Drying Strategy: The 24-48 hour drying window in Step 1 is your best defense against mold. I learned this the hard way after ruining a batch by rushing the process—moisture is the enemy here. Place your seeds in a single layer on the paper towel and prop the towel up slightly at one end to encourage airflow. This prevents uneven drying and keeps them from sticking together. If you’re in a humid climate, consider using a small fan on low to speed up the process without overheating.
Stratification Hack: For the 8-12 week cold treatment in Step 2, I recommend labeling your bag with the date you started stratification. This way, you won’t accidentally forget about them in the fridge. Also, instead of just dampening the towel once, I like to check it every 2-3 weeks—this ensures consistent moisture without risking sogginess. Pro tip: Place a small piece of plastic wrap over the opening of the bag to prevent it from drying out completely while still allowing some airflow.
Soil Mix Precision: When creating your 50/50 potting soil and perlite mix in Step 3, don’t skimp on the perlite. Pomegranates despise soggy roots, and this mix ensures proper drainage. I use a small hand trowel to gently fluff the mix before planting—this creates tiny air pockets that help prevent compaction. After planting, give the soil a light mist with water to settle it gently around the seeds without disturbing their placement.
Germination Timeline: The 4-8 week germination window can feel like an eternity, but there are ways to track progress. After 3 weeks, start checking for tiny cracks in the seed coats—this is your first sign of life. If you notice condensation forming on the inside of your pots, that’s a good sign moisture levels are just right. Once sprouts appear, move them to brighter light immediately to prevent that classic "leggy" seedling syndrome.
Pro Tips for Pomegranate Seed Propagation
- Between us, pomegranate seed propagation is one of those projects where patience pays off big time—but only if you nail the details.
- Drying Strategy: The 24-48 hour drying window in Step 1 is your best defense against mold.
- Stratification Hack: For the 8-12 week cold treatment in Step 2, I recommend labeling your bag with the date you started stratification.
Frequently asked questions
Got questions about growing pomegranates from seeds? You’re not alone! Here are the answers to the most common queries—so you can crack those pods and plant with confidence.
How long does it take for a pomegranate seed to sprout?
Patience is key! Pomegranate seeds typically sprout in 2–4 weeks if kept in warm, moist conditions (70–80°F). If nothing happens after 6 weeks, gently check for mold or rot—your seeds might need fresh soil or better drainage. Pro tip: A humidity dome or plastic wrap can speed things up!
Can I plant pomegranate seeds straight from the fruit?
Just rinse the seeds to remove pulp, let them dry for a day, and plant them in well-draining soil. No soaking or stratification is needed—pomegranate seeds are non-dormant. For faster results, nick the seed coat lightly with sandpaper to help water penetrate. Warning: Store-bought seeds (like those from grocery stores) may be treated to prevent sprouting—opt for organic or homegrown seeds!
What’s the best soil mix for pomegranate seed propagation?
Use a light, airy mix like:
- 50% potting soil
- 30% perlite or vermiculite
- 20% sand or coconut coir
Why aren’t my pomegranate seedlings growing leaves?
No leaves? Check these fixes:
Leggy stems? Too little light—move seedlings to a bright, indirect spot (no direct sun yet).
Yellowing leaves? Overwatering! Let the top inch of soil dry out between waterings.
Slow growth? They’re normal—pomegranates grow slowly at first. Fertilize lightly with diluted fish emulsion once true leaves appear.
If the stem rots at the base, repot in fresh, dry soil immediately.Can I grow pomegranates from seeds in cold climates?
Yes, but with patience and protection. Start seeds indoors 8–10 weeks before your last frost. Young plants are tender—wait until soil is 70°F+ to transplant outdoors. In zones 7 and below, grow them in containers and overwinter indoors or use row covers. Dwarf varieties (like ‘Wonderful’) adapt better to cooler areas. Fun fact: Some gardeners keep potted pomegranates as houseplants year-round!
What’s a faster alternative to seed propagation?
If you want fruit sooner, skip seeds and buy a 1–2 year-old pomegranate tree from a nursery. Grafted varieties (like ‘Eversweet’) produce fruit in 2–3 years vs. 5–7 years from seed. For zero-waste DIY, try air-layering a branch from an existing tree—it’s easier than it sounds!
Wrapping up and next steps
Propagating pomegranate seeds is a rewarding way to grow your own fruit tree while minimizing waste—no fancy tools or complicated steps required! With just a little patience and the right technique, you can crack open those pods twist-free and nurture new life from every seed.
Now that you’re armed with tips and troubleshooting advice, why not give it a try? Grab a ripe pomegranate, gather your supplies, and start your zero-waste gardening adventure today—your future tree (and the planet) will thank you! 🌱✨